
Indoor Lighting Guide
Lighting Fundamentals and Design Thinking
What are illuminance, luminous flux, and luminance, and how can ordinary consumers understand them quickly?
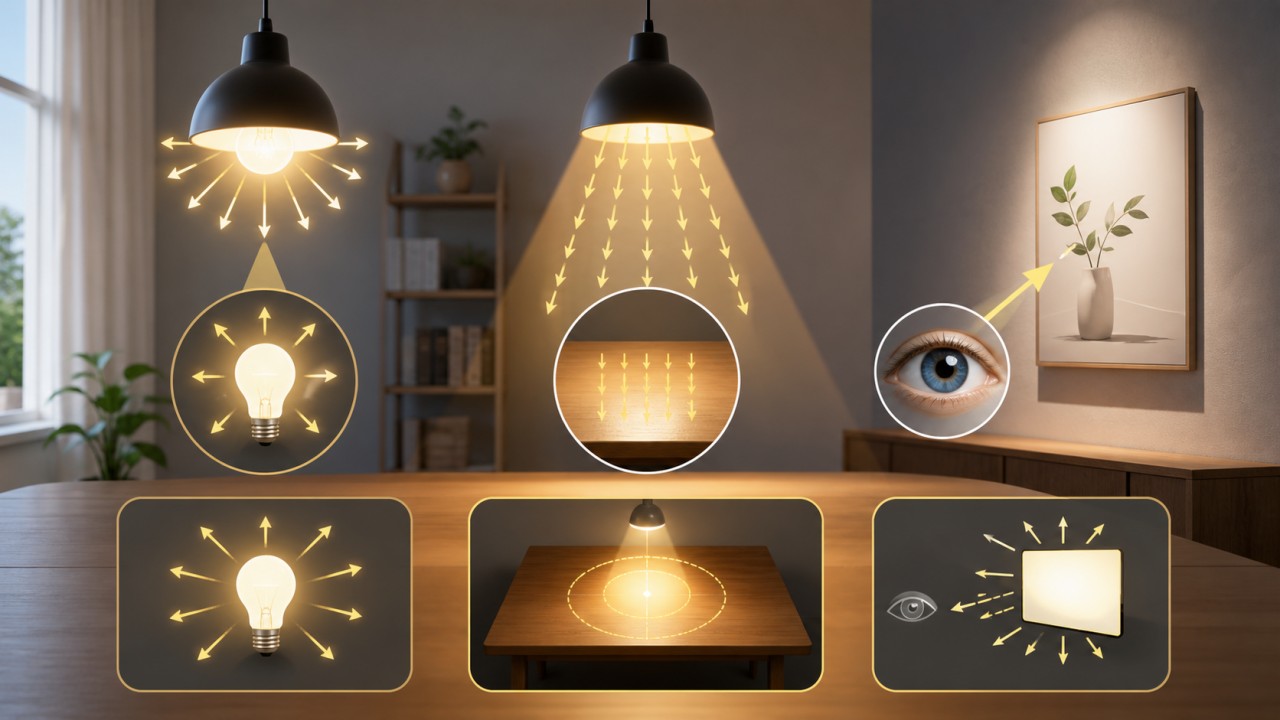
Luminous Flux – The total amount of visible light emitted by a source (such as a bulb or tube) in all directions. Its unit is the lumen (lm). For a consumer, think of it as the total water flow from a faucet — more water means you can water a larger area. Similarly, a higher lumen value means a “brighter” bulb in terms of total light output, regardless of direction. For example, an 800‑lumen LED bulb vs. a 1000‑lumen one: the latter gives out more total light. When buying bulbs, ignore watts (power consumption) and look at lumens: 800 lm is roughly equivalent to a traditional 60W incandescent bulb.
Illuminance – The amount of light falling on a surface, per unit area. Its unit is the lux (lx); 1 lux = 1 lumen/m². In everyday terms, illuminance is the density of light landing on a floor or desk. With a fixed total water flow (lumens), if you pour it into a large basin, the water depth is shallow; pour it into a small cup, the depth is high. Illuminance describes the “depth” of light. For a study desk, recommended illuminance is 300‑500 lux; for a hallway, 100 lux is fine. You can measure it with a lux meter or a phone app. Remember: illuminance decreases rapidly with distance — the farther the lamp, the lower the lux.
Luminance – How bright a surface appears to the human eye when viewed from a given direction. Its unit is candela per square metre (cd/m²), also called nits. In everyday terms, luminance is the glare or brilliance of a surface. The same white paper looks bright in sunlight and dim indoors — that’s different luminance. Crucially, two sources can have the same lumen output and produce the same illuminance on a desk, yet one looks harsh (high luminance) and the other soft (low luminance). This happens because of different emitting areas: 1000 lumens squeezed into a tiny spot = very high luminance; spread over a large frosted glass = low luminance. For consumers, luminance determines whether a light “hurts your eyes”. For a soft light (low luminance), choose a large lampshade or opal glass; for a crisp, detailed light (high luminance), choose a small, clear‑glass source.
How can you estimate the total luminous flux (lumens) needed based on room area and function?
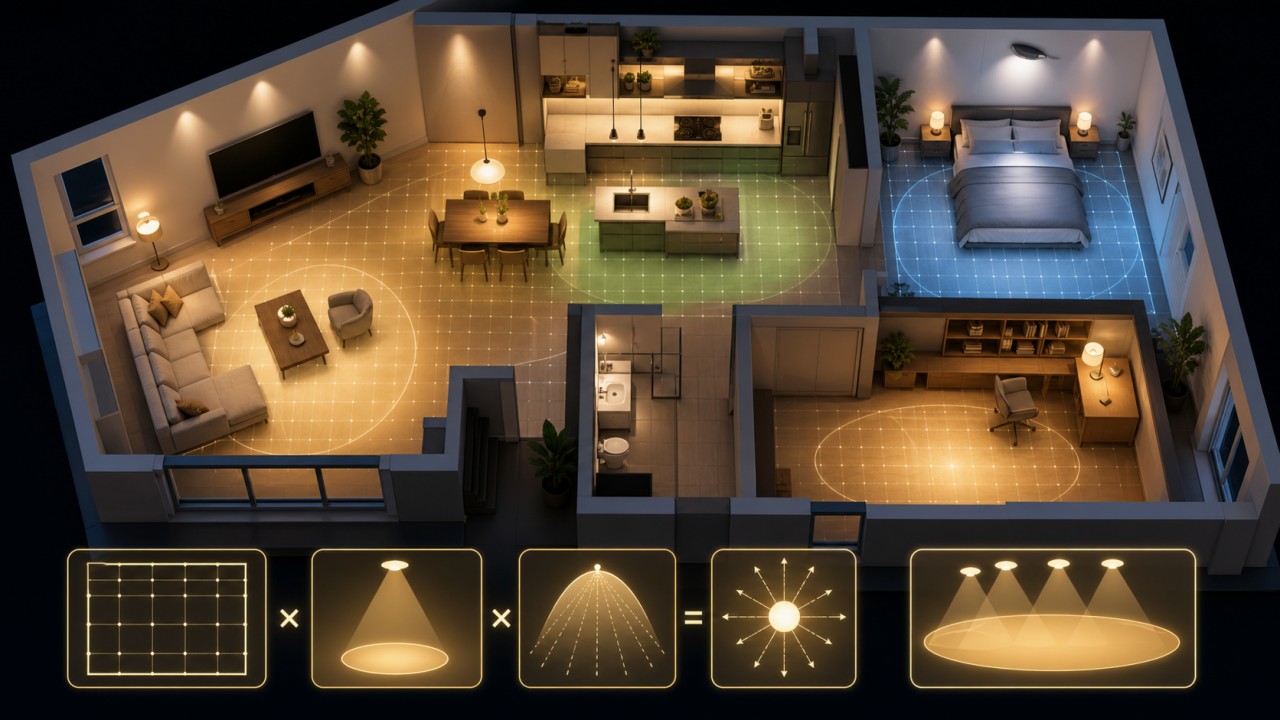
Basic calculation formula The most direct way to estimate the total lumens needed for a room is: Total lumens (lm) = Room area (square meters) × Target illuminance (lux, lx). The target illuminance depends on the room’s function. For example, a 20 m² living room with a target of 200 lx for general activities would need 20 × 200 = 4000 lumens. This is the sum of lumens from all light sources. In practice, there are light losses (luminaire efficiency, wall colors, furniture obstruction), so it is wise to add an extra 20‑30% margin to the calculated value.
Target illuminance values for common room functions (in lux):
Hallway, entryway: 75‑100 lx (just enough to see the path)
Stairwell: 150‑200 lx (higher safety requirement)
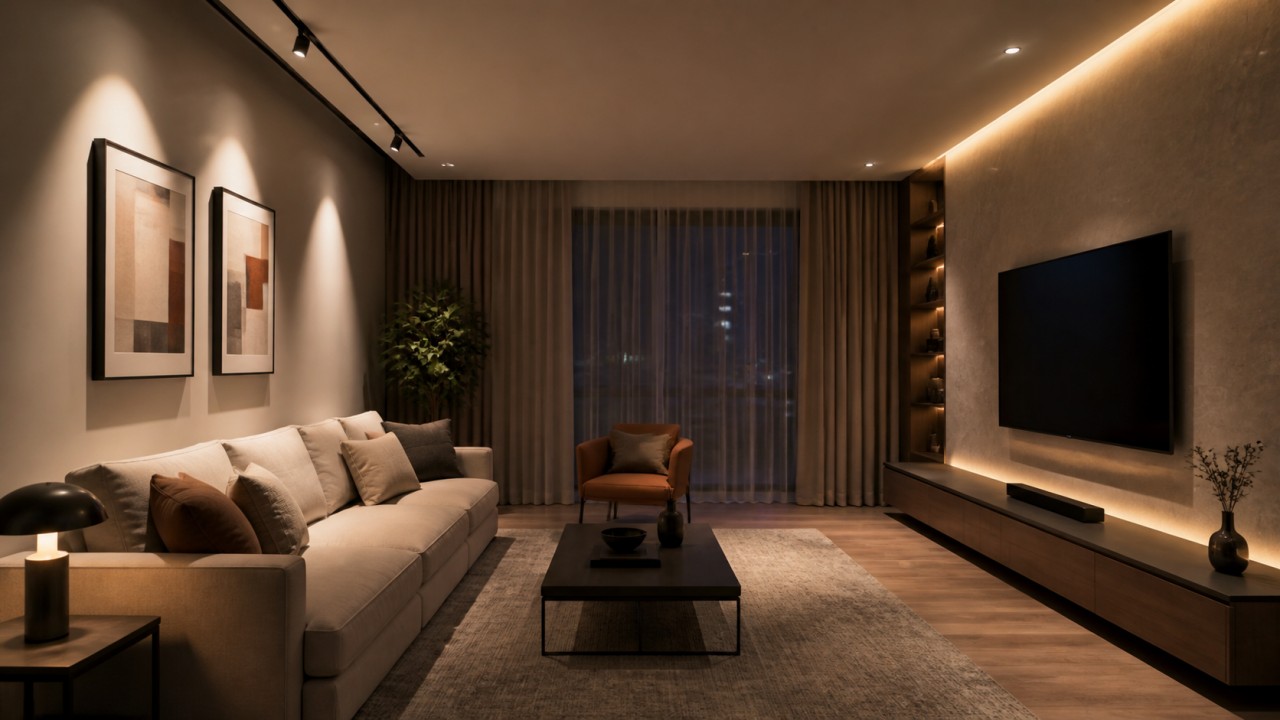
Living room: 150‑200 lx for general activities; 300‑500 lx for reading or detailed tasks
Dining room: 200‑300 lx on the dining table (helps see food clearly)
Kitchen: general lighting 200‑300 lx; countertop area 300‑500 lx (supplement with task light)
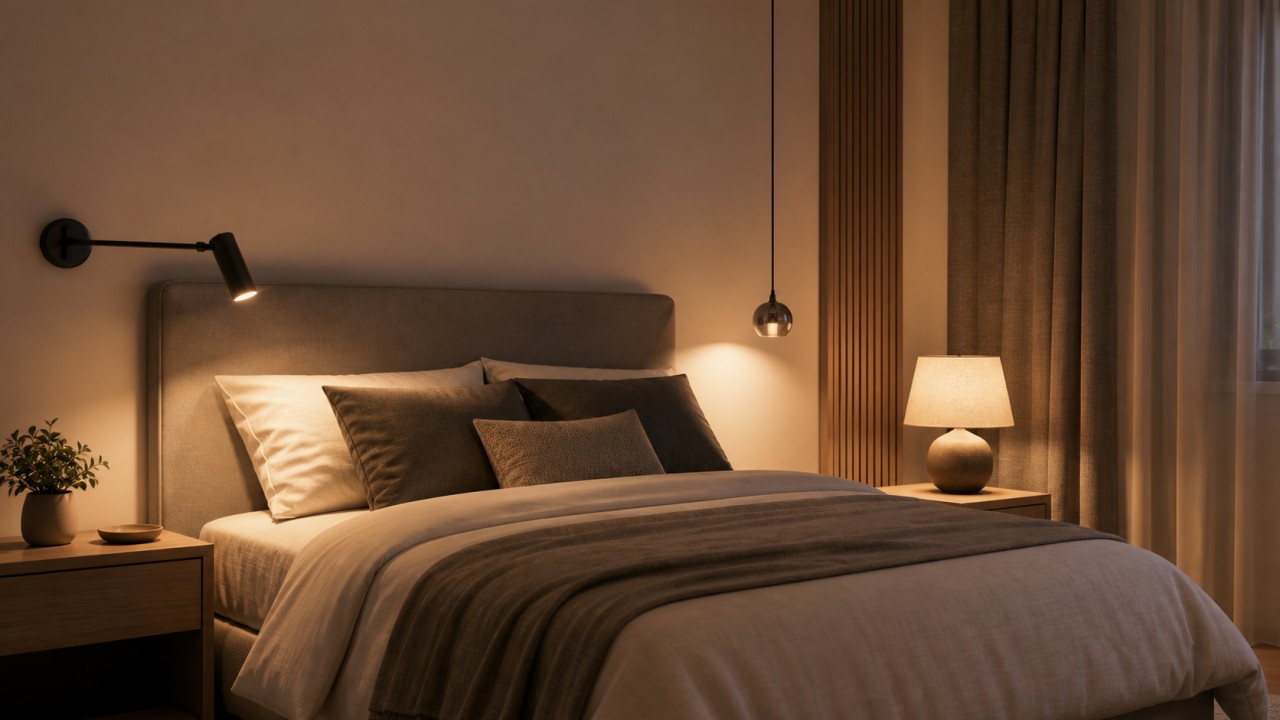
Bedroom: general 100‑150 lx; bedside reading 300‑400 lx
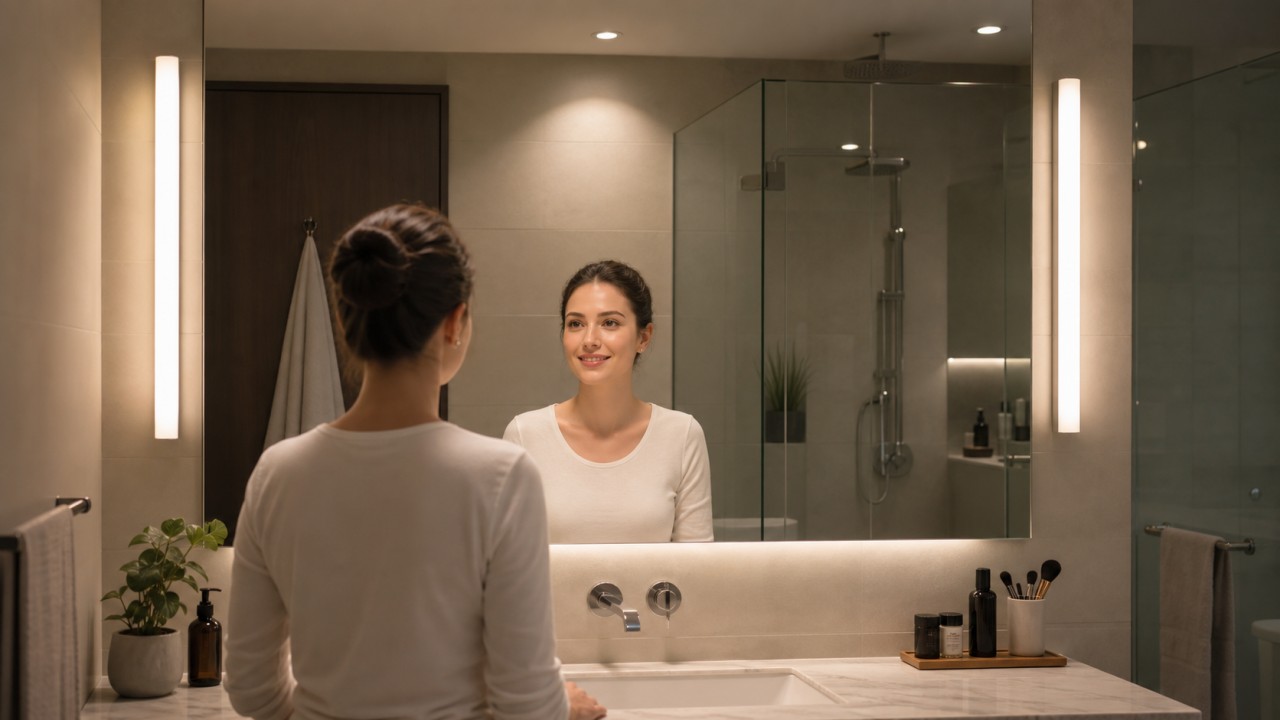
Bathroom: general 150‑200 lx; mirror area 300‑500 lx
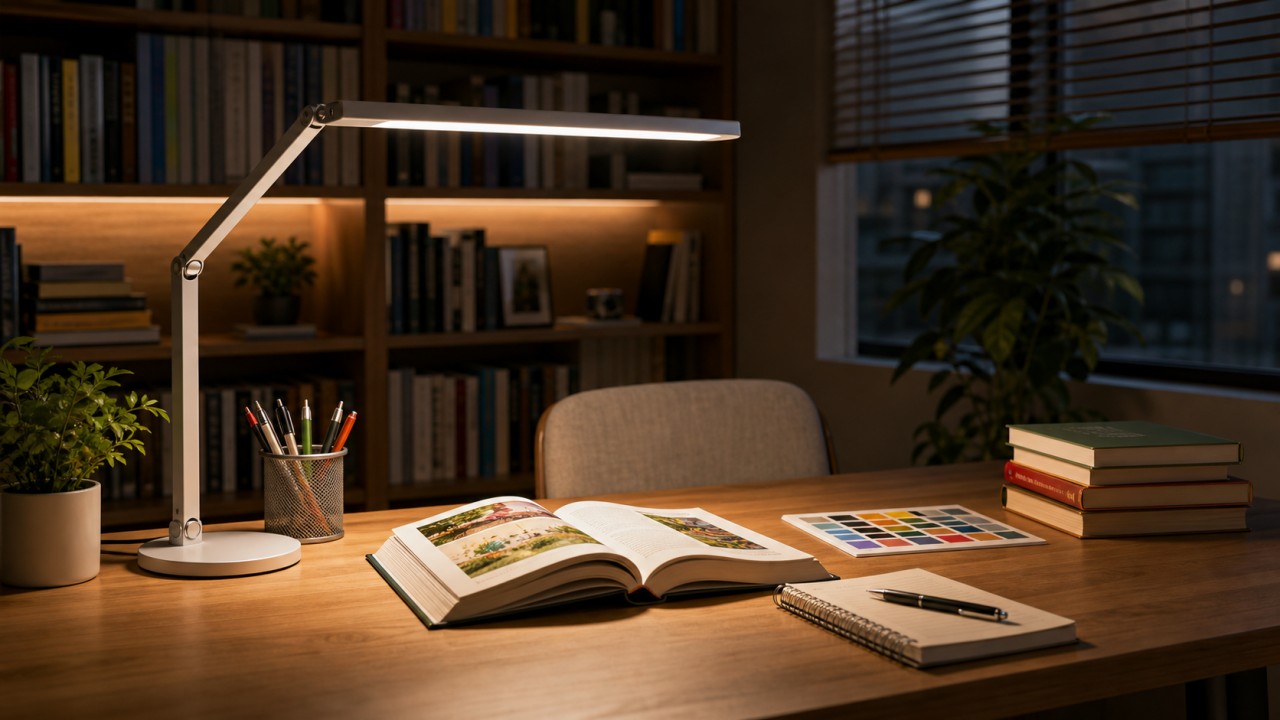
Home office: desk area 300‑500 lx (500 lx is typical for prolonged detailed work)
Children‘s play area: general 200‑300 lx; reading/drawing areas 300‑500 lx
Quick estimation rules of thumb and examples Simplified memory:
Small bedroom (10‑15 m²): 1500‑2500 lumens total
Living room (15‑25 m²): 2500‑4500 lumens
Kitchen (6‑10 m²): 1500‑2500 lumens (plus under‑cabinet task lighting)
Home office (8‑12 m²): 2500‑4000 lumens (best concentrated on the desk)
Example: An 18 m² bedroom with a general target of 150 lx needs 18×150 = 2700 lumens. For bedside reading (local 300 lx), add a 400‑500 lumen table lamp or wall lamp instead of raising the general light level. Another example: a 20 m² living room for TV watching needs only 150 lx (3000 lumens), but if you occasionally read on the coffee table, add an extra 300‑500 lumens from a floor lamp — layered lighting is more energy‑efficient.
Factors that modify the estimate
Wall and ceiling colors: Dark surfaces absorb more light — add 15‑30% to the calculated lumens. Light colors (white, beige) work with the calculated value.
Luminaire type: Clear shades or downlights are efficient (10‑20% loss). Opal, frosted, or indirect‑light shades have higher loss (30‑50%).
Ceiling height: Standard height 2.5‑2.8 m needs no correction. For heights above 3 m, add 10‑15% lumens per additional 0.5 m.
Furniture layout: Large pieces (tall cabinets, sofas) block light and create shadows — add a 5‑10% margin or use task lights.
Example step‑by‑step summary ① Measure length and width, calculate area (m²). ② Pick target illuminance (lux) from the table based on primary function. ③ Area × illuminance = base lumens. ④ Multiply by a correction factor of 1.2‑1.5 (depending on wall color, fixture type, ceiling height). ⑤ Distribute the total lumens among multiple fixtures (main ceiling light, downlights, floor lamps, etc.).
How high should CRI / Ra be to count as good, and how do color-rendering needs differ by room?
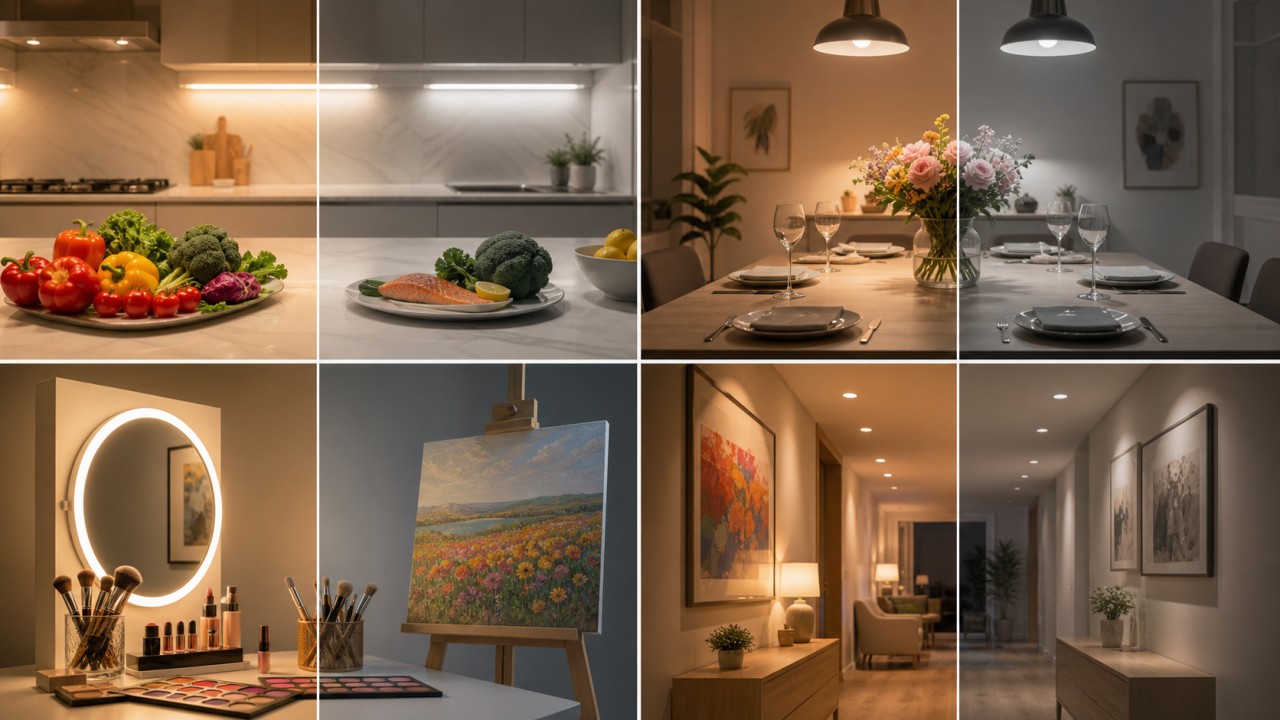
Numerical grading of CRI (Ra) The Color Rendering Index (typically Ra, the average of eight standard color samples) measures how faithfully a light source reveals the true colors of objects. A perfect score of 100 corresponds to natural daylight or an incandescent lamp. According to common industry standards: Ra < 80 is poor – colors appear obviously distorted, suitable only for basic illumination in storerooms or corridors; Ra 80-89 is good – meeting most everyday home needs with generally natural colors; Ra 90-94 is excellent – ideal for spaces where color matters, such as kitchens and dining rooms; Ra ≥ 95 is superb – approaching professional-grade lighting, required for painting, makeup application, medical examinations, and other highly color‑sensitive tasks. For the average consumer, the threshold for “good” is Ra ≥ 80, but Ra ≥ 90 is strongly recommended because modern LED technology can easily achieve 90+ at a modest cost.
The variation of color rendering requirements across rooms Different activities in different rooms demand varying levels of color discrimination, so the need for high CRI changes accordingly.
Hallways, entryways, storage rooms These spaces are used for passage and simple storage, with almost no need for color fidelity. Ra ≥ 80 is sufficient, and even 70‑79 is acceptable. Still, modern practice recommends Ra ≥ 80 for visual comfort.
Living rooms & bedrooms In living rooms and bedrooms, people relax, talk, watch TV, or occasionally read and fold laundry. A moderately high CRI is recommended: Ra ≥ 85 or even Ra ≥ 90. Especially for makeup mirrors in the bedroom or accent lighting for artwork and bookshelves, local lighting should be Ra ≥ 90. Overall ambient light of Ra 85 or above ensures skin tones and soft furnishings look natural and pleasing.
Kitchens & dining rooms In kitchens, you need to judge the freshness of meat and vegetables and monitor cooking doneness; in dining rooms, you want food to look appetizing. Therefore, Ra ≥ 90 is recommended. Moreover, under‑cabinet task lighting in kitchens also needs high CRI to avoid color‑based mistakes that could affect food safety. Light with Ra above 90 makes red meat and green vegetables look vivid and true.
Home office & children’s study/play areas Activities such as reading picture books, doing homework, drawing, and crafting demand accurate color discrimination. Poor color rendering makes colors dull and shades indistinguishable. Ra ≥ 90 is advised; if children frequently draw or read colorful books, choose Ra ≥ 95. Also ensure sufficient illuminance (above 500 lux) – color rendering works together with light level.
Bathrooms (especially the mirror area) Shaving, applying makeup, and skincare require accurate judgment of skin tone and makeup colors. Mirror lights should achieve Ra ≥ 90, ideally Ra ≥ 95. General bathroom lighting can be slightly lower (Ra ≥ 85), but the mirror area demands high CRI. Many people find that their makeup looks fine in the bathroom but different in natural light – that’s due to insufficient color rendering.
Elderly rooms or home care areas Aging eyes have reduced sensitivity to color contrast, so high CRI becomes even more critical for distinguishing objects (e.g., pill colors, skin discolorations). Recommend Ra ≥ 90 for general lighting, and 95+ for critical areas.
Summary table in text
Ra ≥ 80: hallways, storage rooms (minimum)
Ra ≥ 85: living rooms, bedrooms (general activities)
Ra ≥ 90: kitchens, dining rooms, home offices, children’s rooms, bathroom mirror areas
Ra ≥ 95: makeup application, painting, professional task areas, elderly task lighting
Additional note Besides Ra, for spaces where red rendition is critical (e.g., butcher counters, makeup areas), pay attention to the R9 value (special index for deep red). A higher R9 means reds look more realistic. For home use, Ra ≥ 90 LED sources usually achieve R9 above 50; but for makeup or handling fresh meat, prefer R9 > 80. Also, color rendering involves more than just Ra – metrics like color saturation (Rg) and fidelity (Rf) exist – but for ordinary consumers, choosing a reputable brand that states Ra ≥ 90 is already a very good benchmark.
What is SDCM, and why is it important for color consistency in multi-lamp spaces?
What is SDCM? SDCM stands for “Standard Deviation of Color Matching”, often expressed in terms of MacAdam ellipse steps. It measures the deviation between a light source’s actual color and its nominal (target) color coordinates. In simple terms, the smaller the SDCM value, the more accurate and consistent the color of the light source. SDCM = 1 represents a one‑standard‑deviation color difference, which is virtually imperceptible to the human eye under normal viewing conditions. At SDCM = 3, some sensitive observers may notice a slight difference; at SDCM > 5, most people can clearly see that two bulbs differ in color (one greener, one pinker). For LED luminaires, the industry norm is SDCM ≤ 3 for passing grade, and SDCM ≤ 2 for high quality.
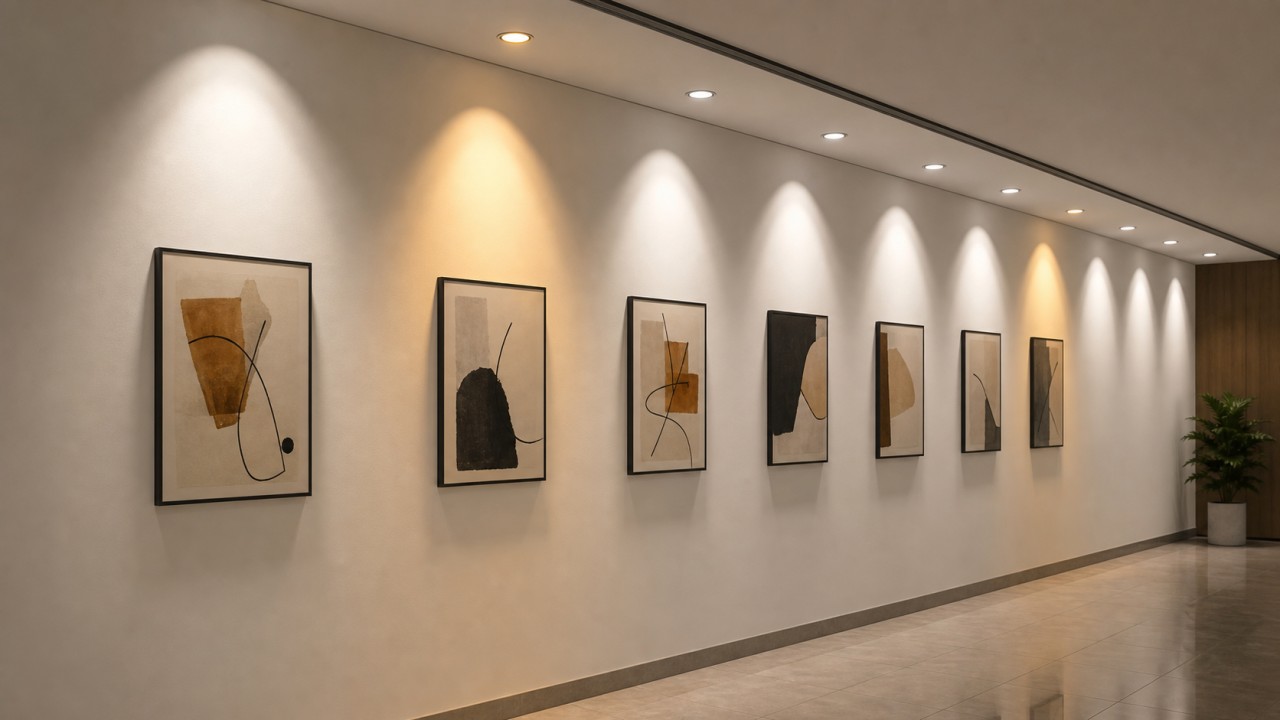
Why is SDCM important for color consistency in spaces with multiple luminaires? In a space with several luminaires — e.g., multiple downlights in a living room, a row of troffers in an office, or a series of spotlights along a hotel corridor — large SDCM differences cause visible color inconsistency: some lights appear warm white, others cool white or even greenish. This creates a messy, unpleasant visual effect that destroys the sense of quality and comfort. The problem is especially noticeable on large continuous surfaces like ceilings or walls, where adjacent patches of light show obvious color shifts. Good SDCM (≤ 3) guarantees that all luminaires emit what looks like exactly the same white light, with no detectable tint difference from any viewing angle. In short: SDCM determines whether a row of lights looks uniform and seamless or patchy and distracting. For multi‑luminaire layouts, it is strongly recommended to keep SDCM within 3 steps, and preferably 2 steps.
How does beam angle affect spatial perception, and where are narrow and wide beam angles suitable?
What is beam angle? An easy analogy Beam angle is simply how wide or narrow the cone of light is when it leaves the lamp. Think of a flashlight: when you focus it to a spot, the beam is narrow and lights up only a small circle (narrow beam angle); when you set it to flood, the beam spreads out wide and lights up a large area (wide beam angle). The smaller the beam angle, the more concentrated the light; the larger the angle, the more spread out the light.
Narrow beam angle (like a “spotlight”) – great for highlighting something specific A narrow beam angle (usually ≤25°) works like a stage follow spot – it puts light on a small area while everything around it stays dark. Your eye is immediately drawn to whatever is lit: a painting, the food on your plate, a piece of jewelry. This creates drama, layering, and focus, but it also makes the rest of the space feel dim. When to use it:
Artwork, decorations, display cases
Over a dining table to shine light on food and create a cozy mood
Bedside reading lamp (lights only your book, not your partner)
Hallways – use pools of light to guide the way Never rely on narrow beams alone for general room lighting – your room will look like a stage with bright spots on the ceiling but dark corners.
Wide beam angle (like a “floodlight”) – great for lighting up the whole room A wide beam angle (usually ≥40°, commonly 60° to 120°) behaves like a ceiling light with an opal shade – light spreads out in all directions, with no obvious bright spot or sharp shadows. The light is soft, even, and makes the room feel bright, open, and comfortable. The downside is it lacks drama or a focal point. When to use it:
General ceiling lights in living rooms, bedrooms, offices
Kitchen ceiling lights (even illumination across the whole counter, no dark corners)
Classrooms, conference rooms (everyone gets enough light)
Supermarkets, clothing stores (shelves and products are evenly lit) It works best with an opal or frosted lampshade, which makes the light even softer.
Medium beam angle (around 30°‑40°) – the best of both worlds A medium beam angle sits right in between. The light pool is neither too small nor too wide. For example, a pendant over a dining table with a medium beam lights the whole table but doesn’t splash onto the walls in a way that highlights every scuff mark. For home downlights or adjustable spotlights, 36°‑40° is a safe, all‑purpose choice.
Just remember two sentences
To highlight something (artwork, food, a decoration) → use a narrow beam angle (spotlight)
To light up the whole room → use a wide beam angle (floodlight)
Not sure? → use a medium beam angle (30‑40°)
Also, if your light is mounted high, even a narrow beam will widen its spot; if it’s mounted low, a wide beam might shine right into your eyes. Try a flashlight as a test before you buy.
Does a main-light-free design require a full dropped ceiling, and how can it be done without one?
A design without a main ceiling light does not require a full suspended ceiling Many people think that using no central ceiling light means you have to put up a full suspended ceiling to hide light strips and downlights. That is not necessarily true. You can achieve excellent main‑light‑free lighting without any suspended ceiling, which saves money, keeps the original room height, and makes the space feel more open.
Option 1: Surface‑mounted fixtures – install them directly, no hiding Mount the fixtures directly onto the ceiling surface, such as surface‑mounted downlights, surface‑mounted spotlights, or track lights. Their bases attach directly to the ceiling without cutting holes. Choosing simple, good‑looking styles can actually add decoration to the ceiling. The advantages are simplicity, no loss of ceiling height, and good heat dissipation. The only downside is that the fixtures protrude slightly, but modern ultra‑thin surface‑mounted lights are only a few centimetres thick – perfectly acceptable.
Option 2: Use existing architectural features for indirect lighting Instead of a suspended ceiling, use the room’s existing structure to hide lights. For example, leave a gap above the curtain pelmet, along the side of a beam, or on top of custom bookcases or wardrobes, and install LED strips inside. The light bounces off the ceiling or wall and creates a soft glow. You get the “light without seeing the fixture” effect without any extra ceiling work. The downside is that you need to carefully plan and leave those gaps during renovation.
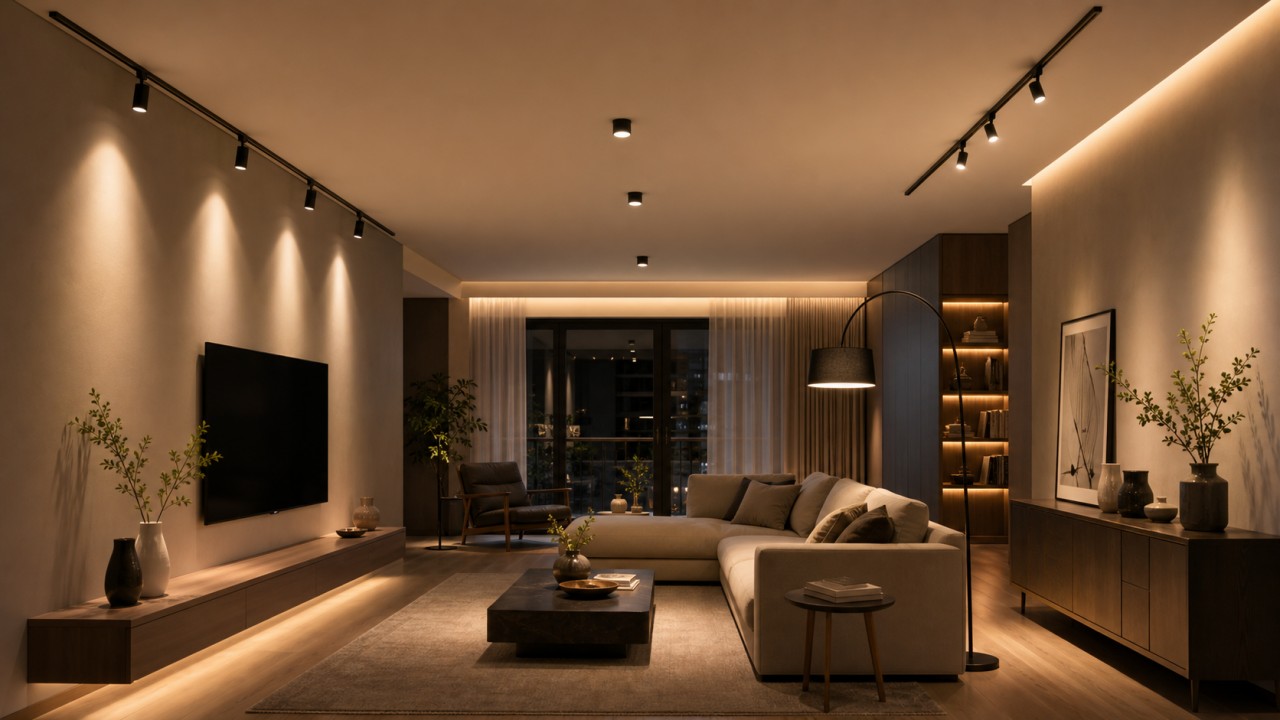
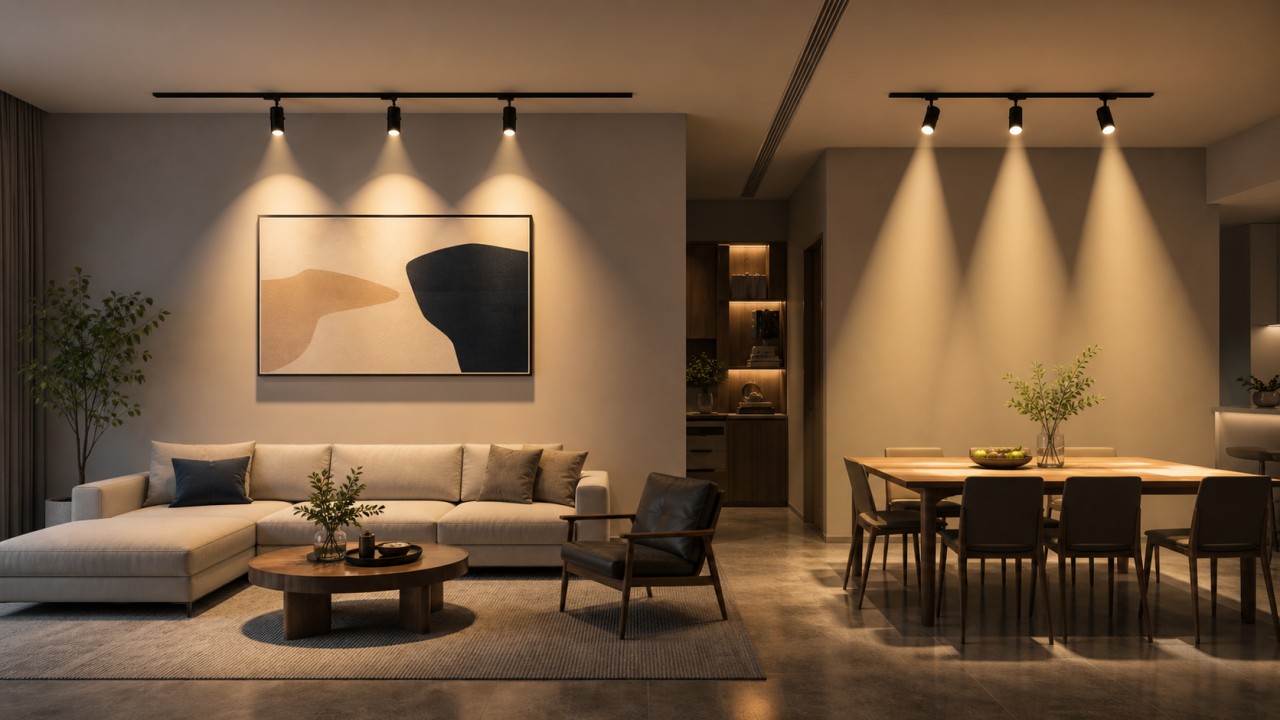
Option 3: Track lighting system – flexible and stylish Track lighting is a star product for non‑suspended ceilings. Install a metal track on the ceiling, then clip on spot modules or flood modules. The track can either have visible wiring or be pre‑wired within the ceiling. The benefit is that you can freely add, move, or angle the light heads – they can wash a wall or light up a coffee table. Track lights work especially well in long, narrow living rooms or dining rooms. The track itself also adds an industrial‑style decorative touch.
Option 4: Skip the ceiling – use floor lamps and wall lamps as main lighting Who says the light source must be on the ceiling? You can fully illuminate a space using only floor lamps, wall lamps, table lamps, or under‑cabinet lights. This is the “borrowed light” approach. For example, place a high‑output floor lamp pointing upward in the living room – its light bounces off the ceiling and creates soft ambient light. Two wall lamps and a table lamp in the bedroom can also provide all the light you need. This is the most affordable and flexible option, and it creates a wonderful atmosphere. The only possible downside is that the ceiling may look a little darker – perfect for those who enjoy a warm, layered lighting effect.
Three final reminders No matter which option you choose, finalise your lighting layout before the electrical rough‑in. Also, when you have no suspended ceiling, fixtures are fully exposed – be sure to choose deep‑recessed anti‑glare models (UGR < 19). Finally, keep the colour temperature consistent across the space, ideally 3500K‑4000K, with a colour rendering index (Ra) of at least 90 – that keeps the light clean and true.
What mistakes should be avoided when selecting luminaires for low-ceiling spaces?
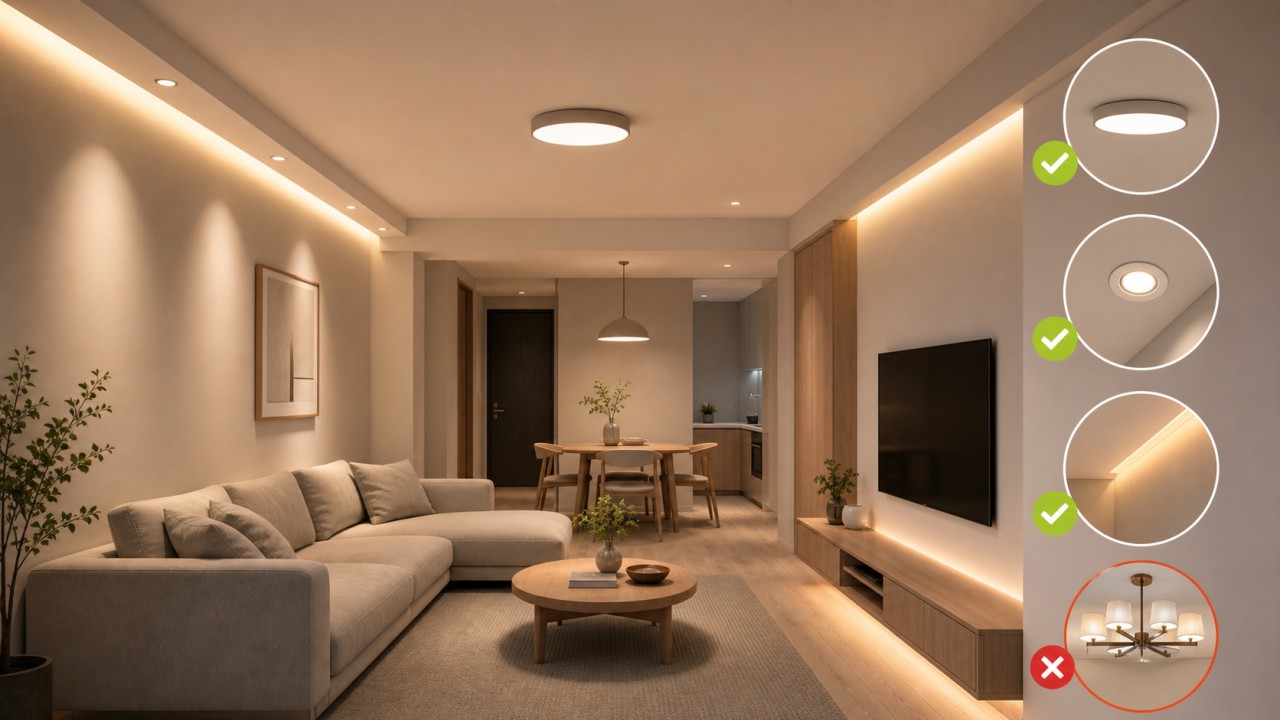
Principle 1: Absolutely avoid pendant lights and chandeliers, especially those that hang down When the ceiling is low, any hanging lamp will make the headroom feel even more cramped. Even a small pendant dropping 40 cm leaves only 2.2 meters of clearance – a tall person can touch it by reaching up. So the first rule: no hanging lamps. This includes single-head down‑pointing pendants and crystal chandeliers. If you really want a suspended look, choose a flush‑mount ceiling light (very flat) or ultra‑thin surface‑mounted downlights.
Principle 2: Avoid ceiling lights that protrude too far downward Many people think any flush‑mount light is safe. But traditional ceiling lights have a shade and base, with a total thickness of 10‑15 cm. At a room height of 2.5 m, the bottom of the light is only 2.35 m from the floor – still visually oppressive. Choose ultra‑thin flush‑mount lights with a thickness under 5 cm, ideally 2‑3 cm. Modern LED technology makes this easy. Also, avoid large flat panel lights (e.g., 60x60 cm) – even though they are thin, their large surface area can make the ceiling feel lower.
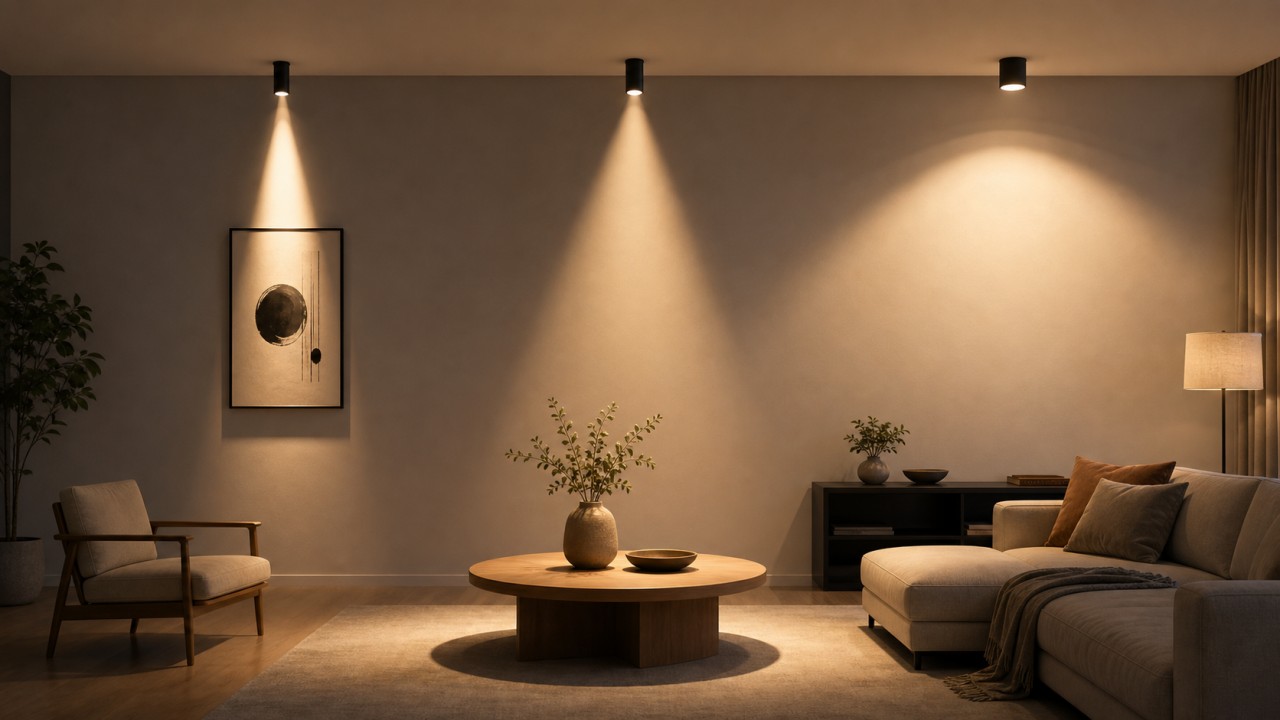
Principle 3: Do not concentrate light on the ceiling – let it go downward or sideways With a low ceiling, the worst thing is to direct light upward (e.g., many uplight wall sconces or floor lamps). This makes the ceiling overly bright, drawing attention to how close it is. Instead, direct most light downward (downlights, spotlights) or diffuse it sideways and downward (e.g., opal‑glass flush‑mount lights). Keep the ceiling relatively darker and brighten the floor and walls – that makes the space feel taller.
Principle 4: Avoid deep‑recessed downlights unless you choose ultra‑short versions Recessed downlights require a suspended ceiling, but surface‑mounted downlights also have height. Common deep anti‑glare downlights are 8‑10 cm tall. In a low‑ceiling room, sticking out that far looks very bulky. If you absolutely want downlights, choose ultra‑short models (height ≤ 5 cm), or use surface‑mounted spotlights that are also flat. Alternatively, use track lighting – the track hugs the ceiling and the small lamp heads add little visual weight.
Principle 5: Avoid large lampshades with complex patterns or dark colors When the ceiling is low, the simpler and lighter‑colored the ceiling fixture, the better. A large dark lampshade acts like a heavy hat pressing down, making people uncomfortable. White, light gray, matte silver – these light colors reflect more light and look airy. Clear glass shades are lightweight but they let you see the bulb directly, making the fixture a focal point – use with caution. Small frosted or opal flush‑mount lights are the safest bet.
Final summary In a low‑ceiling space, the golden rules for choosing light fixtures are: thin, light, downward‑spreading, and no hanging. Thin – thickness under 5 cm. Light – light colors like white or silver. Downward‑spreading – light goes down or sideways, not up to the ceiling. No hanging – avoid all pendant and chandelier styles. Follow these four rules, and you will have a low room that is neither head‑knocking nor oppressive, yet still well‑lit.
How can indoor lighting balance brightness and darkness to avoid the fatigue of an overly bright home?
Why does evenly lighting every corner make you tired? Many people want every corner of their home brightly lit, so they install lots of lights. The result is harsh, flat, and without depth. Uniformly high brightness forces your eyes to stay in a high‑light, shadow‑free environment – like staring at a white sheet all day. Your visual nerves never get a break, leading to rapid fatigue. Also, a space without light‑dark contrast feels lifeless, lacks emotion, and isn’t cozy.
Core principle: Create a brightness gradient, not uniform illumination Good lighting does not turn a room into an operating theatre. It creates a gentle transition from bright to dark. Make the areas where you need the most light (desk, stove, makeup mirror) the brightest; let the surrounding areas (floor, walls, corners) be darker; and keep the ceiling or far areas the darkest. This gives your eyes “rest zones” – when you glance into a darker area, your pupils dilate slightly, which relaxes you.
Method 1: Use layered lighting (ambient + task + accent) Ambient light provides basic illumination – keep it just sufficient (e.g., 100‑150 lux in a living room). Task light adds extra brightness exactly where needed (desk lamp, under‑cabinet kitchen light). Accent light creates focal points (on artwork, on a decorative object). As a result, only the work surface is fully bright; other areas remain softly dim. Keep the ambient light moderate – you can even dim it to 50% brightness.
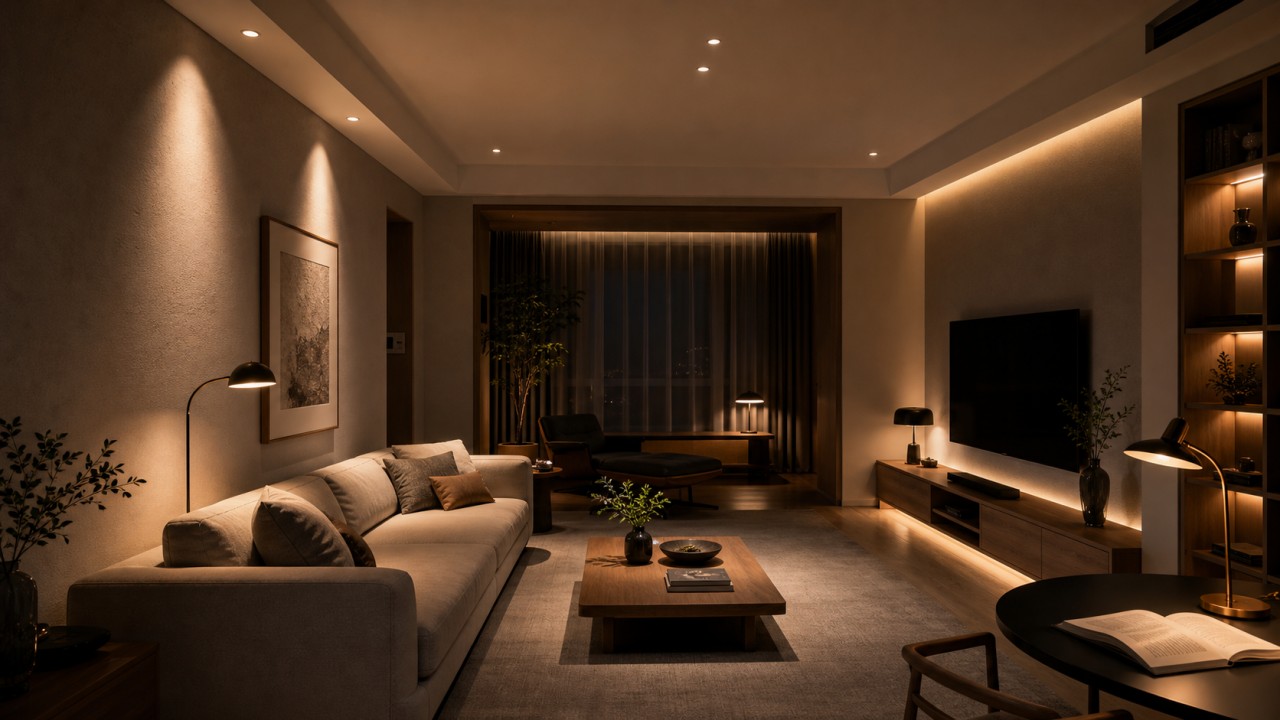
Method 2: Keep walls and ceiling darker, and light up the floor and furniture Many people light up the ceiling brightly, which makes a room feel empty and cold. Instead, direct light downward: use downlights, floor lamps, table lamps. Let the ceiling stay relatively dark while the rug, coffee table, and books on the floor are illuminated. Your eyes naturally look downward, making the space feel more stable and cozy. Especially at night, a darker ceiling feels like the night sky – relaxing.
Method 3: Use shadows to create depth and resting areas Do not be afraid of shadows. Moderate light‑shadow contrast makes furniture and people’s faces look more three‑dimensional. For example, place a floor lamp behind the sofa – it lights up the sofa back and creates a shadow zone behind it. When someone sits on the sofa, their face is lit and the background is dark – it is comfortable and adds depth. Similarly, in a hallway, install only a few small downlights, leaving dark gaps in between; people walking through won’t feel glared at.
Method 4: Add dimming capability to your lights All‑bright rooms often happen because the lights cannot be dimmed. Install dimmable LED lamps and dimmer switches, so you can control brightness as needed. Make it brighter during the day or for cleaning, then dim it to about 30% in the evening for watching TV or chatting. Dimming is the simplest tool to create “dark” – especially in living rooms and bedrooms. You don’t even need new fixtures; just add a dimmer panel.
Method 5: Use warm colour temperatures to reduce fatigue High brightness plus cool white light (above 5000K) makes people tense. If you have an all‑bright room and also use cool light, fatigue doubles. To balance light and dark, use warm white light (2700K‑3000K) or at most neutral 4000K. Under warm light, even if the brightness is a little high, your eyes feel more comfortable. Warm light also carries a psychological hint of “dimness” – it doesn’t force you to see every corner.
Final simple rule Rate the brightness in a room from 0 to 10. Let the most frequently used desk reach level 7‑8, let the floor and walls be level 3‑5, and let the ceiling and far corners be level 1‑2. Wherever you go, your eyes will have a bright area to focus on and a dark area to rest. Remember: lighting is not about lighting everything – it is about lighting selectively. An all‑bright room is the biggest mistake; balancing light and dark is the source of comfort.
How much do wall, floor, and furniture colors and materials affect the lighting effect?
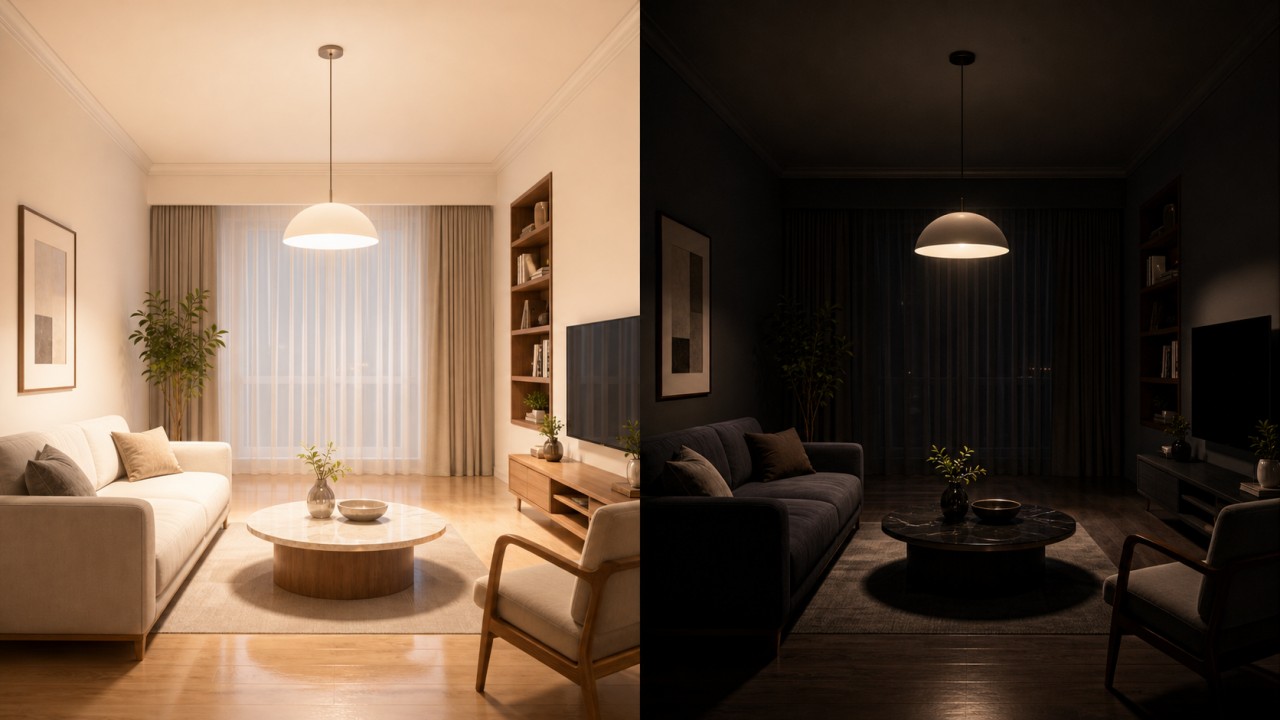
The impact is much larger than you think Many people choose lights based only on lumens and colour temperature, forgetting about the walls, floor, and furniture. In reality, the colour and material of these surfaces act like a dimmer – they change the brightness, colour, and softness of the light. A fully white room versus a fully black room, with the same lamp, can feel two or three times different in brightness.
Light vs dark colours: light reflects, dark absorbs Light‑coloured surfaces (white, off‑white, light grey, light wood) reflect most of the light. When light hits a white wall, over 80% bounces back – it is like having an extra, invisible glowing surface in the room. Dark surfaces (dark grey, dark blue, black walnut, dark carpet) absorb light, turning it into heat. With the same downlight, a dark room looks noticeably dimmer, so you will need more lights or higher‑wattage bulbs. In short: for a bright feel, use light colours; for a dark, moody atmosphere, use dark colours – but then add more lighting.
Warm vs cool colours: they change the perceived colour temperature Warm‑coloured walls (cream, light orange, pale pink) make the light feel warmer and softer – even if the bulb is 4000K, the reflected light can feel like 3000K. Cool‑coloured walls (pale blue, light green, grey‑blue) make white light feel cooler, sometimes even slightly greenish. If you have a 3000K warm light hitting a pale blue wall, the result can look a bit dull and unappealing. So match wall colours with light colour temperatures: warm walls with warm light (2700‑3000K), cool walls with neutral light (around 4000K).
Material gloss: glossy surfaces cause glare, matte surfaces soften light Smooth, glossy surfaces (polished tiles, lacquered cabinet doors, mirrors, glass coffee tables) reflect light directly like a mirror, easily causing glare that hurts your eyes. If you have ceiling lights and glossy floor tiles, you will see harsh reflections of the lights on the floor. Rough or matte surfaces (matte emulsion paint, wooden floors, fabric sofas, textured concrete paint) diffuse light in all directions, making it softer and more uniform, reducing shadows and glare. So in bedrooms and living rooms, prefer matte or low‑gloss materials. In bathrooms and kitchens, a little gloss is fine, but watch the lighting angles.
Surface texture: uneven surfaces create patterned light and shadow Textured surfaces (rough linen wallcovering, rustic tiles, grooved wood panelling, stone walls) create tiny shadows, adding depth and richness to the light. For example, a rough stone wall lit from the side will show small shadows from each bump – it looks very tactile. However, for areas that need uniform lighting (like the wall behind a desk), smooth matte walls are better to avoid distracting texture. Also, metal finishes (brushed stainless steel, brass) create bright highlights and work well for accent lighting.
Examples of real combinations
White walls + white matte ceiling + light wood floor + fabric sofa → the same lamp makes the room very bright; you may even need to lower the power.
Dark grey walls + dark carpet + black glossy TV cabinet → the same lamp makes the room very dark; you need roughly twice the lumens, and you must avoid glare from the glossy cabinet.
Warm wood‑panelled walls + warm spotlights → the cosy feeling doubles, but be aware that the wood grain may cast tiny shadows.
Final practical takeaway The colours and materials of your walls, floor, and furniture directly change how well your (potentially expensive) lamps actually perform. Before decorating, decide: if you want bright and clean, choose light‑coloured matte surfaces; if you want deep moody atmosphere, choose dark colours but then add enough lighting. Whichever you pick, test a sample lamp on your actual wall and floor before final installation – that will save you from regrets later.
Why do lamps with the same wattage and color temperature feel very different in brightness in different rooms?
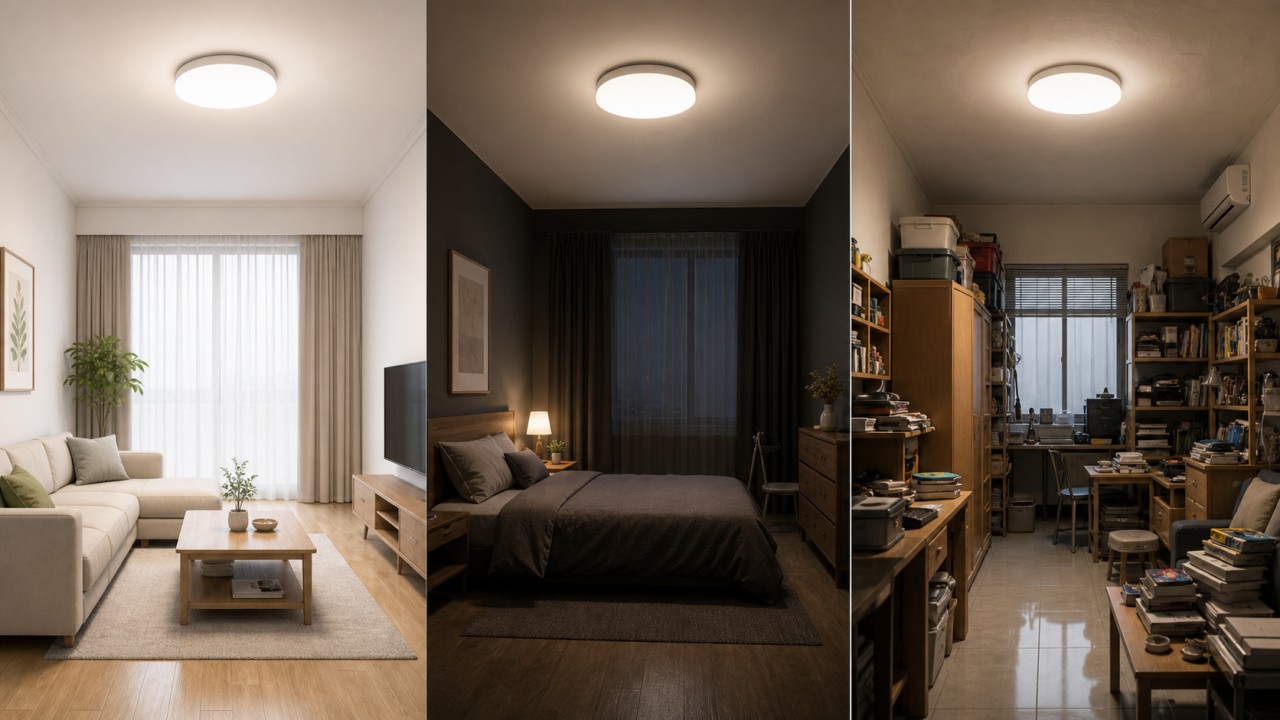
You may notice that the same bulb feels bright in a white living room but dim in a dark-colored bedroom. It’s not the bulb’s fault — the room itself is “cheating.” Simply put, the brightness we perceive depends not only on the bulb but also on how light “bounces around” the room. The colors of the walls, ceiling, floor, the size of the room, and how much furniture is inside all affect how much light finally reaches your eyes.
Wall color is the biggest “helper” or “thief.” Light-colored walls and ceilings act like mirrors, bouncing light around and making the whole room bright. White walls can reflect 70-90% of the light. Dark walls (like dark gray or navy) eat up light — you give them 100%, they might spit back only 20%, absorbing the rest. So, the same lamp in a white room can feel like 20 watts, but in a dark room it may feel like only 5 watts.
Room size matters too. A large room is like a big square — by the time light reaches the floor, it’s already spread out, so it looks dim. A small room is like a small box — light fills it easily. Also, the beam angle of the lamp matters: some bulbs spread light everywhere (like a lantern), others focus it into a narrow beam (like a flashlight). If you use a narrow-beam spotlight in a large room, only a small patch will be bright and the rest dark. If you use a wide-beam bulb in a small room, the light will be nice and even.
Your eyes automatically adjust. If you walk into a room from a sunny balcony, the room will feel very dark. If you turn on the light in the middle of the night after being in a dark bed, the same light may feel blinding. That’s your eyes adapting. Also, if the room has dark corners or a big dark sofa, the contrast makes the bright spots look brighter and the dark spots darker, so the overall feeling isn’t as uniformly bright.
In short, the same wattage and color temperature lamp feels different in different rooms mainly because of: the color of your walls (light or dark), whether the room size matches the lamp’s beam spread, and how your eyes have adapted to the surrounding light. When choosing a lamp, don’t just look at the numbers on the box — also think about whether your room is dark or light, big or small.
Luminaire Selection and Matching
What is the optical difference between downlights and spotlights, and which should dominate in a home?
The biggest optical difference between downlights and spotlights can be summed up as: downlights are like “scattering beans” – they evenly illuminate the whole space; spotlights are like “flashlights” – they focus precisely on an object or wall. Downlights emit light that spreads in all directions, creating a soft, large-area glow; spotlights concentrate light into a narrow beam, forming a sharp-edged spot that highlights a specific target.
Beam angle is the key parameter distinguishing the two. Downlights typically have a beam angle greater than 60°, sometimes up to 120°, spreading light like a fan to cover large areas, making the room bright and open. Spotlights usually have a beam angle less than 60°, with common options of 15°, 24°, and 36°. A 15° beam is good for illuminating very small objects, a 24° beam creates the classic “mountain” wall-washing effect, and a 36° beam covers a larger area but remains focused. Simply put, downlights illuminate “surfaces” while spotlights illuminate “spots.”
Most downlights are fixed to shine straight down and cannot be adjusted, making them suitable for general illumination. Spotlights are often designed to be rotatable or tiltable, able to point in any direction like a searchlight – very flexible. This means that if you install a row of spotlights, you can adjust them to aim at different paintings, display cabinets, or walls, while downlights, once installed, have a fixed direction.
Because downlight light is inherently soft and spread out, it is naturally less likely to cause glare, and deep-baffle designs make it even better. Spotlight light is very concentrated; if you see the bulb directly, it will be harsh on the eyes – that’s glare. So when buying spotlights, be sure to choose “deep-baffle anti-glare” types – meaning the light source is hidden deep inside the fixture and not visible from the side. Also, black baffles work better than white ones.
For typical Chinese homes with ceiling heights around 2.8 meters, the mainstream approach is “downlights as the main, spotlights as the supplement.” That is, first use downlights to provide sufficient general brightness for the entire space, then use spotlights to create layering and atmosphere. Downlights make the space “comfortably bright,” while spotlights make it “bright with focus.” It’s not a choice between the two – they work together.
How to choose for each room? Living rooms work well with a combination: use downlights for general illumination and spotlights to wash feature walls (sofa wall or TV wall), creating beautiful light patterns. Bedrooms should mainly use downlights for a soft, calm atmosphere; use spotlights sparingly and avoid aiming them at the pillow. Kitchens and bathrooms need even, shadow-free functional lighting – downlights are the absolute mainstay, and be sure to choose ones with IP44 or higher water protection. Entryways and hallways mainly use downlights to light the path; you can add one spotlight on a decorative painting or above a shoe cabinet for accent. Studies mainly use downlights to ensure even illumination on the desk and throughout the room; spotlights inside bookcases can help. For dining rooms, install a spotlight directly above the dining table to focus on the food, greatly enhancing the dining ritual.
A few simple principles. First, downlights ensure basic brightness, spotlights create layering: first make sure you have enough downlights so the room isn’t dark, then use spotlights for drama. Second, for wall washing, place spotlights 20-30 cm away from the wall to create beautiful scalloped light patterns; downlights should be evenly spaced on the ceiling to light the floor and main activity areas. Third, keep the color temperature consistent in the same open space – for example, all 3000K (warm yellow) or all 4000K (natural white) – otherwise it looks messy. Remember a rhyme: Downlights for general, soft and even; spotlights for accent, focus and flair; use them together, a match made in heaven.
A text summary of the core differences. Downlights are for general lighting – their light is scattered, uniform, and soft, beam angle usually >60°, mostly non-adjustable, and they naturally have good anti-glare performance. Spotlights are for accent lighting – their light is focused, concentrated, and layered, beam angle usually <60°, mostly adjustable, and they have poor anti-glare performance unless you choose deep-baffle anti-glare types. Visually, downlights feel like “mini suns,” spotlights feel like “flashlights.” For home use, the recommendation is downlights as the main, spotlights as the supplement.

How should beam angle and installation distance be selected according to the size of the illuminated object, such as artwork, coffee tables, or dining tables?
For wall art: the light spot should just cover the artwork, slightly larger than the frame. Recommended spotlights: 24° or 36°. Distance from the light to the wall: 20-30cm. Spacing between multiple lights: 80-100cm. Principle: the spot diameter should be 5-10cm larger than the painting’s height or width to avoid “chopping off” part of the art. If the painting is very wide (e.g., a 1.2-meter horizontal piece), use two 36° spotlights side by side, each covering roughly 60-70cm, with slight overlap. For a narrow painting (e.g., 40cm wide), a single 24° spotlight at a longer distance (e.g., 35cm) works well.
For dining tables: the light spot should cover the entire tabletop without causing glare. The classic solution is a spotlight or pendant directly above the table (wide beam angle works well). Recommended 36° or 45° spotlights. Height from the light to the table surface: 70-90cm. Principle: the spot diameter should equal or slightly exceed the table width. For example, an 80cm wide square table: a 36° spotlight at 80cm height gives a spot about 50-60cm – a bit narrow; switch to a 45° spotlight or lower the height to 65cm. For a round table (1 meter diameter), a 45° spotlight at 75-85cm height works well. For a long table (1.8 meters), use two 36° or 45° spotlights evenly spaced, each covering its own zone, with spot edges overlapping at the center.
For coffee tables: flexible approach, using wide beam angles or moderate distances. Coffee tables are usually in the living room center, possibly under recessed or track spotlights. Typical coffee table sizes range from 60cm×60cm to 1.2m×0.6m. Recommended 36° or 45° spotlights, with mounting height (light to table surface) 80-100cm. If the table is square or round with a side/diameter under 70cm, a single 36° spotlight at 80cm height works. For larger tables (e.g., 1.2m long), use two 36° spotlights side by side, or a single 45° spotlight at a higher mount (e.g., 1 meter). Coffee table lighting does not need to be as strict as dining table coverage – a small dark perimeter is acceptable, as long as the objects on the table are illuminated.
Quick reference (text):
Wall art (40-60cm wide): 24° spotlight, 25cm from wall → spot diameter ~30cm
Wall art (80-100cm wide): 36° spotlight, 30cm from wall → spot ~50cm, or two 24° side by side
Dining table (70-90cm wide): 36° spotlight, 75cm height → spot ~50-60cm; if not enough, switch to 45°
Round table (1m diameter): 45° spotlight, 80cm height → spot ~80-90cm, perfect coverage
Coffee table (60-80cm square): 36° spotlight, 85cm height → spot ~55-65cm, sufficient
Long objects (1.2-1.8m): two 36° or 45° spotlights, spacing 60-80cm, each covering half
A few reminders about installation distance. First, for wall washing (art lighting), placing the light too close (<15cm) creates intense hot spots and glare; too far (>40cm) pulls the spot down to the floor, leaving the wall dark. Best range: 20-30cm. Second, above a dining table, avoid head bumps and direct eye glare – a height of 70-90cm is comfortable. Third, if the object has a very shiny surface (e.g., high-gloss piano finish or mirrored table), a narrow spotlight can cause reflective glare. In that case, switch to a wider beam angle (45° or more) or add a diffuser (e.g., frosted glass cover). Finally, real testing is better than calculation: before final installation, use a flashlight or a portable track light to simulate the spot and check if it looks right.
Above a kitchen countertop, is an LED strip, downlight, or spotlight more reasonable?
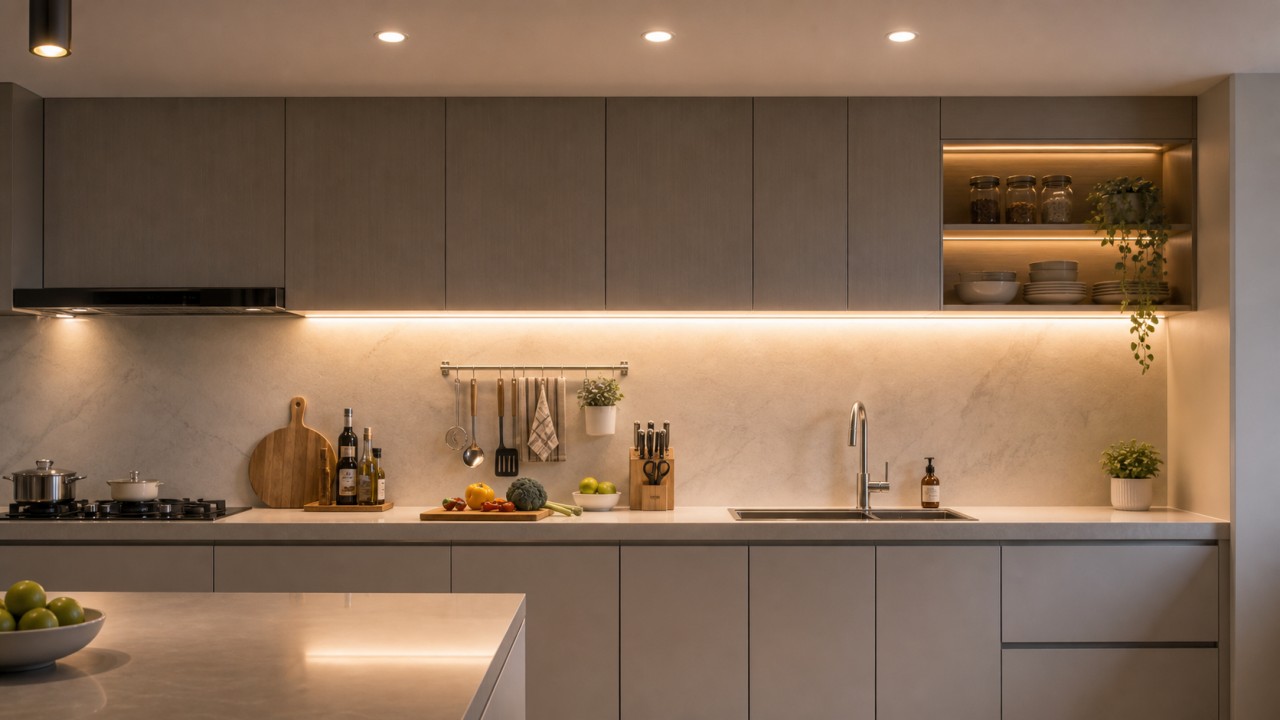
The core requirements for kitchen countertop lighting are: uniform light, no shadows, high brightness, and high color rendering. When a person stands at the counter, their body blocks light from above, casting shadows on the work surface. Therefore, the ideal solution is to install LED strip lights under the upper cabinets (at the front edge), shining diagonally down onto the countertop from in front of the person, completely eliminating shadows. Recessed downlights or spotlights installed directly above or slightly behind are unlikely to avoid body-cast shadows.
LED strip lights (especially low-voltage ones) mounted on the front edge under upper cabinets shine forward and downward, perfectly covering the countertop. Advantages: First, no shadows – the light source is in front of the person, so shadows of hands and body fall behind, not on the work area. Second, continuous and uniform – the linear light matches the shape of the countertop with no alternating bright and dark spots. Third, hidden installation – tucked under the cabinets, taking up no space and causing no glare. Choose strips with CRI ≥90 and color temperature 3000-4000K, and use an aluminum channel with a diffuser to smooth out LED dot effects. A hand-wave sensor switch is a nice addition.
If there are no upper cabinets or they are too shallow for strip lights, downlights are an acceptable alternative. Install multiple downlights directly above the counter, spaced 50-70cm apart, each with a beam angle of 60-90° to cover the work surface. However, when a person stands at the counter, their body will block some light, creating a shadow directly below. To reduce shadows, place the downlights closer to the wall (30-40cm from the wall) so the light comes from a diagonal angle. Even so, strip lights still perform better. The advantage of downlights is a cleaner ceiling look, without needing wiring to the cabinet bottoms.
Spotlights are not recommended. Their narrow beam angle (typically 15-36°) creates a small, intense spot. Installed above a counter, they only illuminate a tiny area, leaving the rest dark, and body shadows are very pronounced. Even wide-beam spotlights (45°) perform far worse than strip lights or downlights in uniformity and shadow elimination. Spotlights are better for highlighting wall art or décor, not for task lighting on work surfaces. So for kitchen countertops, avoid spotlights.
In summary, the best solution for kitchen countertop lighting is: prioritize LED strip lights (under the front edge of upper cabinets) for shadow-free, continuous, and uniform task light. If strip lights are impossible to install, fall back to multiple downlights (placed close to the wall). Spotlights are generally unsuitable. Also, regardless of choice, ensure CRI ≥90, and a color temperature of 4000K (natural white) for true food color rendition. Strip lights and downlights can also work together: strips provide countertop task lighting, downlights provide overall ambient light for the kitchen.
How should bathroom mirror lighting be installed to eliminate facial shadows?
The cause of facial shadows: When you look into a bathroom mirror, shadows are usually caused by light coming from only one direction. The most common mistake is installing only a light above the mirror, shining downward. This creates harsh shadows under the eyes, nose, and chin. Similarly, light from only one side leaves the other side of the face dark. To eliminate shadows completely, you need light to wrap around your face from the front, meaning illumination from the front, both sides, and slightly above simultaneously.
Best solution #1: Wall sconces on both sides of the mirror. This is the most common method in professional makeup rooms and hotel bathrooms. Install one sconce (or vertical strip light) on each side of the mirror, with the center of the light at or slightly above eye level (about 150-165cm from the floor). The two lights illuminate your face evenly from both sides, completely eliminating shadows under the nose and on the cheeks. The horizontal distance between the two lights should be 60-80cm (depending on mirror width). Choose opal frosted glass or diffusers to avoid glare. Recommended color temperature: 4000K (natural white), CRI ≥90.
Best solution #2: Top + both sides combination. If your bathroom only has wiring above the mirror, install a long strip light (tube or LED strip) along the top of the mirror, and also add small sconces on both sides. The top light provides general illumination, while the side lights eliminate shadows. This combination comes close to a professional makeup mirror. If side lights are truly impossible, a fallback is to install vertical LED strips along the edges of the mirror frame, which also helps. Important: never rely on a top light alone; it must be paired with light from other directions.
Acceptable solution: Large ring light around the mirror. There are “vanity mirror lights” in a circular ring surrounding the mirror, or the mirror itself is an illuminated mirror (edge-lit or back-lit). This design provides light evenly from all directions – top, bottom, left, right – producing almost no shadows. The ring should be at least 30cm in diameter, and the light source should be close to your face (mirrors are wall-mounted, you stand close, so it works very well). This is the cleanest all-in-one solution for modern minimalist bathrooms.
Wrong solution: Only a single light above the mirror. Whether it’s a recessed downlight, a spotlight, or a mirror light bar installed only at the top, this directly causes facial shadows. No matter how bright the light, the downward cast from above creates dark eye sockets, shadows under the nose, and a dark chin. Avoid this installation method entirely. If your bathroom already has this, add side sconces to fix it.
Specific numbers for installation height and position:
Side sconces: center height 150-165cm (eye level), spacing 60-80cm apart, 5-10cm from the mirror edge.
Top strip light: mounted just above the mirror frame, strip center 2-5cm above the mirror, length at least 80% of mirror width.
Ring mirror light: mirror center at about 150-160cm height, ring diameter 30-50cm, with your eyes at the center height of the ring.
Uniform color temperature: all lights in front of the mirror should match (4000K recommended) to avoid a mixed yellow-white appearance. CRI ≥90 to see true skin tones.
In plain language: To avoid shadows on your face when washing or applying makeup, remember: don’t let light only come from above – make sure it also comes from both sides of your face. The best method is to install a wall sconce on each side of the mirror. Next best is to buy a mirror with a full ring of light. The worst is having only a light above the mirror. The side lights should be about shoulder-width apart, at eye level, for the most even and natural look.
What are the pros, cons, and installation points of bedside wall lights, pendants, and table lamps?
Bedside lighting is mainly used for reading, using a phone, getting up at night, and creating a cozy atmosphere. The ideal bedside lamp should provide soft, non-glaring light, be adjustable in direction or brightness, not take up valuable nightstand surface, and be easy to switch on and off. Different types of lamps vary greatly in these aspects.
Wall sconces are mounted on the wall, typically on both sides of the bed at about 100-120cm from the floor (slightly above shoulder height). Lighting advantages: They don’t take up nightstand space – great for small rooms. Choose models with adjustable arms that can be swiveled and tilted for directional reading light with minimal disturbance to a partner. The higher angle creates a downward reading-like light. Lighting disadvantages: Fixed position cannot be moved later. If the shade has no glare control, the bare bulb can be harsh. Some sconces cast a very narrow pool of light. Installation advantages: No need for an outlet on the nightstand; wiring is hidden in the wall – clean and tidy. Installation disadvantages: Requires pre-planned wiring during construction (height and position must be decided early). Retrofitting is expensive and messy. Repair or replacement may involve opening the wall.
Pendant lights hang from the ceiling, typically above the nightstand or on both sides of the bed, about 40-60cm above the nightstand surface. Lighting advantages: Very decorative and stylish. Light is directed downward onto the nightstand area, suitable for small-scale reading. Works well with dimmers for ambiance. Lighting disadvantages: Most pendants have fixed downward shades with no directional adjustment. When sitting up in bed reading, the light comes from above and to the side, which can cause glare. Low-hanging pendants risk bumping your head. Installation advantages: Can be installed as long as there is a ceiling junction box – more flexible than sconces. No outlet needed on the nightstand. Installation disadvantages: The hanging point must be determined during construction (directly above the bed); moving it later is difficult. Pendants eat up vertical space above the bed – tall people may hit them. Cleaning requires a step ladder.
Table lamps sit directly on the nightstand. Lighting advantages: Most flexible – you can move them anywhere, change the angle easily. The shade can be rotated to control light direction, making it easy to achieve glare-free reading light (angle the shade toward the wall or downward). Bulbs can be swapped for different brightness and color temperature anytime. Lighting disadvantages: Takes up valuable nightstand surface – may not work in very small bedrooms. Easy to knock over (especially with kids or pets). Cords are visible and can look messy. Installation advantages: No pre-wiring needed at all. Just plug and play after moving in. Zero cost to upgrade or replace. Installation disadvantages: Requires a power outlet near the nightstand (older homes may lack one, forcing an extension cord – ugly and potentially unsafe). The cord sits on the nightstand or hangs down, affecting aesthetics.
Summary and recommendations:
Lighting quality ranking: Table lamp (most flexible, easiest to avoid glare) > adjustable wall sconce (good directionality, saves surface space) > pendant (fixed downward, possible glare).
Ease of installation (retrofit): Table lamp (zero install) >> wall sconce ≈ pendant (both require pre-wiring).
Space efficiency: Wall sconce (saves nightstand best) > pendant (saves surface but uses airspace) > table lamp (uses surface).
Aesthetics: Subjective, but pendants and sconces often look more built-in and designed; table lamps are more casual.
Practical advice: If you’re still renovating and have small nightstands, choose adjustable-arm wall sconces. If the room is already finished and you have an outlet bedside, table lamps are the most hassle-free. If you have high ceilings and want a design statement, choose small pendants but be mindful of head clearance. Use separate switches on each side, warm color temperature (2700-3000K), and CRI >80 (CRI >90 for reading).
How should fixture position and light direction be arranged for the sofa background wall and TV background wall?
The two walls in a living room have opposite lighting goals. The sofa wall is mainly for creating ambiance, highlighting artwork or wall textures, and works well with wall-washing lights to create layered shadows. The TV wall needs to avoid light bouncing off the screen, while still keeping the wall from being too dark. Once you understand these different tasks, you’ll know where to place the lights.
For the sofa wall: wall-washing + accent lighting. Use recessed spotlights or track spotlights, installed 20-30cm from the wall (center of light to wall), spaced 80-120cm apart. The light direction should be diagonally downward for wall-washing, so the beam starts near the ceiling and “washes” down the wall. If there is artwork above the sofa, add an extra spotlight directly above the art (same distance from the wall) with a 24° beam angle for precise highlighting. A more advanced option: install upward-facing LED strips in the ceiling cove above the sofa wall, bouncing light off the ceiling – extremely soft and glare-free.
For the TV wall: anti-glare + indirect lighting. A TV screen acts like a mirror – any light coming from the front or side will cause reflections and ruin the viewing experience. Never install spotlights directly above the TV shining straight at the screen. Two correct approaches: First, install deep-baffle anti-glare spotlights at the far edges of the TV wall (40-50cm from the wall), angled diagonally downward away from the TV, lighting only the frame or adjacent display cabinets. Second, use indirect lighting – for example, hidden LED strips behind the TV cabinet, behind the TV itself, or in the ceiling cove, bouncing light off the wall without ever hitting the screen directly. If you must install ceiling lights to illuminate the TV wall, choose very wide beam angles (60° or more) and place them far from the wall (at least 50cm), so the light spreads evenly and avoids creating bright spots on the screen.
Coordination principles between the two walls. The sofa wall can have more spotlights for layering, but not too bright – otherwise the peripheral light will distract when watching TV. The area around the TV wall should be darker than the sofa wall by about one level, so your eyes naturally focus on the screen. The simplest setup: use wall-washing spotlights on the sofa wall, and only a hidden LED strip on the TV wall. Also, put the lights for the two walls on separate circuits, so you can switch or dim them independently – for movie watching, keep only a faint glow on the sofa wall and turn off the TV wall entirely.
Specific numbers summary:
Sofa wall spotlights: 20-30cm from wall, spacing 80-120cm, beam angle 24-36°, direction diagonally downward for wall washing.
TV wall spotlights (if absolutely necessary): at least 50cm from wall, beam angle 60° or more, deep-baffle anti-glare, aim diagonally to the sides or away from the screen.
TV wall indirect lighting: LED strips hidden 5-10cm behind the TV in a recess, or in a ceiling cove, direction upward or toward the wall.
Color temperature recommendation: uniform 3000K-3500K (warm light) – comfortable for TV viewing.
Color rendering: sofa wall can be Ra>90 (to highlight art), TV wall Ra>80 is sufficient.
In plain language: For the sofa wall, mount lights close to the wall (20-30cm) and aim them diagonally downward. For the TV wall, never let light shine directly on the screen – hidden backlighting is safest. Remember: when watching TV, the dimmer the light outside the screen, the more comfortable you feel.
Besides enough brightness, what optical indicators should a study reading lamp consider?
Color rendering is critical when reading—paper, images, and book covers should appear natural. The Color Rendering Index (CRI, maximum 100) measures how accurately a light source reveals object colors. For a study reading lamp, Ra ≥ 90 is recommended, with good performance on R9 (deep red) as well (R9 > 50). Low CRI (e.g., Ra < 80) makes text and images look grayish and distorted, causing eye strain. For tasks requiring precise color discrimination (e.g., maps, charts, art books), Ra ≥ 95 is preferable.
The color temperature of a reading lamp directly affects concentration and fatigue. 3000K-4000K is the optimal range for reading: around 3000K (warm white) relaxes the eyes without glare, suitable for evening reading; around 4000K (neutral white) boosts alertness and focus, ideal for daytime or long study sessions. Avoid below 2700K (too yellow, drowsy) or above 5000K (too blue, may suppress melatonin and increase glare). A tunable‑CCT reading lamp is even better, allowing adjustment by time of day.
“Bright enough” does not equal comfortable. Direct glare or reflective glare severely disrupts reading. For a desk lamp, the key parameter is the shielding angle — the light source should be hidden behind the lampshade or edge so that the user’s line of sight does not directly see the bright LED chips. National standards require that in a normal seated posture, the light source should not be visible; a shielding angle >30° is typical. For general room lighting, UGR (Unified Glare Rating) should be ≤ 19 in the reading area. Also consider reflections from glossy paper: the lampshade should produce diffused light or use anti-glare (frosted, micro‑prism) glass to prevent direct specular reflection into the eyes.
Invisible flicker can cause headaches, eye strain, and reduced concentration. Reading lamps should be flicker‑free (no visible flicker) and meet the high‑risk exemption level of IEEE 1789. Common metrics include percent flicker (modulation depth). For LED luminaires at ≥80% output, percent flicker should be <5% (preferred) or at least <30% (low risk). Check product labels for “flicker‑free” or test reports. A simple test: point a smartphone camera at the lit lamp; if you see moving bars or stripes, flicker is significant.
The light beam should evenly cover the entire book or work area. Chinese national standards (e.g., GB/T 9473-2017) require that for a 300 mm × 300 mm rectangular area, the illuminance uniformity (max/min ratio) should be ≤ 3, and preferably ≤ 2 (grade A or AA). Avoid a “spotlight” effect with a bright center and dark edges. The diffusing properties of the glass shade are crucial here: medium‑haze (40-60%) opal or micro‑prism glass effectively widens the beam and reduces the hot spot. Also, the beam should have sufficient lateral coverage (e.g., at 40 cm distance, the spot diameter should be at least 30 cm).
When reading for long periods, the eyes are close to the light source, so RG0 (no risk) classification is preferred, especially for children and teenagers. RG0 means no blue‑light photochemical damage within 10000 seconds (≈2.8 hours). For reading lamps, choose LEDs with reduced blue‑light components (e.g., using phosphors that broaden the blue peak or shift it to longer wavelengths) or a glass shade that selectively filters harmful blue light (415‑455 nm), but ensure that color rendering remains high (Ra ≥ 90).
In summary, beyond adequate illuminance (typically ≥500 lux), a study reading lamp must deliver high color rendering (Ra ≥ 90), appropriate color temperature (3000-4000K), strict glare control (shielding angle >30°), flicker‑free operation, good beam uniformity, and a blue‑light hazard rating of RG0. Together, these metrics determine the comfort and visual health of prolonged reading sessions.
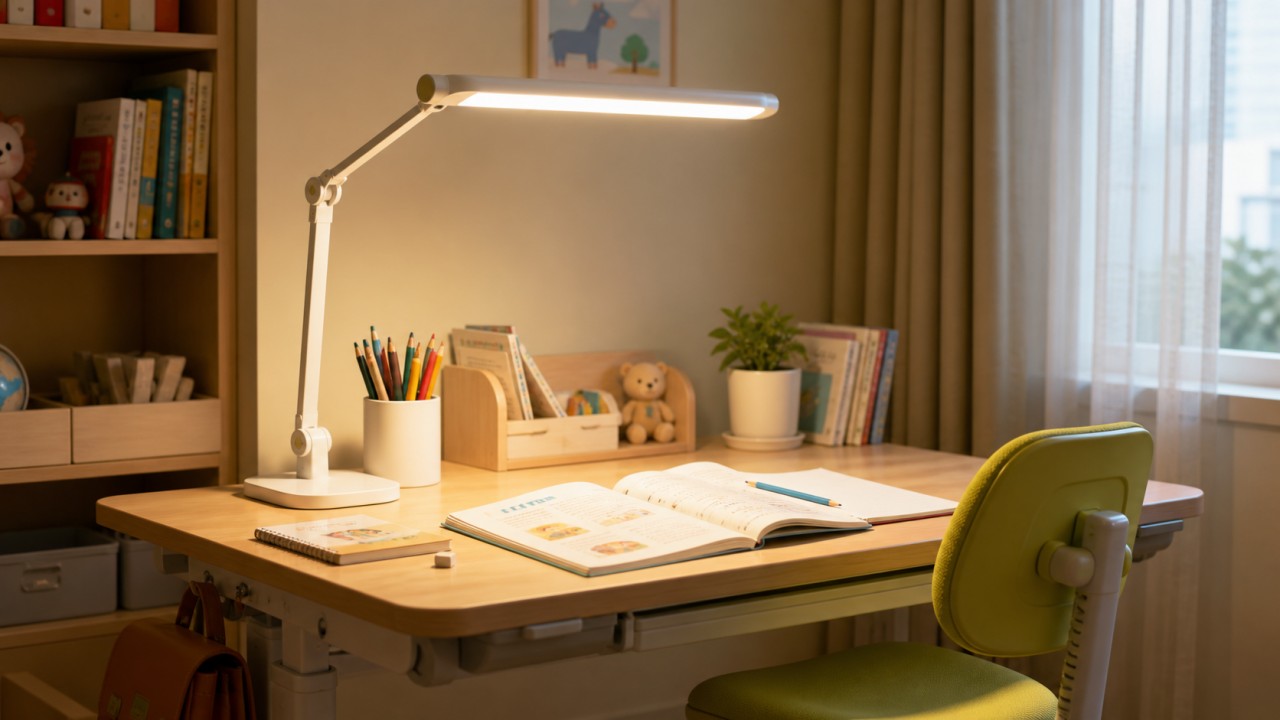
What lighting indicators matter most for a children's desk lamp?
Choosing a desk lamp for a child requires more than just “bright enough.” A range of lighting metrics specifically designed to protect children’s visual health must be considered. These metrics include illuminance and uniformity, color rendering index, blue light hazard rating, flicker, color temperature, and anti‑glare design. Only by addressing all these factors can you ensure that your child sees clearly, comfortably, and safely while reading and writing.
Illuminance refers to the light intensity on the work surface, while uniformity measures the ratio between the brightest and darkest areas within the work zone. China’s national standards classify desk lamps into Grade A and Grade AA. For Grade AA, the central area must have at least 500 lux, the peripheral area at least 250 lux, and the uniformity (max/min ratio) ≤ 3. For a child’s desk lamp, it is strongly recommended to choose an AA‑rated product. Good illuminance and uniformity prevent the child’s eyes from constantly adjusting between bright and dark zones, reducing visual fatigue and the risk of myopia.
The Color Rendering Index (CRI, max 100) measures how accurately a light source reveals true colors. Children need accurate color perception when reading colorful picture books, doing crafts, or drawing. China’s standard requires Ra ≥ 82 for desk lamps, but for better visual comfort, Ra ≥ 90 is recommended, and ideally Ra ≥ 95. Also pay attention to R9 (saturated red): a high R9 value renders red colors more faithfully. High color rendering allows a child’s eyes to recognize colors without strain, reducing fatigue and protecting vision.
Children have clearer lenses than adults, so blue light penetrates more easily to the retina, increasing the risk of photochemical damage with long‑term exposure. Therefore, a child’s desk lamp must meet the RG0 (no risk) classification, the strictest blue‑light safety level. When purchasing, check whether the product clearly states “RG0” or provides a test report for blue light hazard. Note that RG0 does not mean completely blocking blue light; it limits harmful blue light radiation to a level that poses no danger to the eyes.
Rapid flicker that is invisible to the naked eye can cause headaches, eye strain, and reduced concentration. Children are even more sensitive to flicker, and prolonged exposure may accelerate myopia progression. A qualified child’s desk lamp must be flicker‑free, preferably meeting the “no risk” level of IEEE 1789 (flicker frequency ≥ 3125 Hz). A simple test: point a smartphone camera at the lamp; if rolling bars appear on the screen, flicker is severe. Prioritize products labeled “flicker‑free” with supporting test reports.
Color temperature affects the warmth or coolness of light, as well as alertness and sleep rhythms. Excessively high color temperature (>5000K) suppresses melatonin secretion, disrupts sleep, and may worsen eye strain. Excessively low color temperature (<3000K) induces drowsiness and reduces study efficiency. The recommended color temperature for a child’s desk lamp is ≤4000K, with an optimal range of 3300K‑4000K. A lamp with adjustable color temperature is strongly preferred, allowing a slightly higher setting during the day for focus and a setting below 4000K in the evening to reduce circadian disruption.
Glare refers to excessively bright spots or reflections in the field of view, forcing the pupil to contract and causing discomfort and fatigue. A child’s desk lamp should incorporate anti‑glare design features such as an opaque shade, deeply recessed light source, or frosted/micro‑prism glass. In a normal seated posture, the child’s eyes should not directly see the light‑emitting surface or the reflective inner walls. Proper placement is also key: a right‑handed child should place the lamp on the left front to avoid hand shadows, and always use the lamp together with the room’s ceiling light to reduce brightness contrast.
All desk lamps sold in China must have CCC certification (China Compulsory Certification), which is the basic guarantee of electrical safety, covering protection against electric shock, heat resistance, flame retardance, etc. Some products also earn voluntary CQC certification, indicating higher performance and reliability. Parents should look for the CCC mark on the packaging or manual and never buy uncertified cheap products.
Even with a lamp that excels in all metrics, correct usage habits are equally critical. Always turn on the room’s ambient lighting (ceiling light) to avoid the “tunnel effect” of a bright desk and a dark surrounding. Place the lamp on the side opposite the writing hand, and use a matte, non‑glossy desktop or a frosted desk mat to prevent specular reflections. Clean the lampshade and LED surface regularly to maintain light output. It is also advisable to check flicker and illuminance every six months (a smartphone lux meter app can provide a rough indication).
In summary, the key metrics to focus on when choosing a desk lamp for a child are Grade AA illuminance and uniformity, Ra ≥ 90 (ideally ≥ 95) color rendering index, RG0 blue‑light hazard rating, flicker‑free performance, color temperature ≤ 4000K (preferably adjustable), effective anti‑glare design, and CCC safety certification. Together, these metrics form a solid foundation for protecting children’s vision. On this basis, combined with correct placement and ambient‑light habits, you can create a truly healthy and comfortable learning environment for your child.
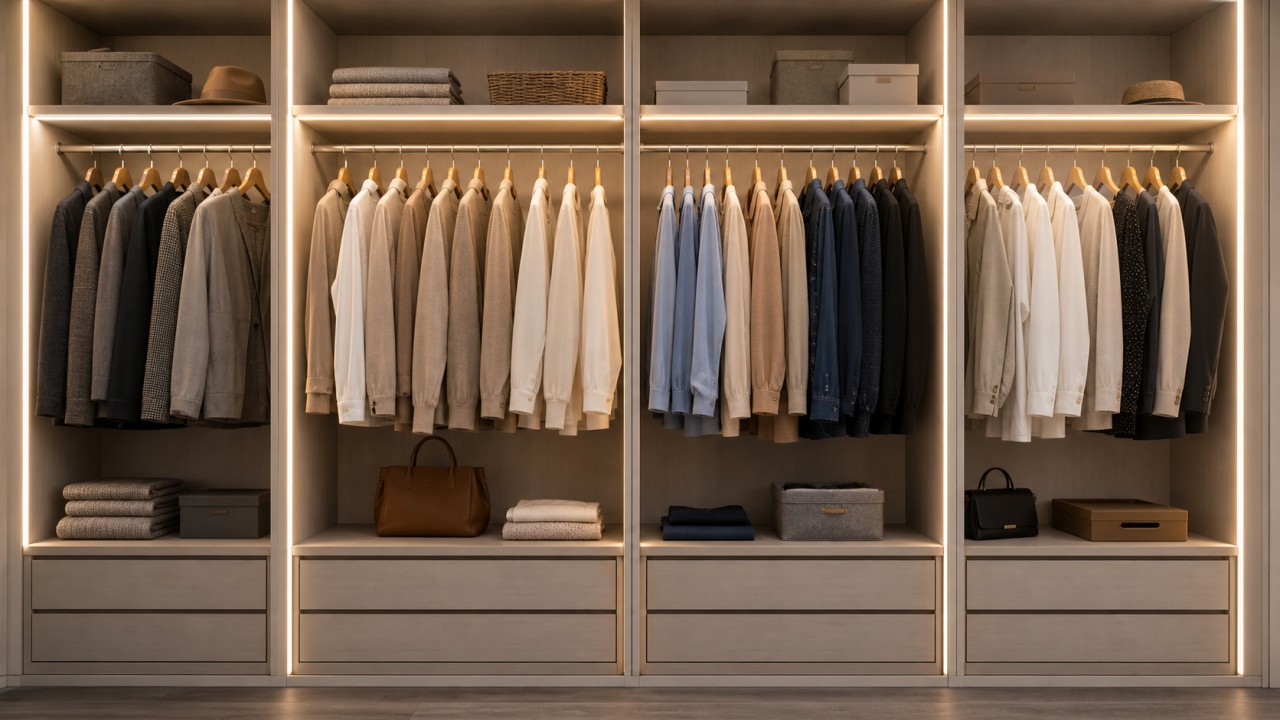
How should wardrobe interior lighting be selected so clothes are visible without glare?
Type of Light: Light Strips vs. Spotlights
Choosing the right type of light is the first step. Light strips are the top choice for wardrobe illumination because they provide a continuous, even wash of light, leaving no dark corners, unlike a single central light. Pay close attention to COB (Chip-on-Board) light strips. Unlike traditional SMD strips, COB's high-density packaging technology eliminates the annoying "starry sky" effect of individual dots, creating a smooth, seamless line of light that is both elegant and glare-free. For deep, hidden installations where the light isn't directly in the line of sight, a high-quality SMD strip can be a more cost-effective alternative.
Spotlights (or recessed downlights) can serve as a supplementary source, used in the walkway of a walk-in closet or as accent lighting to highlight special displays like handbags or accessories. However, relying on a single spotlight to light an entire wardrobe will create deep, frustrating shadows, making it difficult to distinguish colors like navy blue from black. Also, the angle of spotlights must be carefully controlled to prevent harsh reflections directly into your eyes.
The Golden Rule of Installation: See the Light, Not the Lamp
The secret to a glare-free experience is to "hide the lamp, not the light". This means concealing the light source so the illumination reaches you indirectly, through reflection or diffusion, rather than shining directly into your eyes.
The ideal placement for a light strip is on the bottom side of the shelf, near the front edge. This directs light straight onto the clothes for maximum clarity. For a softer, moodier effect, install it near the back edge of the shelf, allowing the back panel to diffuse the light and create a gentle glow. For high-end walk-in closets, embedding vertical light strips inside the side panels is a popular technique, creating a beautiful, even wash of light over the hanging clothes without any harsh shadows.
To achieve this, always use an embedded aluminum profile (heat sink). The channel’s depth (recommended >5cm) and a 45-degree angled design help shield the light source from direct view and create a smooth, gradual transition of light, avoiding harsh cutoff lines. The aluminum profile also acts as a necessary heat sink, which is especially critical for COB strips to prevent premature dimming.
Key Parameters: Color Temperature and CRI
Fine-tuning the color temperature and Color Rendering Index (CRI) is key to creating a comfortable and accurate dressing experience.
Color temperature dictates the "warmth" or "coolness" of the light. You don't have to choose between functionality and ambiance. The solution is to opt for tunable white lights. A 4000K natural white light is perfect for daytime outfit planning, as it clearly renders colors, helping you make accurate color matches. For a late-night trip to grab pajamas without waking your partner, you can switch to a 3000K warm white light, which is gentle on the eyes and creates a serene atmosphere. Stick to a range between 3000K and 4000K for the ideal balance of practicality and comfort.
CRI (Ra) measures a light source's ability to reveal the true colors of an object. This is crucial in a wardrobe, especially when differentiating between subtle shades like navy and black. To avoid color mismatches, choose a light with a CRI (Ra) greater than 90. Premium options achieve Ra > 92 and also enhance the rendition of reds (R9 > 90), ensuring your clothes look vivid and true to life.
Choosing a light for your wardrobe that is both functional and comfortable is a matter of following the golden rules of selection. This is your comprehensive guide.
A Working Example
Let's say you are building a lighting set for your wardrobe:
Balance practicality and atmosphere. In practice, you should prioritize COB light strips, as they offer the most continuous and uniform illumination. For installation, you should use an embedded aluminum profile, mounting the strip under the front edge of the shelf or inside the vertical side panel to achieve the "hide the lamp" effect.
Get the parameters right. Choose a strip with tunable color temperature from 3000K to 4000K to adapt to different times of day. Ensure it has a CRI (Ra) greater than 90 to distinguish dark colors accurately. Finally, pair it with a motion sensor, so the light turns on automatically when you open the door and off shortly after you close it, which is both energy-efficient and incredibly convenient.
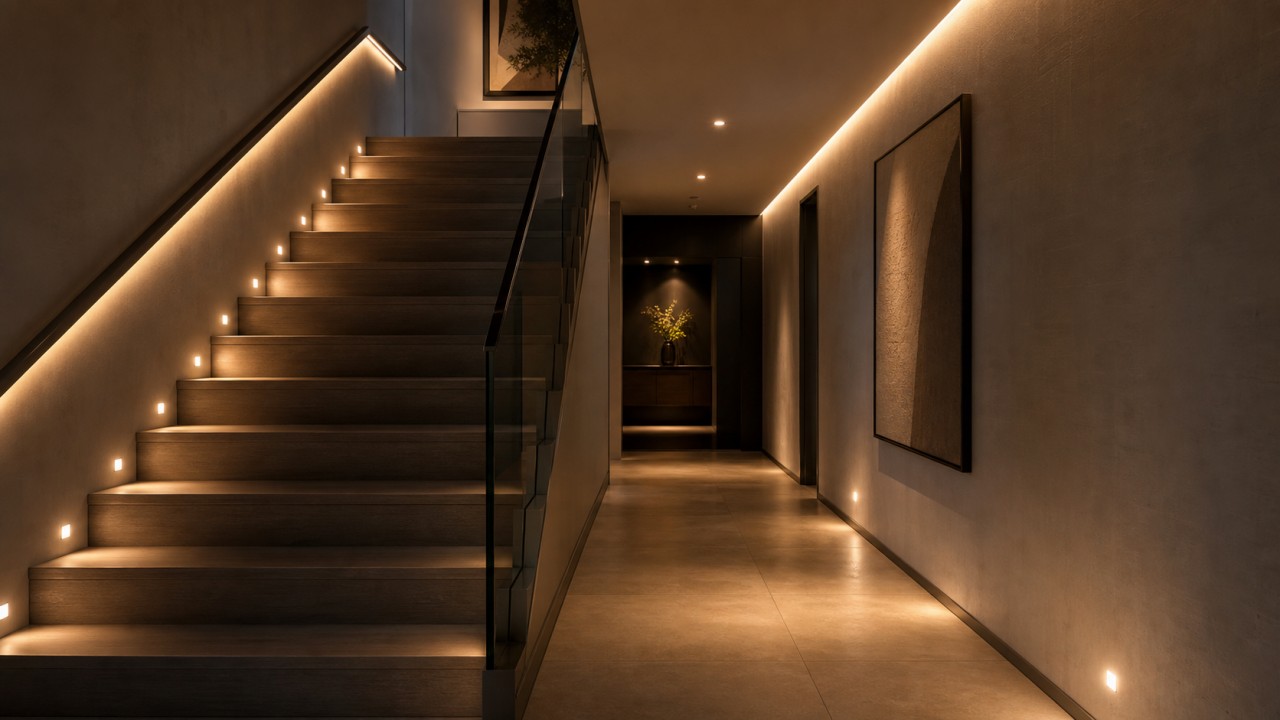
How can stair and corridor lighting provide both safety and guidance through fixture layout?
The core concept of lighting stairs and hallways is to balance two goals: first, to provide a strong sense of safety by eliminating dark spots and glare that could cause tripping; second, to create clear wayfinding that intuitively guides occupants or visitors through the space. The key to achieving this balance lies in using multi‑layer, low‑level, continuous luminaire placement combined with smart motion sensing, avoiding the shadows and disorientation caused by a single overhead source.
The most hazardous areas in stairs and hallways are step edges, corners, and the junction between floor and wall. A single ceiling light often casts a person’s shadow onto the stairs, creating sharply alternating bright and dark zones that increase the risk of missteps. To solve this, consider step lighting: install recessed LED strips under the riser of each step, or at the side of each tread. Alternatively, use baseboard light strips mounted 30‑40 cm above the floor. These low‑level continuous lights clearly outline every step, allowing safe ascent or descent even when the main light is off. For hallways, install wall sconces or recessed corner lights at 30‑50 cm height on both sides to avoid harsh floor reflections.
Wayfinding means the light should naturally suggest the direction of travel. In a hallway, the most effective method is to install continuous LED strips along the center or one side of the ceiling, or to use equally spaced downlights forming a “stream of light”. The linear direction of the strips should follow the long axis of the hallway – a person’s gaze will unconsciously follow the extended line of light. For stairs, in addition to step lights, you can embed light strips under the handrail, so the light flows along the rail, reinforcing the upward or downward trend. Furthermore, placing accent lighting, such as a spot on a painting or a niche, at the end of a hallway creates a visual anchor that draws people toward the destination.
Step light strips should be mounted at the bottom of each riser, shining downward onto the tread’s front edge – outlining the step without shining into the eyes. Handrail light strips can be embedded under or inside the handrail, providing a continuous guiding line while illuminating the rail itself for better grip confidence. Baseboard light strips are installed 10‑15 cm above the floor along one or both sides of the hallway, softly lighting the floor‑wall junction and creating a visual guide. Recessed corner wall‑washer lights are recessed into the corner between wall and floor, washing up or down – they are glare‑free and ideal for modern styles. Ceiling downlights should be spaced 1‑1.5 m apart with a beam angle of 60°‑90°. Avoid placing them directly above the middle of stairs, as this causes head‑top shadows; instead, offset them to one side or stagger them.
For optical parameters, a color temperature of 2700‑3000K warm white is recommended, creating a cozy and safe feeling. Avoid cool white above 5000K in stairs and hallways as it feels harsh and increases glare. For illuminance, the average on stair treads should be 50‑100 lux, and on hallway floors 30‑75 lux. However, uniformity is critical – the ratio of brightest to darkest point should not exceed 5:1. For glare control, all luminaires must have deeply recessed sources or frosted/opal diffusers. Step lights shining directly downward should use honeycomb anti‑glare louvers or angled light design. For control systems, strongly recommend microwave radar or PIR occupancy sensors for stairs and hallways, turning lights on when someone approaches and off with a delayed timer after they leave. This provides illumination exactly when needed and saves energy. Place sensors at both ends of the stairs and in the middle of long hallways for full coverage.
Common mistakes to avoid: only one ceiling light at the top and bottom of stairs, which leaves middle steps covered by your own shadow – extremely dangerous. The correct approach is to use step light strips plus handrail light strips, or evenly spaced low‑level wall sconces. Another mistake is using a single high‑intensity spotlight on a hallway floor, creating harsh bright spots and reflective glare. The correct approach is to use continuous light strips or uniformly spaced downlights, supplemented by wall‑washing. Also, a motion sensor timeout that is too short, such as 15 seconds, will cause the light to go out while you are halfway through, causing panic. Set the timeout to 45‑90 seconds and ensure the sensor can detect minor movements.
In summary, to achieve both safety and wayfinding in stairs and hallways, you should move away from a single ceiling light and instead adopt low‑level continuous light strips (steps, handrails, baseboards) as basic safety illumination, and use linear or spaced point sources along the traffic path to reinforce direction. Choose warm white (2700‑3000K), maintain low but uniform illuminance, and pair with motion sensors. This approach eliminates glare and shadow hazards while naturally guiding people along their intended route.
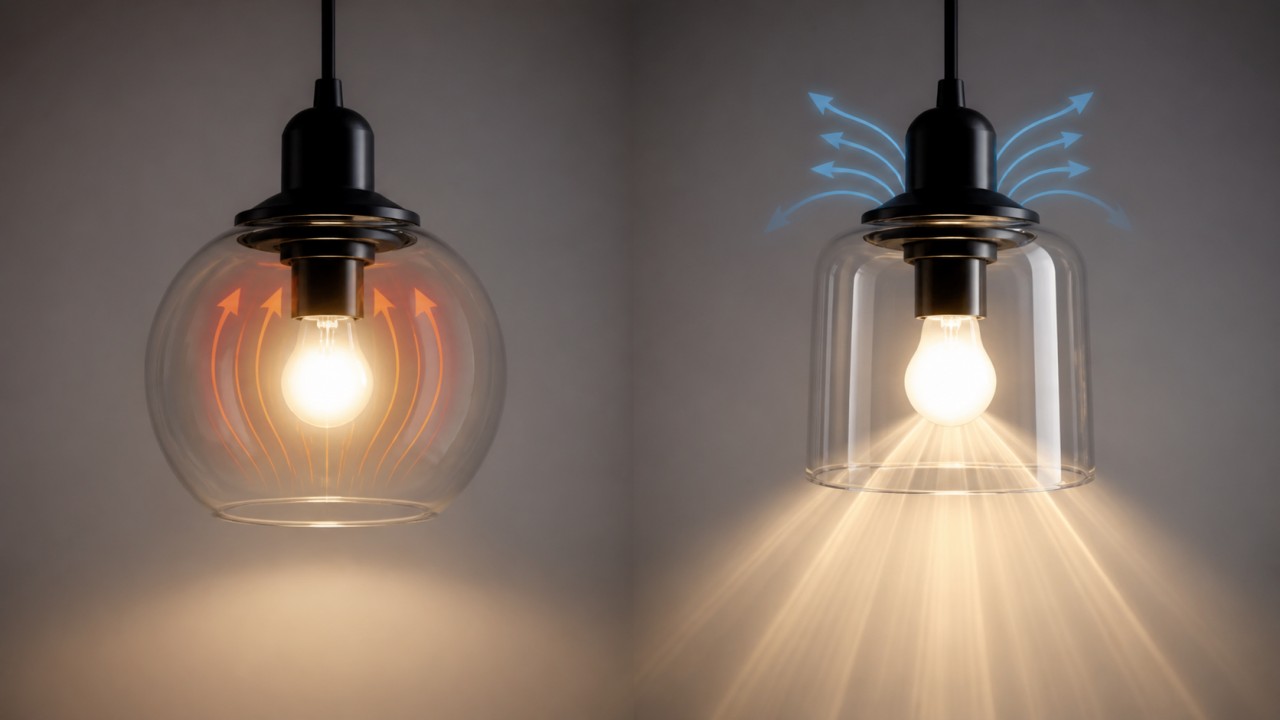
What different requirements do closed and open glass lampshades have for efficacy, heat dissipation, and safety?
Light efficacy requirements: transmittance and beam control A closed glass lampshade completely encloses the light source, so light must pass through two glass interfaces (inner and outer surfaces), each incurring reflection and absorption losses. Therefore, closed shades require high‑transmittance glass such as ultra‑clear tempered glass (≥91% transmittance) or anti‑reflection coated glass, keeping total light loss below 15%. In addition, the inner surface of a closed shade tends to accumulate dust and grease, requiring regular cleaning; otherwise, efficacy degrades significantly over time. For applications needing precise beam control (e.g., spotlights), a closed shade disturbs the beam direction, so it is more suitable for opal or frosted glass that produces uniform diffuse light.
An open glass lampshade allows light to exit directly through a single glass interface, with lower reflection loss. Dust accumulation is also less severe because the interior is not sealed. Open shades are better for high efficacy and precise light distribution, such as clear or ribbed glass used in reading lamps or display lights. However, an open shade cannot use the glass’s diffusing property to hide the light source. If clear glass is used with an exposed source, glare can be a problem, so deep‑recessed sources or anti‑glare structures are usually required.
Heat dissipation requirements: heat buildup and LED lifetime A closed glass lampshade creates a relatively sealed cavity where heat tends to accumulate. LED chip operating temperature directly affects lumen maintenance and lifetime – a 10°C increase roughly halves the lifetime. Therefore, closed shades have strict thermal design requirements: the luminaire housing must have adequate heat sinks, and small air convection paths (or thermally conductive materials) should exist between the glass shade and the housing. Also, closed shades should use heat‑resistant glass such as borosilicate (low thermal expansion, good thermal shock resistance) to avoid cracking from localized overheating. For high‑power LEDs (≥10W), closed shades often require active cooling fans or enlarged heat‑sinking surfaces.
An open glass lampshade allows free air circulation, so heat dissipates quickly via natural convection. This imposes lower thermal demands on the glass itself; ordinary soda‑lime glass is usually sufficient. Open shades permit higher‑power light sources without overheating concerns. However, the open structure may allow direct contact with a hot bulb or hot glass surface, so burn prevention warnings or sufficient guarding distance are needed. For LED luminaires, open shades significantly extend lifetime because junction temperatures are easier to keep within safe limits.
Safety requirements: glass breakage, surface temperature, and ingress protection For a closed glass lampshade, safety involves three aspects. First, the glass must withstand internal heat buildup without cracking; tempered or laminated glass is recommended, so that if breakage occurs, it produces blunt fragments or stays adhered to an interlayer. Second, closed shades are often used in damp or outdoor environments (bathrooms, kitchens, balconies), requiring IP44 or higher dust/water protection; the sealing gasket between glass and housing must be aging‑resistant and moisture‑resistant. Third, the outer surface temperature of a closed shade can become high – within a child’s reach, surface temperature should be limited (e.g., ≤60°C) or a protective guard should be added.
For an open glass lampshade, safety requirements differ. First, because the glass is exposed and may be touched, tempered glass is mandatory to prevent sharp shards from accidental breakage. Second, open shades do not provide sealed protection, so they cannot be used in humid or heavily greasy environments. Third, open shades must prevent fingers or metal objects from contacting live parts – according to IEC standards, openings should be sized so that a “test finger” cannot reach internal live components. Also, if an open shade uses a high‑temperature source like a halogen bulb, adequate distance and a “hot surface” warning label are necessary.
Selection guidance for different applications In summary, closed glass lampshades are suitable for applications requiring high ingress protection, humid or dusty environments, and uniform diffuse light – such as bathrooms, kitchens, and outdoor wall lights – but careful thermal design and regular cleaning are necessary. Open glass lampshades are suitable for dry indoor spaces where high efficacy and precise beam control are desired – such as living room pendant lights, desk lamps, and reading lamps – but tempered glass is mandatory, and protection against electric shock and burns must be ensured.
When chandeliers use crystal or glass pendants, how can sparkling refraction be balanced with glare control?
The brilliant sparkle of crystal or glass pendants comes from their high refractive index (crystal about 1.55-1.66) and precision cuts. Light entering a pendant undergoes multiple refractions, dispersion, and total internal reflection, splitting into spectral colors and creating sparkling highlights. However, when these bright refractive spots enter the human eye directly, they cause harsh glare and destroy visual comfort. The core of balancing these two aspects is to control the angle and intensity of light entering the pendants, so that the refracted light is directed mainly to the surrounding walls and tabletop, rather than upward or downward directly into the line of sight.
The most effective balancing strategy is to make the pendants not directly emit light, but be illuminated by hidden upward or side lighting. For example, install LED strips or bulbs on the upper or inner part of the chandelier. The light first hits the ceiling or an internal reflector, then softly reflects downward through the pendants. At this point, the light entering the pendants is already large‑area, low‑brightness diffused light, and the resulting refracted spots are evenly distributed and soft – the sparkle remains but the harsh glare disappears. Alternatively, use an opal acrylic or glass inner shade to completely enclose the light source, with the pendants hung around the outer shade, receiving only transmitted soft light.
If it is impossible to completely hide the light source, choose a light source with low peak luminance. Avoid bare high‑brightness LED chips or clear halogen bulbs. Instead, use frosted/opal bulbs or coated bulbs. A frosted glass bulb converts a point source into an area source, reducing peak luminance by more than 50%. Additionally, use dimmable LEDs and set the brightness to 50%-70% – this maintains sufficient sparkle (refraction efficiency is still adequate) while greatly reducing glare. Choose a color temperature of 2700K‑3000K warm light, because warm light is less glaring than cool white.
The design of the pendants directly affects glare. Avoid flat‑bottom or lens‑like cuts that focus light into sharp spots. Prefer multi‑faceted irregular cuts (e.g., snowflake, hazelnut shape) or lightly frosted/acid‑etched surfaces. These cut styles scatter refracted light in many directions, reducing high‑intensity beams in any single direction. Do not hang pendants too densely; leave gaps between them to avoid creating continuous bright reflective bands. Also, add small anti‑glare louvers or metal decorative shields below or beside the pendants to block the most glaring refractive points from the viewing angle, without compromising the sparkle seen from the side.
Glare is most noticeable when the light source is at or below eye level. For dining room chandeliers, hang the fixture so that its bottom is 75‑85 cm above the table – this places most pendants above typical eye level, with refracted light directed downward to the table, while the eyes see few direct upward or sideward bright spots. For living room chandeliers, use a multi‑tier pendant arrangement: longer pendants on the outer edges and shorter ones in the center, forming an arched profile that moves the most glaring refractions away from typical sightlines. Also, choosing small‑size pendants (diameter <1 cm) reduces the energy of each spot, replacing a few intense glares with a myriad of tiny sparkles.
After installation, evaluate the balance by standing or sitting at normal positions: look at the chandelier and see if any bright spots force you to squint or turn away. If so, first try dimming the light to 60% brightness. If glare persists, consider switching to a softer bulb or adding a translucent diffuser. The ideal result is: the chandelier sparkles beautifully, with refracted light creating dappled patterns on walls and ceilings, yet when you look directly at it, your eyes remain comfortable – no single overly bright spot.
In summary, balancing the sparkle of crystal pendants with glare control hinges on controlling the angle and intensity of light entering the pendants. The best approach is indirect lighting or a soft inner shade. Alternatively, use frosted bulbs with dimming, and optimize the cut, size, and hanging density of the pendants. By these methods, you can preserve the beautiful refractive aesthetics of crystal while reducing glare to a fully comfortable level.
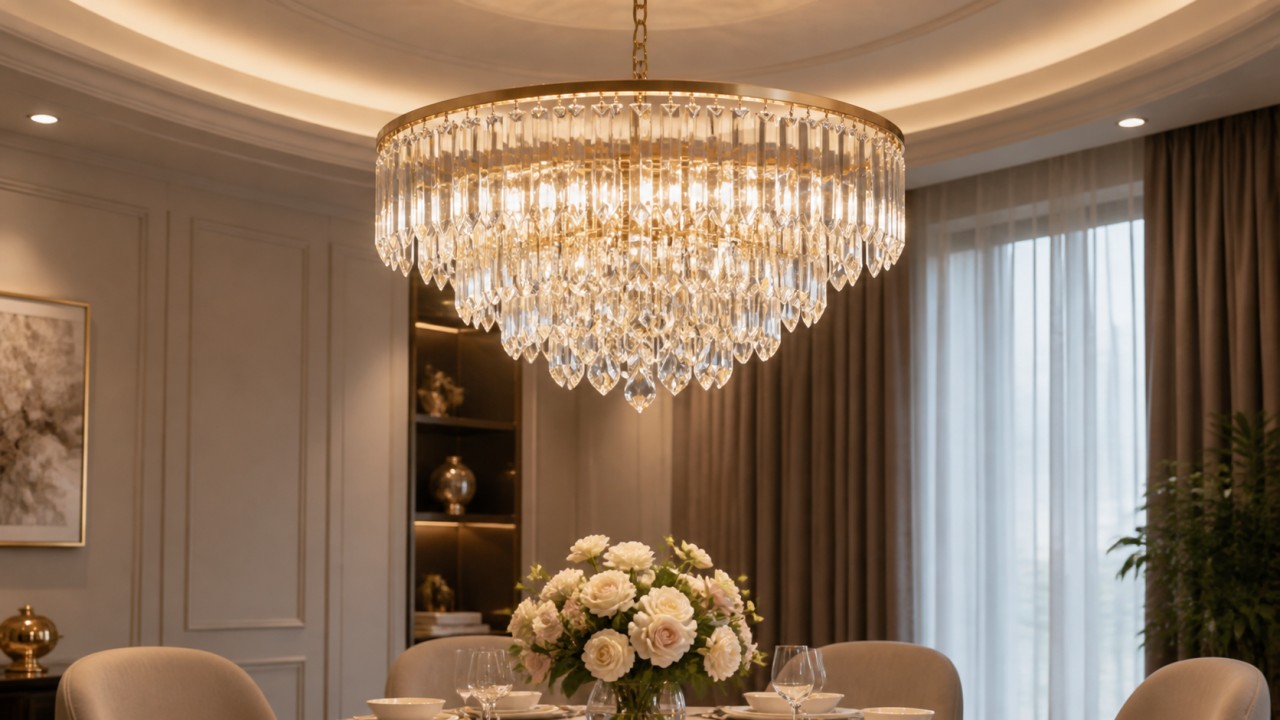
Why do large glass chandelier shades require higher mechanical strength and thermal stability than other luminaires?
Self‑weight and suspension stress Large‑sized glass chandelier shades typically have large diameters (e.g., >50 cm) and considerable thickness, with self‑weight reaching several kilograms or even more than ten kilograms. Unlike small luminaires, these loads are fully transferred through the suspension points (such as top metal rings or screw fittings) into the entire glass structure. Ordinary glass may creep or develop stress concentrations under long‑term static loading, whereas tempered or laminated glass can withstand higher bending and shear stresses. Furthermore, the suspension points must be designed to distribute stress uniformly and avoid local overload. Large shades also may experience accidental impact during transport and installation, requiring higher impact resistance.
Thermal stress and temperature gradient Another challenge for large glass shades is thermal stress. When the internal light source (especially halogen bulbs or multiple LEDs) generates heat, the area close to the source heats up quickly, while the rim and top remain cooler due to different heat dissipation conditions. The large size implies a greater temperature gradient – the difference from center to edge can exceed 30‑40°C. As glass is a poor thermal conductor, such a gradient creates substantial internal thermal stress. Ordinary annealed glass is prone to cracking under thermal stress, while borosilicate or well‑annealed soda‑lime tempered glass offers much higher thermal shock resistance. For small shades, thermal stress is less noticeable because of the small area and small gradients; large shades must treat thermal stability as a critical design parameter.
Mechanical impact and installation risks Large shades are more likely to suffer accidental impact during installation, cleaning, and daily use. For example, changing a bulb may cause a tool or an arm to strike the edge of the shade; cleaning requires applying pressure when wiping the glass; a low‑hanging large chandelier may be hit by a person or object. Because of the large size, even a small impact can generate significant bending moments and tensile stresses inside the glass, leading to sudden breakage. Moreover, large glass pieces are more prone to edge micro‑cracks (chips or small flaking) during manufacturing and transport, and these defects become initiation points for crack propagation under stress. Therefore, large glass shades almost always require tempered glass (safety glass), which has 3‑5 times the flexural strength of ordinary glass and, when broken, fragments into small blunt particles, reducing injury risk.
Thermal stability and long‑term reliability During its service life, a large shade may experience many on‑off cycles, each producing a thermal shock. If the glass has a high coefficient of thermal expansion or is poorly annealed, internal micro‑cracks may gradually propagate after hundreds of cycles, eventually leading to low‑stress fracture. For chandeliers using LEDs, although the LED surface temperature is lower, a dense array of multiple LEDs can still create local heating. Due to the larger thermal mass of a big shade, temperature differences become more pronounced during cooling. Therefore, thermal stability metrics such as thermal shock resistance (ΔT, the maximum temperature difference the glass can withstand) are required to be 20‑30°C higher than for small shades. For example, a small shade might only need to withstand a ΔT of 60°C, while a large shade may need to survive ΔT > 90°C. Borosilicate glass (ΔT ≈ 150‑200°C) or chemically strengthened glass are ideal choices.
Differences in standards and certification For large glass shades, relevant safety standards (e.g., IEC 60335-2-105, GB 7000.1) often require additional mechanical strength tests. For example, large shades must withstand heavier static load tests (suspension strength) and more severe impact tests (e.g., a steel ball of specified diameter dropped from a higher height). In thermal stability tests, large shades are typically subjected to more demanding thermal cycling (e.g., repeated switching between 25°C and 90°C). Drop tests and package vibration tests are also more stringent. Shades failing to meet these requirements will be deemed non‑compliant during certification.
Conclusion Because large glass chandelier shades experience greater self‑weight, more significant thermal gradients, higher probability of accidental impact, and more severe long‑term cyclic thermal stress, their requirements for mechanical strength and thermal stability are far higher than those for small luminaires. Design must adopt tempered or borosilicate glass, optimize suspension structures, and pass rigorous safety tests to ensure safe and reliable use.

How can laminated crystal glass shades provide decorative transparency and soft diffusion at the same time?
The laminated crystal glass lampshade achieves both decorative transparency and soft light diffusion through a unique “sandwich” structure: a functional interlayer is placed between two layers of crystal glass. The outer crystal glass provides high clarity and brilliant refraction, while the interlayer softly diffuses the light passing through. This “hard outside, soft inside” design solves the traditional dilemma where crystal chandeliers are either too glaring or lose their sparkle.
The outer layer is typically made of high‑transmittance crystal glass, with almost no iron impurities, achieving transmittance above 90%. More importantly, crystal glass can have its refractive index raised from 1.5 (ordinary glass) to above 1.7 by adding lead (e.g., 24% PbO). When light enters this high‑index material, it undergoes strong refraction and dispersion, splitting into spectral colors and creating the beloved “sparkle” effect. The outer glass can also be cut into multi‑faceted, diamond, or other textured shapes to further enhance the artistic refraction of light.
The interlayer is the key to achieving soft light diffusion. Common interlayer materials include thermoplastic resin films (e.g., PVB or EVA) containing light diffusion particles. These microscopic particles act like tiny lenses, scattering light uniformly in all directions as it passes through, thereby converting a concentrated point source into a soft, even area light. The interlayer can also feature digitally printed patterns or textures, which themselves block and scatter light to create unique shadow effects. Moreover, the interlayer can integrate other functions such as UV blocking, heat insulation, or solar control films, providing multiple benefits in a single material.
The shape design of the outer surface also plays a crucial role. By cutting the outer crystal glass into multi‑faceted, diamond, or textured patterns, the already softened light is refracted and reflected again as it exits the shade, further enhancing sparkle and artistic light patterns. The final visual effect is: the intense light from the source is first broken up by the interlayer into uniform, soft diffuse light, and then passes through the high‑index cut surfaces of the outer layer, producing countless soft, shimmering highlights – avoiding harsh glare while retaining the luxurious feel unique to crystal.
When selecting a laminated crystal glass shade, four aspects can be evaluated. For transparency, choose high‑lead crystal glass with high purity and high refractive index. For diffusion, confirm whether the interlayer contains light diffusion particles or printed patterns. For functionality, select interlayers with UV blocking, heat insulation, or solar control as needed; note that PVB/EVA interlayers also provide shatter‑proof safety. For decoration, consider additional UV‑blocking films and combine with external cutting, grooving, or embossing. Typical applications include: living room ceiling lights that balance high clarity with soft diffusion; dining room chandeliers that maximize decorative sparkle; and children’s room or bathroom lights where extreme softness and safety are priorities.
In summary, the laminated crystal glass lampshade achieves both transparency/sparkle through the outer high‑clarity, high‑index crystal glass, and soft light diffusion through the interlayer. The outer precision cuts further enhance the light patterns. This structure allows contradictory optical properties to coexist, making it an exemplary combination of materials science and optical design.
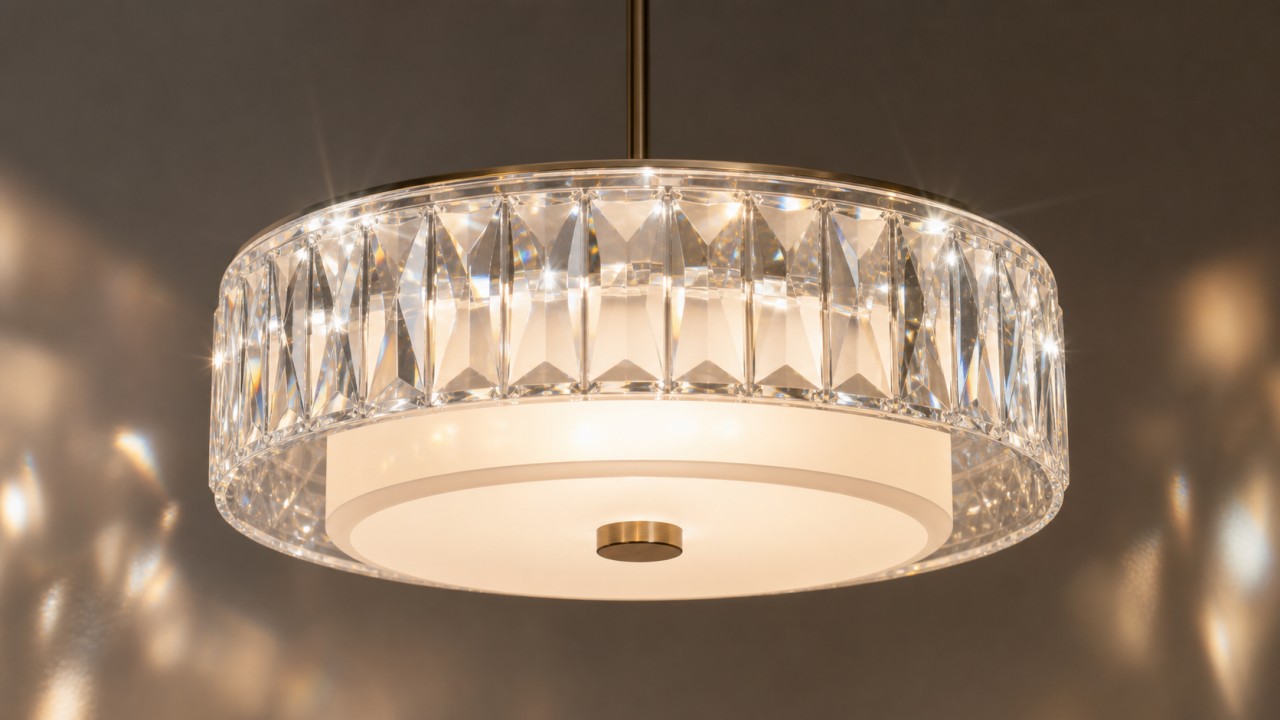
What optical indicators must flat glass panels for ceiling lights meet to keep room brightness uniform?
To ensure uniform room brightness from a ceiling-mounted luminaire with a flat glass panel, the panel must provide extremely high haze (typically >90%, ideally near 100%). If the haze is too low, the discrete LED chips or strips will project sharp bright spots and dark areas on the ceiling and walls, resulting in poor uniformity. High haze causes multiple scattering, blending point or line sources into a uniform Lambertian area light source with consistent luminance from all viewing angles. For opal glass or micro-prismatic diffusers, higher haze directly improves the mixing effect.
Appropriate transmittance is also critical. Higher transmittance does not mean better uniformity. A clear glass panel (transmittance >90%) offers almost no diffusion and fails to homogenize light. On the other hand, transmittance below 50% wastes too much light, leaving the room dim. For ceiling-mounted flat glass panels, the typical transmittance range is 60% to 85%, depending on the haze and micro-structure. High-quality diffusers can achieve transmittance >80% while maintaining haze >90%, striking a good balance between efficiency and uniformity. Choose transmittance according to room size and total light output.
The angular distribution of scattered light should approximate Lambertian cosine law — constant luminance from any direction. If the scattering is strongly forward-peaked (light mainly goes straight down), the room center will be much brighter than the edges. If side scatter is too strong, axial illuminance suffers. By engineering the glass surface with microstructures (micro-lens arrays, random textures, or bulk diffuser particles), a near-Lambertian pattern can be achieved. A useful metric is the full width at half maximum (FWHM) of the intensity distribution. For uniform ceiling lighting, the ideal FWHM is between 100° and 140°.
The panel itself must have excellent uniformity and be free of local optical defects. Any variation — thickness fluctuations, bubbles, stones, surface scratches, uneven coating, or stress marks — will create bright or dark streaks in the transmitted light, ruining uniformity. For large-area flat glass, use high-precision float glass substrates and ensure that the diffusive coating or embossed texture has a uniformity better than ±3%. Transmission light inspection should confirm no visible brightness variations.
Uniformity alone does not guarantee visual comfort. Even if the brightness distribution is even, a panel that is too bright or has specular reflections can cause glare, raising the Unified Glare Rating (UGR) . For residential or office ceiling luminaires, a UGR below 19 is typically required. This can be achieved by limiting the panel’s average luminance (generally recommended <2000 cd/m²) and using a slightly diffusing surface finish rather than a mirror-like gloss. Fine frosted or anti-glare micro-structured surfaces are preferred.
In practice, the design of a flat glass panel for a ceiling luminaire involves trade-offs among transmittance, haze, and glare. For instance, micro-prismatic diffuser panels can achieve high haze (>95%) and near-Lambertian distribution with relatively high transmittance (~85%), while also reducing glare at wide angles via prismatic redirection. Another solution is a dual-layer diffuser: the bottom glass provides mechanical protection and primary diffusion, while a top film further homogenizes light. Ultimately, the direct measure of uniformity is the illuminance uniformity ratio (U0 = Emin/Eavg) on the floor and walls, which should be no less than 0.7.
In summary, to achieve uniform room brightness with a ceiling‑mounted flat glass panel, the required optical specifications are: haze >90%, transmittance 60–85%, near‑Lambertian angular distribution (FWHM 100°–140°), freedom from local optical defects, and UGR <19. Together, these metrics eliminate LED hotspots and dark zones, creating a comfortable and evenly lit environment.
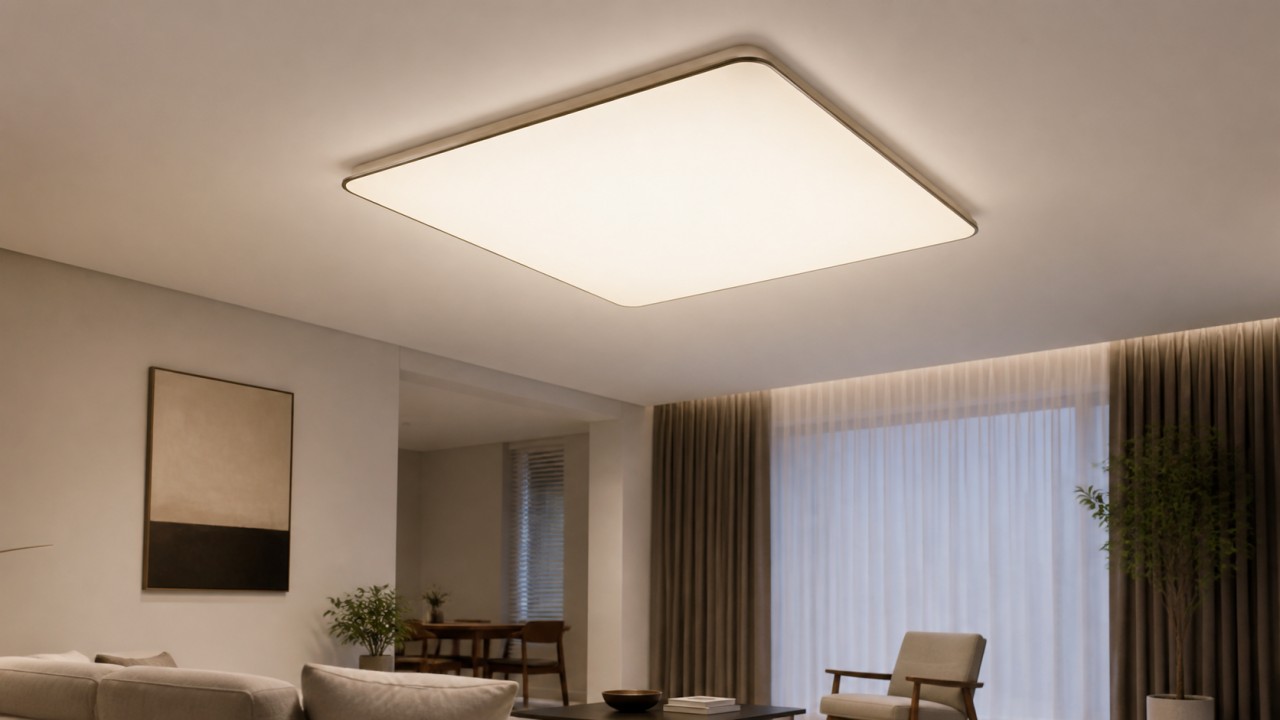
How do patterns and ink layers on screen-printed glass panels affect transmittance and spot shape in ceiling lights?
Effect on transmittance The ink layer of a silk‑screened glass panel reduces the total transmittance. The degree of reduction depends on the ink coverage ratio, the ink’s own transmittance, and the printing thickness. Opaque inks (especially black or dark colors) completely block light, making the printed area have zero transmittance; white or light‑colored translucent inks allow some light to pass but still absorb and scatter light, lowering transmittance. The larger the coverage area, the greater the loss in total transmittance. For example, a black dot pattern with 50% coverage will roughly cut total transmittance by 50% (ignoring glass substrate absorption). To maintain adequate luminous efficacy for a ceiling luminaire, it is generally recommended to keep the coverage ratio within 30‑40%, or to use highly translucent white ink, and to avoid multiple overprints.
Effect on beam shape (opaque ink) If fully opaque ink (e.g., black) is used, light can exit only through the unprinted openings. The panel then acts like an aperture with many small holes, each hole becoming a secondary light source. When the luminaire has a diffuse reflective cavity, these holes produce numerous tiny point‑like beams, creating a bright‑dark texture on the floor or wall that is complementary to the printed pattern — such as a grid, dotted array, or stripes. If the openings are large and clearly spaced, the human eye will perceive alternating bright and dark areas, ruining uniformity.
Effect on beam shape (semi‑transparent white silk screen) Semi‑transparent white silk‑screen ink strongly scatters light, converting a moderately directional output into a more uniform Lambertian distribution. This scattering helps eliminate LED hot spots and improves overall beam uniformity. Moreover, because the scattering increases the beam angle, the edge of the spot becomes softer. Therefore, a well‑designed white silk screen can actually act as a diffusing element to enhance lighting quality.
Shaping the beam with graded patterns By varying the dot size or density from the center to the edge, one can actively shape the beam. For instance, using small, sparse dots in the center (high‑transmittance area) and large, dense dots at the periphery (low‑transmittance area) compensates for the natural fall‑off of ceiling‑mounted luminaires, resulting in more uniform floor illuminance. Conversely, a pattern that leaves a transparent area only in the center while printing densely around it will create a hot spot in the middle and darker edges. Random or irregular patterns (e.g., random dots, water‑wave textures) help break up regular interference fringes, making the beam appear more natural.
Design recommendations In practice, to balance decorative pattern, light output, and beam quality, the following strategies are recommended: prefer highly translucent white or semi‑transparent inks and avoid large areas of fully opaque black ink; keep the total coverage ratio below 40%, and if necessary, place high‑density printed areas near the fixture’s edge; combine the silk‑screened panel with a high‑haze diffuser — light passing through the screen and then the diffuser will have its residual shadows greatly blurred, resulting in a smoother beam; and before mass production, it is best to validate the pattern with optical simulation software (e.g., LightTools, TracePro) to ensure the transmittance and beam shape meet expectations.
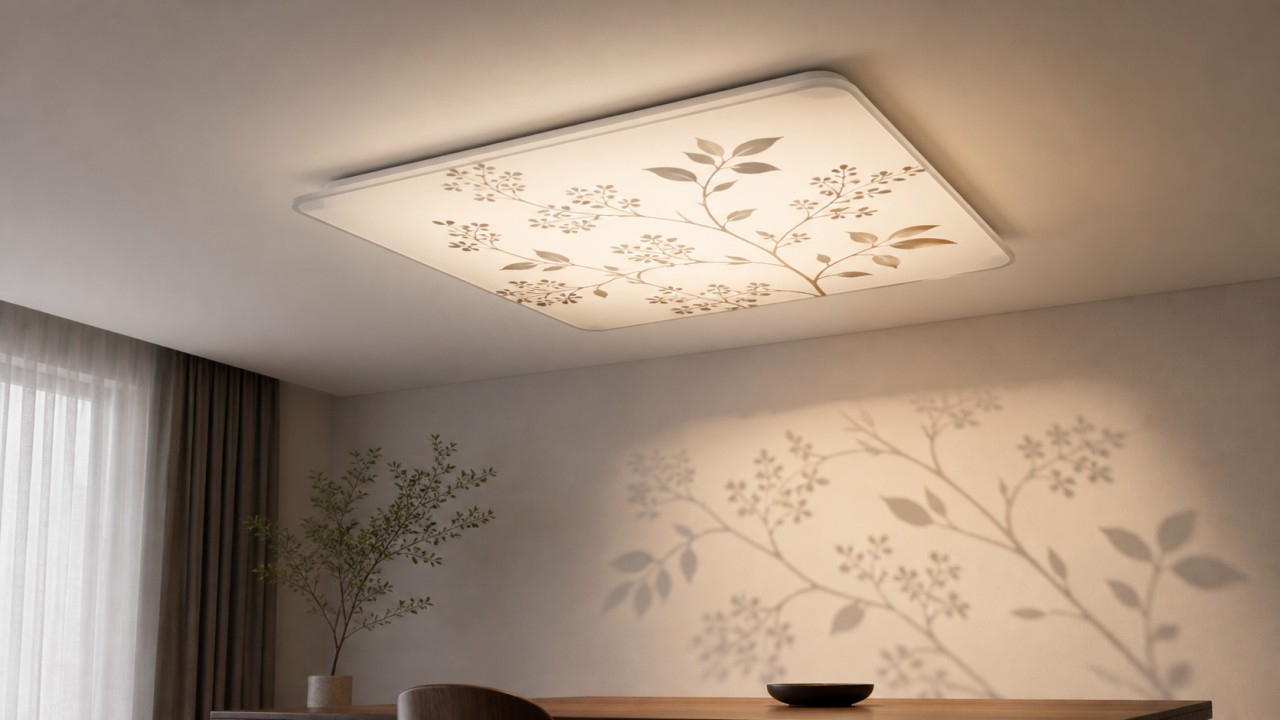
Why are light weight/thinness and uniform diffusion equally important when selecting ceiling-light glass covers for low-ceiling spaces?
The special challenge of low ceiling height spaces Low ceiling height spaces typically refer to rooms with a ceiling height below 2.5 meters, or even as low as 2.2-2.4 meters. In such spaces, a ceiling luminaire is almost directly overhead, with the human eye very close to the fixture. Any shortcoming of the fixture is magnified: a thick or bulky glass shade will intensify the feeling of oppression; uneven light diffusion will allow the human eye to directly see bright LED spots or alternating bright‑dark patterns, causing severe glare and visual discomfort. Therefore, thinness and uniform diffusion become two equally indispensable requirements.
Why “thinness” matters In low ceiling spaces, the visual oppression largely comes from the perceived bulk of objects overhead. A thick, heavy glass shade feels like a heavy stone hanging over your head, making the space feel cramped. A thin glass shade (e.g., only 3-5 mm thick, flat or slightly curved) appears visually lighter and blends almost seamlessly with the ceiling, reducing the sense of intrusion. Moreover, thinness also means a lighter total fixture weight, safer installation, and less load on the ceiling structure. Optically, thin does not mean low transmittance — modern ultra‑clear glass can achieve over 90% transmittance even at small thicknesses.
Why “uniform diffusion” is equally important With a low ceiling, the direct distance between the human eye and the luminaire is very short — perhaps only tens of centimeters to one meter. If the glass shade does not diffuse light uniformly, the eye will directly see images of discrete LED chips or light strips inside the source — appearing as tiny glaring points or bright lines. Such direct‑view bright points create extremely high luminance contrast, causing glare and even dizziness. Uniform diffusion requires the glass shade to have high haze (typically >90%) and good light‑mixing ability to completely soften point sources into a uniform luminous surface. Only then, no matter from which angle a person looks up under the fixture, they will see a soft, shadow‑free light rather than harsh, bright spots.
The synergy between thinness and uniform diffusion Thinness and uniform diffusion are not independent; they complement each other. If the glass shade is thin but has poor diffusion, LED hot spots will be directly visible, causing unacceptable glare. If diffusion is uniform but the shade is thick and heavy, the optical comfort is offset by a strong sense of oppression. The ideal glass shade for low‑ceiling spaces should combine: thin profile (3-5 mm), ultra‑high haze (>92%), moderate transmittance (70-85%), and Lambertian scattering characteristics. This combination physically reduces bulk and optically eliminates direct glare, making the ceiling itself feel like the luminous surface — thereby making the room appear taller and more open.
Summary In low‑ceiling spaces, “thinness” addresses the psychological and physical burden of spatial oppression, while “uniform diffusion” solves the problem of glare and visible light spots when looking directly at the fixture from close range. Both are equally important and neither can be ignored. Overlooking either one will significantly degrade the lighting effect and may even cause discomfort. Therefore, when selecting a glass shade for such spaces, priority should be given to panels that are both thin and high‑haze, rather than simply pursuing high transmittance or decorative appearance.

How do glass lenses and reflectors affect beam-angle precision and beam quality in downlights and spotlights?
How glass lenses affect beam angle accuracy and spot quality Glass lenses control light direction through refraction. The surface curvature (convex, concave, freeform) determines the beam angle: steeper curvature produces a narrower beam; shallower or concave surfaces produce a wider beam. High-precision glass lenses can achieve beam angle tolerances within ±1°, far outperforming common plastic lenses which suffer from thermal deformation. In terms of spot quality, glass lenses can be micro-textured (e.g., lenticular arrays, honeycomb patterns) to mix light uniformly, eliminating discrete LED chip projections and creating either sharp-edged or softly graded beams. Quality glass lenses also significantly reduce stray light and secondary spots (residual halos outside the main beam), ensuring smooth illuminance distribution within the spot and a natural transition from the center to the edge. Moreover, glass lenses resist high temperatures and UV aging, maintaining beam angle accuracy and spot purity over years of use.
How reflectors affect beam angle accuracy and spot quality Reflectors rely on reflective surfaces (typically parabolic, elliptical, or compound curves) to collimate or spread light. The beam angle is determined by the reflector’s contour and the position of the light source within it. High-precision metal or coated reflectors can provide stable beam angles, but accuracy is limited by surface profile errors and reflectivity consistency. Regarding spot quality, if the reflective surface is not smooth or has local deformations, it can produce “halos” or “petal-like” stray light. Poorly finished rim edges may create noticeable secondary spots (bright rings at the edge). To improve spot uniformity, modern reflectors often employ “orange peel” or micro-prism textured surfaces to diffuse light and soften the spot edge. However, compared to glass lenses, reflectors are more prone to producing “hard” spots with a very bright center and rapid fall-off, and when used with COB LEDs, they may leave a dark center or chromatic aberration (yellow ring effect) in the spot.
Comparison and application scenarios Glass lenses generally offer superior beam angle accuracy compared to reflectors, making them ideal for narrow beams (e.g., below 15°) or precise light distribution (e.g., museum spotlights, stage lighting). Lenses can produce cleaner, more symmetric spots with minimal secondary spots. Reflectors, on the other hand, have cost advantages for wide beams (e.g., above 40°) and high-power applications, and can achieve uniform wall-washing effects with textured surfaces. For professional downlights and spotlights that demand the highest spot quality (free of artifacts, yellow fringes, or dark centers), high-precision glass lenses are often the preferred choice. In practice, “lens + reflector” hybrid designs are also used to combine the strengths of both for precision and texture.
Summary Glass lenses achieve high beam angle accuracy and clean, uniform spots through precise refractive profiles; reflectors shape the beam via reflective curvature and textures, but are more prone to stray light and secondary spots. In downlight and spotlight applications, if extreme angular precision and spot quality (especially narrow angles, artifact-free beams) are required, glass lenses are superior to reflectors. If cost sensitivity or very wide, even illumination is the priority, high-quality textured reflectors can be a viable alternative.
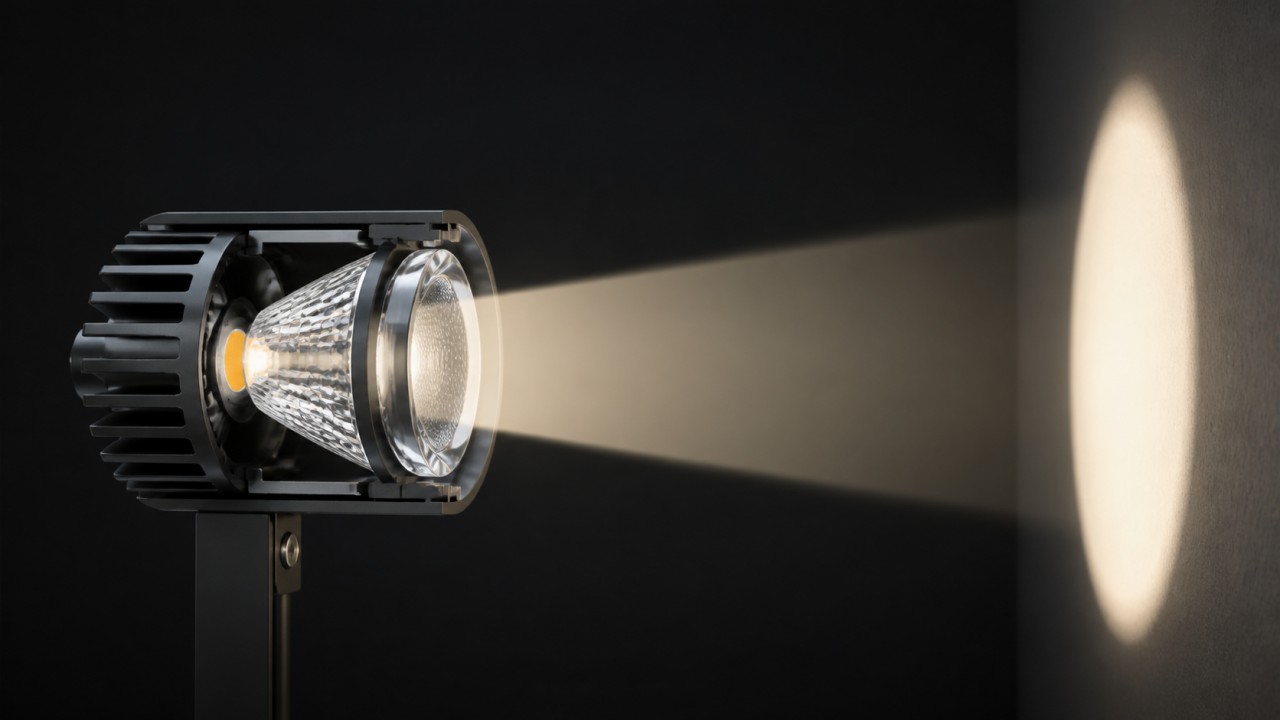
Why are borosilicate glass lenses preferred over ordinary optical plastics for high-power LED spotlights?
Long-term stability: core advantage under high temperature and UV High-power LED spotlights generate significant heat and may be exposed to UV radiation. Common optical plastics (such as PMMA acrylic and PC polycarbonate) will yellow, become brittle, and suffer a sharp drop in transmittance when operating above 85°C for extended periods; UV exposure also accelerates plastic degradation. In contrast, borosilicate glass is an inorganic material with excellent thermal stability, capable of withstanding temperatures above 450°C for long periods, and is completely immune to UV aging. This means that a glass lens maintains its initial optical performance throughout the entire lifetime of the luminaire (typically 10+ years), with virtually no decline in transmittance; plastic lenses may degrade significantly within just a few years and require replacement.
Optical performance: sustained precision and high transmittance Borosilicate glass has an initial transmittance of over 92%, which can be raised to 97% with anti‑reflection coatings. More importantly, glass barely deforms under heat (coefficient of thermal expansion ≈3.3×10⁻⁶/K), whereas plastics have a thermal expansion coefficient more than 20 times higher. For spotlights that demand precise beam angle control, a plastic lens will change curvature when heated, causing beam distortion and shift, severely compromising light distribution accuracy. A glass lens retains its designed optical surface throughout operation, ensuring the accuracy of narrow beams or special light patterns. In addition, the hard surface of glass resists scratching from routine cleaning; plastic surfaces are easily scratched, creating permanent light‑scattering marks.
Mechanical and safety properties: trade‑off between hardness and impact resistance Borosilicate glass has a Mohs hardness of 7–7.5, much higher than that of plastics, effectively resisting scratches from dust, sand, and cleaning tools. However, glass is brittle and has lower impact resistance than plastic — it may shatter under a strong blow. In high‑power spotlights, the lens is usually mounted in a relatively protected interior position or with a metal bezel, so the actual risk of mechanical impact is low. If higher impact resistance is needed (e.g., in sports arenas or industrial environments), tempered or laminated glass can be used. While plastics are tough and unlikely to break, their surface becomes brittle with aging, and impact resistance actually decreases over long‑term use.
Chemical and corrosion resistance High‑power spotlights may be installed in environments such as kitchens, bathrooms, chemical plants, or coastal areas, where oil vapor, acidic/alkaline fumes, or salt mist are present. Ordinary optical plastics are sensitive to such chemicals and may develop surface cracking, fogging, or loss of strength. Borosilicate glass, however, offers excellent resistance to acids, alkalis, and salt spray, and is virtually unaffected by common corrosive media. This allows glass lenses to maintain high transmittance and clear beam quality even in harsh environments.
Cost considerations: initial investment vs. long‑term value Ordinary optical plastic lenses have lower material and injection‑molding costs, making them suitable for high‑volume, low‑cost, short‑life‑cycle products. However, given that high‑power LED spotlights are typically designed for tens of thousands of hours, plastic lenses will yellow and age within a few years and require replacement, adding maintenance costs and light output loss. Borosilicate glass lenses have a higher upfront cost, but their performance hardly degrades over a 50‑year lifespan, requiring no replacement — making the total long‑term cost lower. For professional projects, commercial lighting, or high‑end residential applications, choosing glass lenses is a more economical and rational decision.
Summary The recommendation to use borosilicate glass lenses for high‑power LED spotlights is fundamentally driven by their superior long‑term thermal stability, UV aging resistance, precision optical retention, and chemical corrosion resistance. Although glass has lower impact resistance than plastic and a higher initial cost, these disadvantages are outweighed by its irreplaceable long‑term advantages in professional applications that demand longevity, consistent light output, and reliability. Ordinary optical plastics are more suitable for short‑term use or non‑critical lighting where cost is the primary concern.
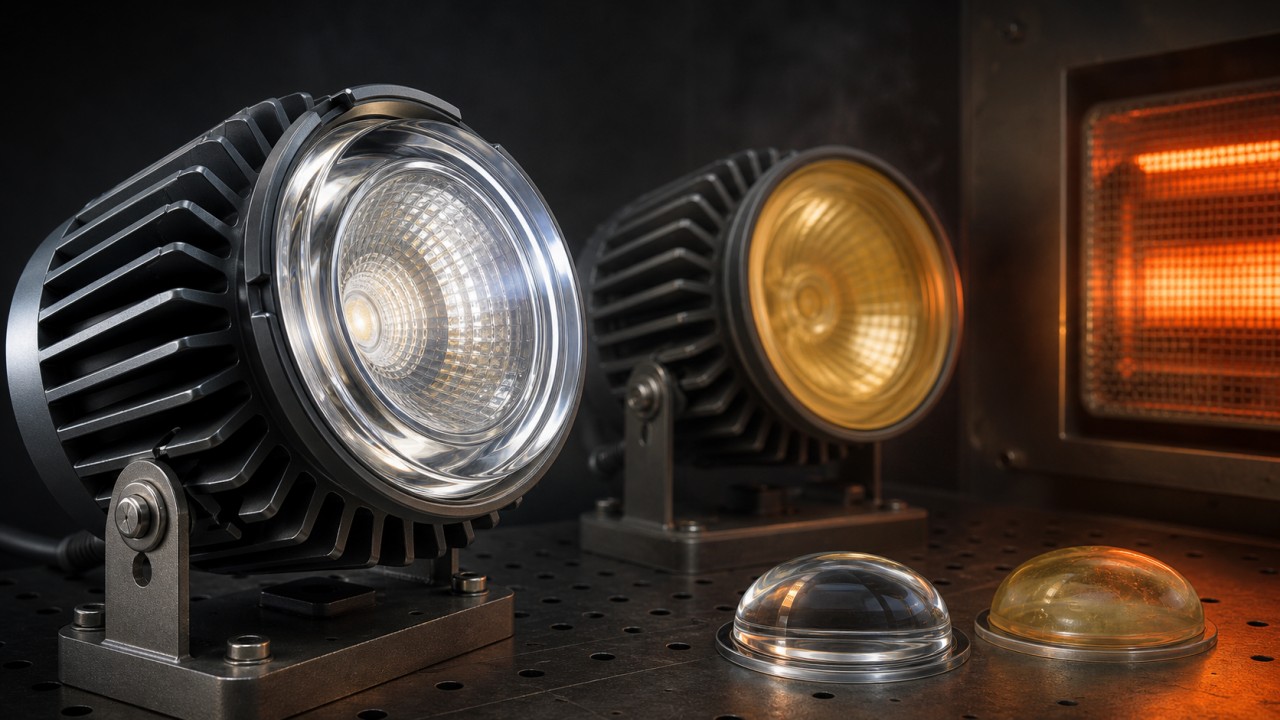
By what optical principle does anti-glare glass in downlights separate useful light-emitting area from stray light?
Core principle of anti-glare glass covers: controlling exit angle Glare in downlights mainly comes from light emitted at large angles (near horizontal), which enters the human eye directly or causes uncomfortable bright spots. The anti-glare glass cover uses microstructures to allow only light within a predetermined angular range (typically within 30° from the vertical, the “useful exit aperture”) to be transmitted, while large-angle stray light is blocked, reflected, or absorbed. This “angle-selective transmission” property is the fundamental principle that separates the useful luminous area from stray light.
Micro-prismatic louver structure: applying the louver effect The most common anti-glare glass covers are embossed with micron-scale sawtooth or trapezoidal prism arrays on the surface or inner layer, acting like miniature louvers. The two facets of these prisms serve transmission and reflection respectively: light incident at a small angle (close to normal) passes directly through the transmission facet; light incident at a large angle (near horizontal) strikes the steep reflective facet, is totally reflected back into the luminaire or deflected elsewhere, and is eventually absorbed by light-absorbing materials inside the fixture. As a result, only light within the useful exit angle can escape the luminaire, effectively blocking large-angle stray light.
Surface diffuse reflection and absorbing coating Another method to achieve separation is to combine a diffuse-reflective microstructure with a black light-absorbing layer. The underside of the anti-glare glass cover (the side facing the light source) can be textured with fine bumps or cones, with a black or dark coating applied to these structures. Light within the useful exit angle transmits directly, while large-angle incident light first hits the sidewalls of these microstructures, undergoes multiple diffuse reflections, and is eventually absorbed by the light-absorbing layer. This design is particularly suited for high-end downlights requiring extremely low glare (UGR < 10), though it sacrifices some transmittance.
Total internal reflection (TIR) cone arrays Another type of anti-glare glass cover uses micro-cone or pyramid arrays. Each micro-cone acts as an optical trap: normally incident light passes straight through the cone tip; large-angle incident light enters the cone and undergoes one or multiple total internal reflections at the cone’s sidewalls, eventually being reflected back into the source cavity. Because total internal reflection has virtually no absorption loss, this method can suppress stray light while maintaining relatively high transmittance. However, it requires extremely high precision in microstructure fabrication and is typically used in professional downlights.
Comparison between anti-glare glass and ordinary diffusing glass Ordinary diffusing glass (e.g., opal or frosted glass) homogenizes light through diffuse scattering, but it does not discriminate by angle — all directions are scattered equally, so it cannot separate the useful exit aperture from stray light. It merely reduces the peak luminance of bright spots, while potentially increasing lateral stray light. In contrast, anti-glare glass uses angle-selective transmission to actively block large-angle light, thereby maintaining high downward brightness while significantly reducing glare risk at horizontal viewing angles.
Summary The core optical principle by which an anti-glare glass cover separates the useful luminous area from stray light in a downlight is angle-selective transmission, realized through micro-prismatic louvers, absorbing textured reflectors, or TIR cone arrays. These structures allow light within the designed exit angle to transmit while blocking or absorbing large-angle stray light, significantly reducing glare without sacrificing the core illumination efficiency.
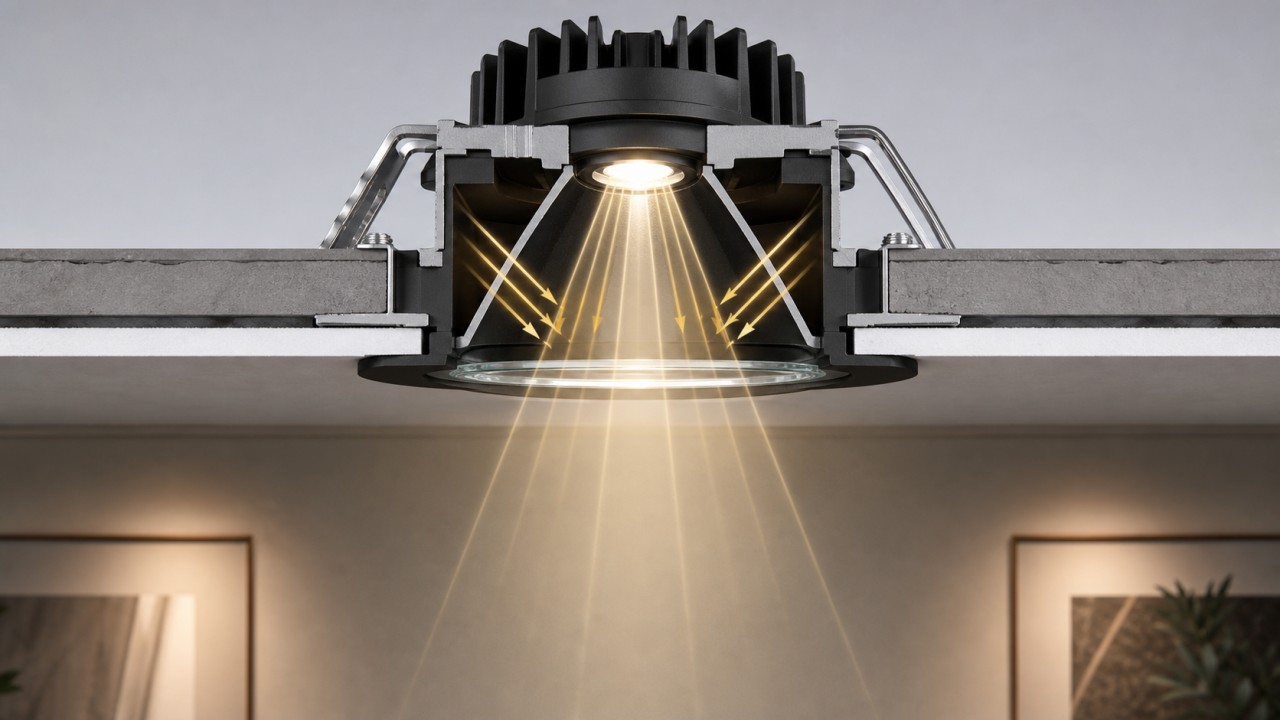
How do microstructured glass diffusers eliminate secondary spots and hot spots when spotlights illuminate walls?
Causes of secondary spots and hot spots A spotlight typically consists of an LED source, a reflector, or a lens. Secondary spots (stray halos or extra bright rings around the main beam) often originate from reflections at the rim of the reflector, diffraction at the lens edge, or residual aberrations of the source’s light-emitting surface. Hot spots refer to the overly bright central area of the beam, with a sharp contrast to the surrounding region, usually caused by imaging of the light source or an excessively steep central peak in the intensity distribution. Both defects ruin the uniformity and visual comfort of wall washing.
Basic role of microstructured glass diffuser: disrupting ordered light propagation A microstructured glass diffuser is engraved with random or pseudo‑random microlens arrays, micro‑pyramids, or sand‑ripple patterns. When light from the spotlight passes through this glass, each micro‑structure refracts or scatters the incident rays, breaking up the originally ordered and concentrated light paths. This “phase‑scrambling” effect destroys the edge diffraction fringes that cause secondary spots and the central focusing that causes hot spots, effectively remixing the light spatially.
Elimination of secondary spots: smoothing edge diffraction and stray light Secondary spots usually correspond to minor light energy concentrated in a narrow annular zone. A microstructured diffuser provides isotropic scattering, which redistributes the stray light originally confined to a thin ring into a much wider angular range. In practice: the secondary beam caused by the reflector rim, after passing through the microstructure, is no longer a distinct bright ring but breaks into many weak scattered rays in various directions, with an energy density below the human perception threshold. Moreover, the random phase modulation on the microstructured surface also destroys coherence (even for quasi‑coherent LEDs, the random surface significantly reduces interference fringe contrast), making secondary spots completely disappear.
Elimination of hot spots: homogenizing the central intensity distribution Hot spots occur because the central illuminance is much higher than that of the surrounding area. A microstructured diffuser solves this through two mechanisms: first, the microlens array deflects incident rays from the central region to off‑center angles, reducing the central peak; second, multiple refraction mixes light from different positions, so that the originally bright central area formed by direct imaging of the source is broken up and redistributed across the entire beam. A well‑designed microstructure (e.g., a fly‑eye lens array with a tailored curvature distribution) can achieve an approximately flat‑top illuminance profile, where the difference between the center and edge is less than 10%, completely eliminating hot spots.
Selection of diffuser parameters: haze and feature size To effectively eliminate secondary spots and hot spots, the microstructured glass diffuser must have appropriate haze and feature size. Typically, haze should exceed 90% to ensure sufficient scattering. The feature size (microlens diameter or characteristic pitch) should be between 10 and 100 microns — too small will cause diffraction that worsens secondary spots; too large will provide insufficient mixing. Additionally, the diffuser should be placed at the exit aperture of the spotlight or at a suitable point within the optical path, usually at some distance (a few millimeters to a few centimeters) from the light source, allowing light to mix sufficiently in space before being scattered.
Practical considerations Although a microstructured glass diffuser effectively eliminates secondary spots and hot spots, it introduces some transmittance loss (typically 5%-15%) and slightly widens the total beam angle. Therefore, the luminaire design should compensate for the light flux, for example by increasing LED power or choosing a more efficient optical system. For applications that demand extremely high beam quality (such as museum or commercial display lighting), the microstructured glass diffuser is one of the most reliable solutions available.
Summary The microstructured glass diffuser uses random microlens arrays or similar structures to re‑angle and redistribute the light from a spotlight. It scrambles the secondary diffraction rings that cause secondary spots and eliminates the central hot spot through light mixing, ultimately producing a smooth, uniform, defect‑free spot on the wall. Choosing the correct haze, feature size, and mounting position allows significant improvement in visual quality without sacrificing the main light output.
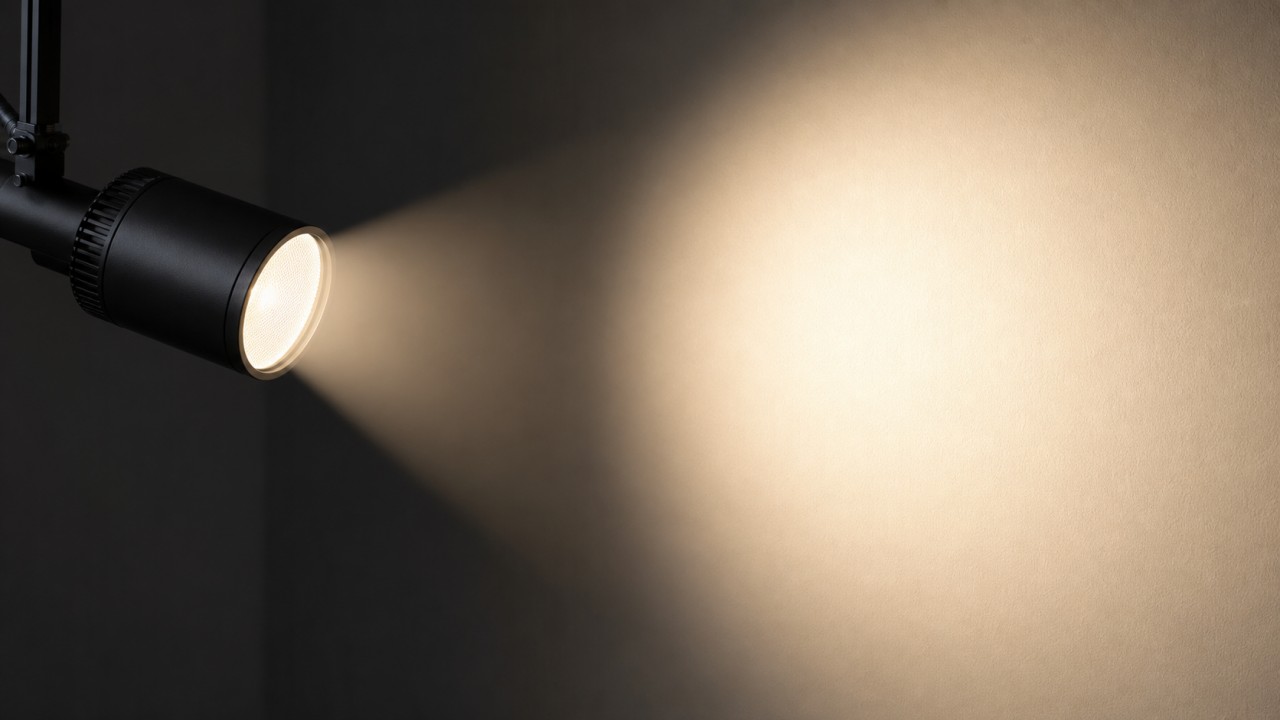
How much do AG anti-glare glass and ordinary frosted glass differ in anti-reflection and anti-dazzle performance for wall lamps?
Core difference between AG anti-glare glass and ordinary frosted glass AG anti-glare glass forms microscopicmicro-rough structures on the surface through chemical etching, controlling both transmitted and reflected light, reducing specular reflectance from about 8% to below 1%. Ordinary frosted glass becomes rough through mechanical or chemical means, mainly producing diffuse reflection for transmitted light, but it has weak control over surface reflection. Therefore, there are significant differences between the two in anti-reflection and anti-glare performance.
Difference in anti-reflection performance When the wall lamp’s own material and the light form a strong contrast, the surface of ordinary frosted glass produces obvious specular reflections that interfere with the line of sight. AG anti-glare glass greatly reduces the reflectivity, making the shade surface’s reflection very weak, more like a matte, non-luminous surface, thereby completely eliminating the visual disturbance from reflected light. In terms of anti-reflection capability, AG glass is significantly superior to ordinary frosted glass.
Difference in glare reduction AG anti-glare glass achieves glare reduction through dual effects: first, eliminating interference from surface reflected light; second, softening the transmitted light, making direct viewing of the shade more comfortable. Ordinary frosted glass mainly reduces glare by softening transmitted light, but because it cannot suppress surface specular reflection, it may still produce uncomfortable bright spots at certain angles. Therefore, AG glass performs better in glare reduction, especially in positions where the eye often looks directly at the fixture.
Differences in clarity and transmittance AG anti-glare glass can retain object contours while softening light, giving the light more layering, and its transmittance is usually above 90%, combining anti-glare with brightness. Ordinary frosted glass suffers more light loss due to greater surface damage, with transmittance typically around 70-80%, and it makes the light more uniformly blurred, offering better privacy but lower clarity.
Durability differences High-quality AG anti-glare glass uses chemical etching, with microstructures etched into the glass body, so the anti-glare effect is permanent and does not peel off. The frosted layer of ordinary frosted glass is also a permanent physical structure and is stable over the long term, but because its surface is rougher, it is more likely to trap dirt and is somewhat less convenient to clean.
Selection advice For wall lamps, when the fixture is at a low position or at an angle that eyes often look at directly (e.g., bedside reading lights, floor lamps next to sofas, low corridor wall lights), AG anti-glare glass is preferred for better anti-reflection and glare reduction. When the lamp is mainly used for ambient indirect lighting and is mounted high, not easily viewed directly (e.g., foyers, wall washers for TV background walls), ordinary frosted glass is a more cost-effective choice.
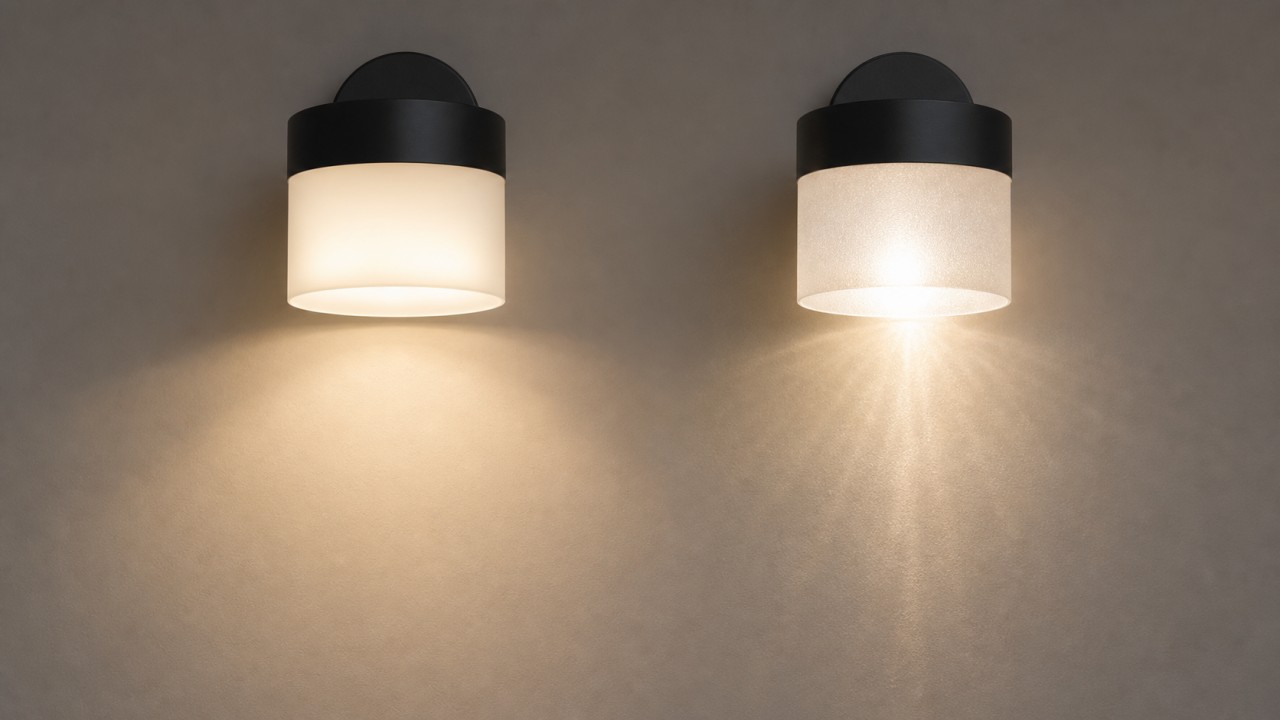
Why should corridor wall-lamp glass shades consider impact resistance and shatter protection in addition to efficacy?
Special usage environment of corridors A corridor is a narrow passage in a home or building where people pass frequently, often carrying items, moving furniture, or occasionally bumping into walls. Wall lamps are typically installed at a relatively low height (commonly 1.8-2.2 meters from the floor), which falls exactly within the activity range of an adult’s shoulder, elbow, or a child’s head. Therefore, the glass shade of a corridor wall lamp must not only provide adequate lighting efficiency but also possess excellent impact resistance and shatter-proof characteristics to prevent injury from broken glass in the event of accidental collision.
Impact resistance: preventing breakage from collisions Wall lamps in corridors may be accidentally hit by fast-moving people, playing children, luggage being carried, or cleaning tools. Ordinary annealed glass shatters into sharp shards upon moderate impact, creating a serious safety hazard. Therefore, the glass shade of a corridor wall lamp should be made of tempered glass or laminated glass. Tempered glass has 3-5 times the impact strength of ordinary glass, and when broken it fragments into small blunt particles, greatly reducing the risk of injury. Laminated glass, even if shattered, holds the fragments adhered to the interlayer without falling. For wall lamps installed at low heights, additional protective grids or polycarbonate covers may be considered, but if glass is required, safety glass is mandatory.
Shatter-proof characteristics: preventing injury after breakage Besides resisting direct impact, the glass shade should have shatter-proof design so that if it does break under extreme conditions, it should not produce flying sharp fragments. The “dice-like” fragmentation mode of tempered glass is ideal for corridor environments, as the small particles have rounded edges and do not cause deep cuts. Laminated glass firmly holds fragments through the PVB or SGP interlayer; even under strong impact, the entire glass may crack but remains integral, with no fragments falling onto the floor or onto people. Additionally, glass edges should be chamfered or rounded to reduce the risk of breakage from edge stress concentration.
Trade-off between luminous efficiency and safety Corridor wall lamps still need to meet basic lighting functions, such as providing adequate floor illuminance (typically 50-100 lux) and avoiding glare. Safety glass (tempered or laminated) has slightly lower transmittance than ordinary annealed glass (tempered glass: about 88-91%; laminated glass: about 85-88%), but this can be compensated by choosing ultra-clear glass substrates or optimizing surface treatments. For a corridor, where light output requirements are not extremely demanding, sacrificing a small amount of transmittance for safety is a completely reasonable and necessary trade-off. Ordinary annealed glass should never be used just to pursue higher transmittance, because the safety risk far outweighs the few percent gain in light output.
Summary The glass shade of a corridor wall lamp must place impact resistance and shatter-proof performance on an equal footing with luminous efficiency, because the low mounting height and high traffic frequency of corridors make them collision-prone areas. Using tempered or laminated glass not only effectively resists accidental impact but also avoids injury from sharp fragments when breakage does occur, thereby ensuring the safety of family members. Luminous efficiency requirements can be met by choosing high-transmittance safety glass, without sacrificing safety.
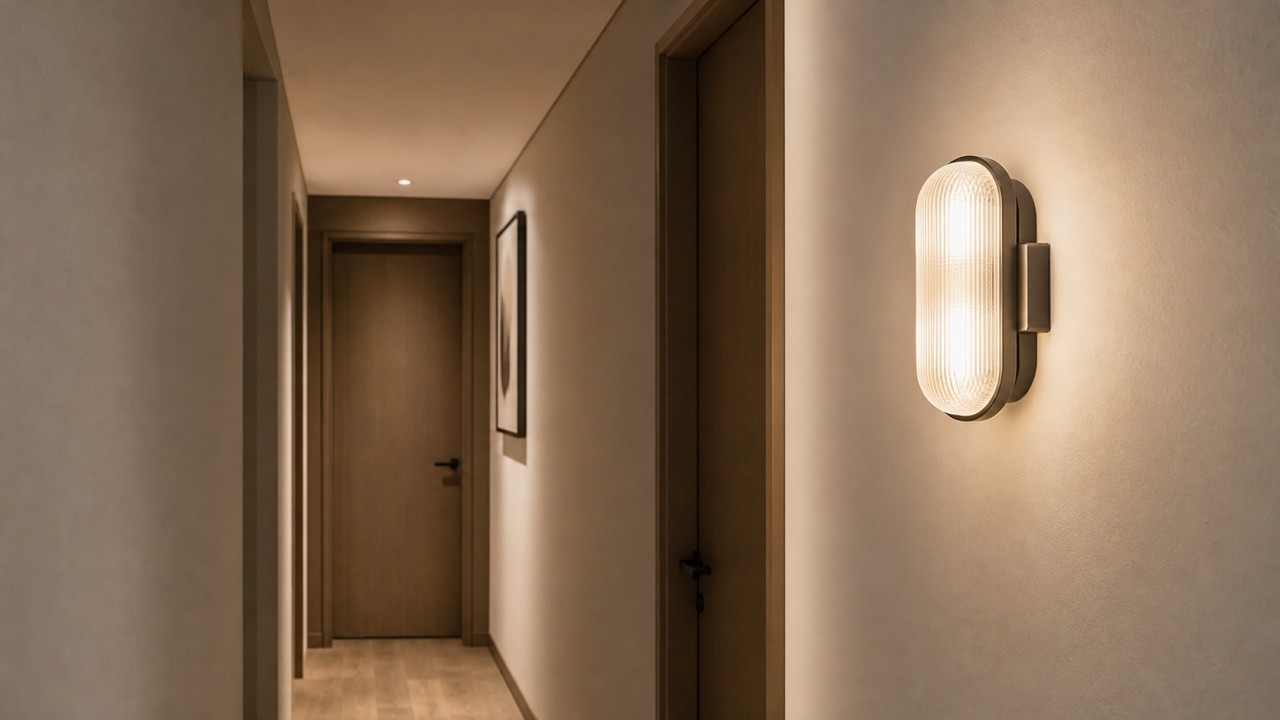
What should be noted about cleaning difficulty and long-term maintenance for fabric-textured or embossed glass wall lamps?
Cleaning difficulty analysis Patterned or textured glass, with its unique raised and recessed surfaces, creates an artistic ambiance but also presents greater cleaning challenges than smooth glass. The uneven surface easily accumulates airborne dust, which settles into the recesses of the texture — this is both the difficulty of cleaning and the reason why a meticulous approach is required. Moreover, extra care is needed during cleaning: ordinary cloths or hard objects (such as steel wool) can easily scratch the textured pattern, and strong acids, alkalis, or corrosive cleaners should be avoided to prevent damage to any special coating or finish on the glass surface. Accumulated dust also blocks light transmission, reducing luminous efficiency, so a thorough cleaning at least every three to six months is recommended.
Cleaning methods and tips Always turn off the power before cleaning to ensure safety. First, use a soft brush, an electrostatic duster, or a small vacuum cleaner to remove surface dust, avoiding dry wiping that might press dust deeper into the texture. For stubborn dirt embedded in the texture, if the shade is removable, take it down and use a soft brush with a mild detergent or clean water, then rinse thoroughly and allow it to air dry completely before reinstalling. For routine cleaning, a wrung-out microfiber cloth with a small amount of white vinegar solution (one to one) or warm vinegar water works well. For stubborn grease, a vinegar-plus-salt mixture or toothpaste can be used; for limescale, a diluted hydrochloric acid solution (wear gloves and handle with extreme care) can be applied for about 30 minutes before rinsing. Removable shades can also be soaked in warm water with a mild detergent and then lightly brushed.
Long-term maintenance considerations During installation, ensure the luminaire has proper ventilation to allow heat from the bulb to dissipate, preventing the shade from overheating. For wall lights installed in environments that may be exposed to moisture (such as bathrooms or semi-outdoor areas), periodically inspect the sealing gasket between the glass and the housing to prevent moisture from entering the inner surface, which could form stubborn limescale or cause internal fogging. Avoid prolonged direct sunlight on the fixture to prevent surface discoloration or accelerated aging. In daily use, be careful to avoid hard impacts, as ordinary patterned glass is not as impact-resistant as tempered glass and may produce sharp fragments if broken. Additionally, after cleaning and drying, a small amount of anti-static spray can be applied to effectively reduce subsequent dust attraction.
Summary Patterned or textured glass wall lamps are more difficult to clean than smooth glass, requiring careful methods such as soft brushes, mild detergents, and avoiding scratches and corrosion. Long-term maintenance should focus on ventilation, seal inspection, impact protection, and aging prevention. Although maintenance is somewhat more involved, proper cleaning and care can keep the textured glass wall lamp aesthetically pleasing and optically efficient for a long time.
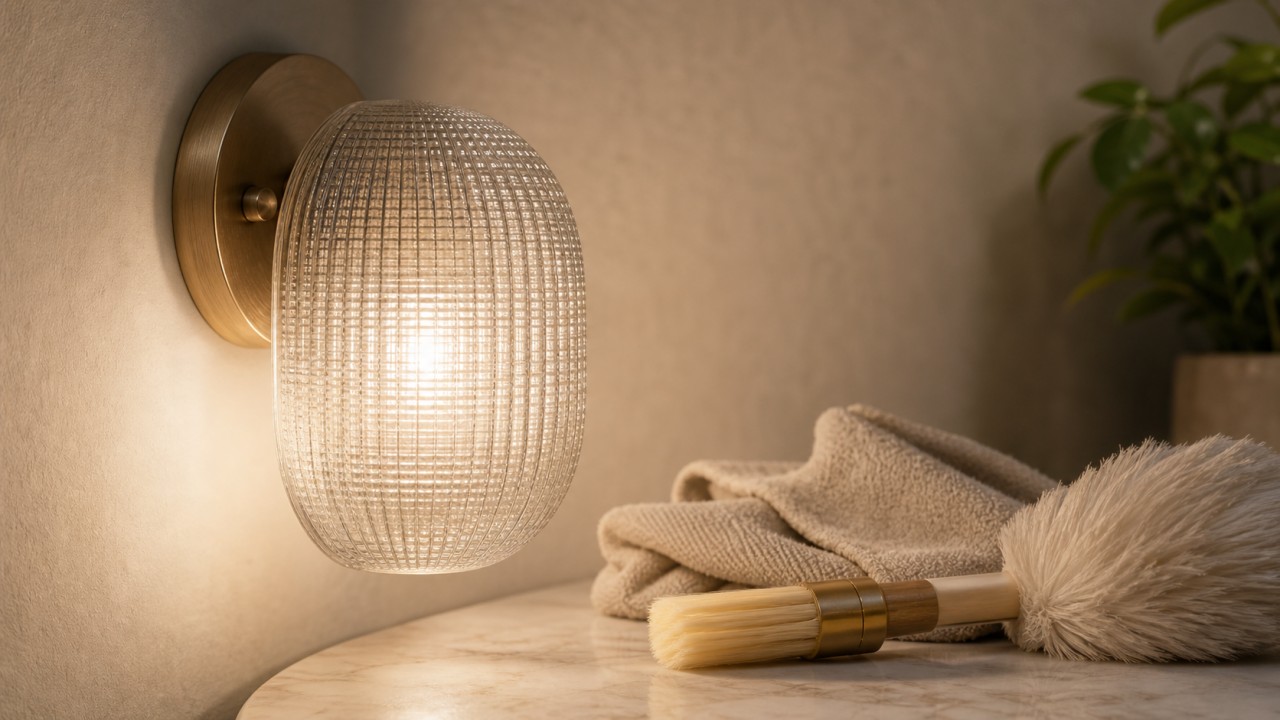
For replaceable glass lampshades, how can optical matching and safety be ensured when users replace them themselves?
Optical matching: precision of physical dimensions Replaceable glass lampshades must first precisely match the original luminaire in physical dimensions. The luminaire’s optical path is typically designed for a specific shade size, so the diameter, height, opening size, and mounting interface (e.g., clip-on, screw-fixed, twist-lock) must be identical to the original specifications. Mismatched dimensions not only alter light distribution and reduce efficacy but may also cause insecure attachment and risk of falling. Therefore, users should prioritize replacement products that explicitly state compatibility with the original model and verify that all geometric parameters and interface types are exactly the same.
Optical matching: consistency of material and finish The glass material and surface treatment directly affect transmittance, haze, and transmitted light color. Clear glass, opal glass, frosted glass, and patterned glass each have distinct optical characteristics. If the original shade uses high-haze opal glass to hide the light source and provide uniform diffusion, replacing it with clear glass will ruin glare control and create harsh bright spots. Likewise, the absence of original coatings or films (such as anti-reflection or oleophobic layers) will alter optical performance. Users should try to select replacement shades that match the original glass type and surface finish, or choose certified compatible components that have been optically tested.
Optical matching: maintaining light distribution characteristics For luminaires that perform precise light distribution (such as spotlights and downlights), the shade often contains prism arrays or freeform lenses. Replacing such a shade with ordinary flat glass will completely alter the beam angle, illuminance uniformity, and glare control. If replacement is necessary, users should purchase specifically designed replica shades whose internal optical structure matches the original. Furthermore, the correlated color temperature (CCT) and color rendering index (CRI) of the light source must be compatible with the shade: cool‑toned glass (e.g., smoky gray, blue) should be paired with cool white light (above 5000K), while warm‑toned glass (amber, pink) should be paired with warm white light (2700-3000K); otherwise, the light color may appear muddy (grayish‑yellow or greenish). For reading or makeup lighting, it is advisable to choose a high‑quality shade with a color rendering index (Ra) of at least 90.
Safety: material safety and burn prevention During do‑it‑yourself removal and installation, ordinary annealed glass can easily shatter into sharp shards if dropped, causing severe cuts. Therefore, replaceable glass lampshades should be mandatorily made of tempered glass or laminated glass. Tempered glass fragments into small, blunt particles without sharp edges, greatly reducing injury risk; laminated glass holds fragments adhered to the interlayer even if broken. Additionally, the luminaire should be designed so that the glass shade’s surface temperature rise stays within a safe limit (typically not exceeding 25K) to prevent burns during handling. Before replacement, users must turn off the power and wait for the luminaire to cool completely (15–30 minutes is recommended).
Safety: electric shock prevention and anti‑fall design When replacing a glass shade, users may come into contact with live parts inside the luminaire (e.g., LED modules, terminal blocks). Manufacturers should provide physical barriers (such as coating glue or insulating shields) to prevent finger contact. For more advanced replaceable modules, the product should pass safety certifications such as UL or CCC. Furthermore, the shade’s fastening mechanism must be reliable to prevent accidental falling during use. Common reliable designs include magnetic attachment, twist‑lock, or screw fixation. Apply moderate torque during installation: over‑tightening may crack the glass or cause stress‑induced breakage, while under‑tightening may allow the shade to fall. Users should avoid low‑quality shades with un‑chamfered sharp edges.
User safety operation guide To ensure safety during do‑it‑yourself replacement, users should follow these steps: first, turn off the lamp switch and disconnect the main circuit breaker, ensuring dry hands and a water‑free working area. After turning off the power, wait 15–30 minutes for the shade and internal light source to cool completely. It is recommended to wear cut‑resistant gloves for hand protection. Carefully remove the old shade according to its interface type; if it is fixed with sealant, evenly heat it with a hot air gun to soften the sealant while protecting the wiring. When removing LED modules, avoid touching the light source glass or chips directly with fingers. Before installing the new shade, verify that its dimensions and interface match, then install with moderate torque — do not over‑tighten. After installation, check for stability and ensure no bare wires are exposed, then restore power and test.
Summary Optical matching for replaceable glass lampshades requires that physical dimensions, material/finish, and light distribution characteristics be consistent with the original shade to avoid efficacy loss and color distortion. Safety relies on tempered/laminated glass, burn‑prevention temperature control, shock‑proof isolation, and reliable fastening. Users performing replacement must cut power, allow cooling, wear protective gear, and strictly follow the operation steps. Only with joint efforts from manufacturers and users can convenient and safe optical replacement be achieved.
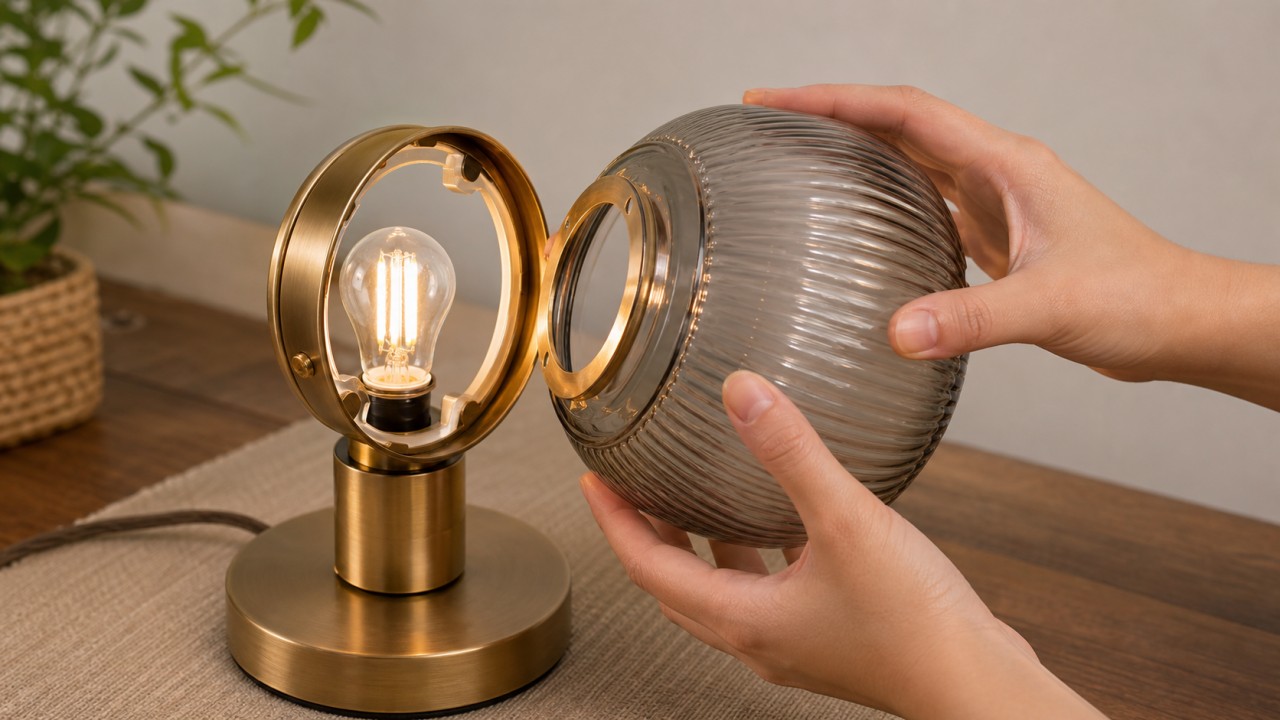
Why are borosilicate heat-resistant glass shades recommended for reading lamps and children's desk lamps instead of ordinary soda-lime glass?
Thermal shock resistance: preventing breakage from bulb heat Reading lamps and children’s desk lamps are often used for long periods, and the bulb or LED module generates heat. Ordinary soda-lime glass has a relatively high coefficient of thermal expansion (approximately 9×10⁻⁶/K). When the glass is heated locally (e.g., a bulb close to the shade) or suddenly cooled (e.g., by a cold draft or water droplets), internal thermal stress can easily cause the glass to crack. Borosilicate glass has a very low coefficient of thermal expansion (approximately 3.3×10⁻⁶/K), about one‑third that of soda‑lime glass, giving it excellent thermal shock resistance. Even if the shade is placed very close to a hot bulb or accidentally splashed with cold water during use, borosilicate glass will not crack from thermal stress, greatly reducing safety risks for children.
Mechanical strength and impact resistance: reducing breakage risk from accidental collisions Children’s desk lamps may be pushed over, bumped, or knocked off the table by a child. Ordinary soda‑lime glass (non‑tempered) has a relatively low flexural strength (about 40‑60 MPa) and shatters into sharp shards, posing a serious cut hazard. Borosilicate glass has slightly higher mechanical strength (flexural strength about 70‑100 MPa) and, more importantly, a more uniform structure with fewer internal micro‑defects. Although borosilicate glass is still a brittle material when not tempered, it is more resistant to light impacts than ordinary soda‑lime glass. For children’s luminaires, with appropriate wall thickness design, a borosilicate glass shade offers better resistance to accidental impacts. If tempered treatment is added, safety is even higher, but borosilicate glass alone is already a better choice than soda‑lime glass.
Chemical stability and anti‑leaching: no fogging over long‑term use Under prolonged heat and humid conditions, sodium ions in ordinary soda‑lime glass can migrate to the surface, reacting with moisture and carbon dioxide in the air to form sodium carbonate crystals. This leads to “sweating” or “weathering” of the glass surface, making the shade cloudy and reducing transmittance. Borosilicate glass contains a high proportion of silica and boric oxide, with low sodium content, giving it excellent chemical stability and resistance to alkali leaching. During long‑term use of a reading lamp, a borosilicate glass shade maintains high transmittance without surface fogging, which is especially important for reading and writing activities that require good visual clarity.
Optical performance and transmittance retention Borosilicate glass has a refractive index (approximately 1.47) similar to that of soda‑lime glass (approximately 1.52), and the initial transmittance is also comparable (about 91‑92%). However, borosilicate glass is heat‑resistant and does not leach alkalis, so its transmittance remains almost unchanged after years of use. Ordinary soda‑lime glass may suffer transmittance loss due to surface weathering or micro‑crack propagation. Furthermore, borosilicate glass has slightly higher UV transmittance than soda‑lime glass, but this characteristic has little impact on desk lamp lighting. For children’s desk lamps, consistently high transmittance over time helps protect eyesight and maintain uniform illuminance.
Safety: fragmentation pattern and temperature limits Although borosilicate glass still produces fragments when broken, the fragments are generally less sharp than those of ordinary soda‑lime glass (depending on the exact treatment). More importantly, borosilicate glass can withstand temperature differences of over 250°C without breaking, so it will not shatter suddenly due to heat concentration from the bulb. In a children’s desk lamp, if an overly powerful bulb is used or the bulb sits too close to the shade, a soda‑lime glass shade may instantly crack from thermal stress and spray sharp fragments, whereas a borosilicate glass shade will remain intact. This makes borosilicate glass a safer choice for children’s desk lamps and reading lamps.
Summary Reading lamps and children’s desk lamps are recommended to use borosilicate glass shades instead of ordinary soda‑lime glass because borosilicate glass offers excellent thermal shock resistance (low coefficient of thermal expansion), higher mechanical strength, superior chemical stability (no alkali leaching, no fogging), and the ability to maintain high transmittance over long periods. These characteristics significantly reduce the risk of shade cracking from bulb heat or accidental impacts, thereby preventing cuts and injuries to children, while also ensuring consistently good lighting quality. Although borosilicate glass is slightly more expensive, it is a superior choice for child safety and long‑term reliability.
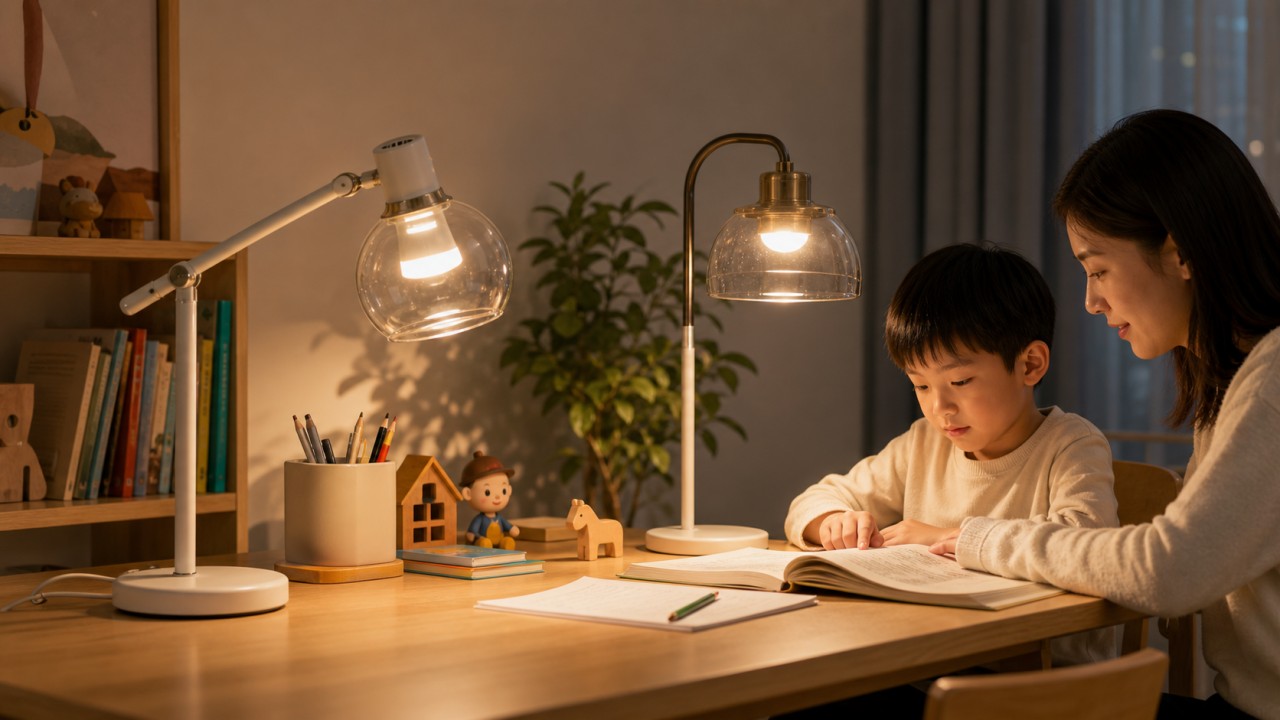
For table lamps, what reading or work scenarios suit clear, frosted, and opal glass shades respectively?
Clear glass lampshade A clear glass lampshade has the highest transmittance (typically >90%), allowing almost all light to pass through with minimal loss, thus providing the brightest illumination. However, a clear shade does not conceal the light source. If the bulb or LED chips are directly exposed, looking at them causes intense glare, leading to visual fatigue over prolonged use. Therefore, a clear glass shade is suitable for task lamps where the light source is deeply recessed or equipped with a louver, or for scenarios that require high brightness and directional light control, such as professional drafting, precision handcrafting, or jewelry inspection. In these cases, users can adjust the lamp arm to avoid direct line of sight while enjoying sharp, high‑illuminance lighting. Clear shades are not recommended for general reading unless the luminaire design already provides adequate glare protection.
Frosted glass lampshade A frosted glass lampshade is sandblasted or acid‑etched to create a fine diffuse‑reflective structure, with transmittance typically between 80% and 90% and moderate haze (about 40%-70%). It softens point light sources into a uniform area light, significantly reducing direct glare while retaining good brightness and a certain level of light‑shadow layering. Frosted glass shades are suitable for general reading and routine office work, such as reading novels, newspapers, processing documents, or using a computer. They provide a comfortable, non‑glaring light environment that is soft yet bright enough to see fine details, with minimal eye fatigue over long periods. The frosted shade is the most versatile and balanced choice for task lamps, suitable for most homes and offices.
Opal glass lampshade An opal glass lampshade contains a high density of scattering particles or has a uniform opacified structure, resulting in lower transmittance (typically 50%-75%) and very high haze (>90%). It completely conceals the light source, diffusing light uniformly in all directions with no harsh bright spots, producing an extremely soft beam with almost no shadow edges. However, the trade‑off is a noticeable reduction in brightness. Opal glass shades are suitable for prolonged, close‑up detailed work, such as a student doing homework for long hours at a desk, sewing, puzzle assembly, or any desktop activity that requires intense concentration. Because there is no glare or hard shadows, eye fatigue is minimized, making opal shades ideal for scenarios where visual comfort is paramount. They are not suitable for precision drafting that needs high illuminance or for reading by people with low vision, as the brightness may be insufficient. Opal shades also work well as supplementary lighting for bedtime reading, providing gentle, non‑stimulating light.
Summary When choosing a glass lampshade for a task lamp, the decision should be based on the specific reading or work activity: a clear shade is suitable for professional fine work that requires the highest brightness and allows avoidance of direct line of sight; a frosted shade is the best balanced choice for general reading and office work, offering both brightness and comfort; an opal shade is ideal for long‑duration, close‑up tasks where visual comfort is the top priority, even at the cost of some brightness.

How can ultra-thin glass diffusers for LED strips balance uniform diffusion and mechanical strength below 3 mm thickness?
Achieving uniform diffusion: internal scattering particles During the manufacturing process, ultra-thin glass diffusers incorporate fine scattering particles (such as titanium dioxide or barium sulfate) with high melting points and high refractive indices into the glass matrix. When light passes through the glass, it undergoes multiple refractions, reflections, and scattering events among these particles, thereby mixing the originally discrete point or line light sources of LED strips into a uniform area light. This internal scattering (bulk diffusion) does not rely on surface roughness and can achieve haze over 90% even at very thin thicknesses while maintaining relatively high transmittance. Because scattering occurs inside the glass, the surface remains smooth, making it easy to clean and resistant to wear.
Achieving uniform diffusion: surface microstructures Another advanced approach is to fabricate micron-scale lens arrays, prisms, or random texture structures on the surface of ultra-thin glass. This can be achieved through photolithography, chemical etching, or precision imprinting (such as LIDE technology). These microstructures precisely control the exit angle of light, eliminating hot spots and dark areas, resulting in extremely uniform diffusion. Compared to internal scattering, surface microstructures offer greater design flexibility, allowing customization of the diffusion angle according to the arrangement of LED strips while reducing light loss. This technology is particularly suitable for high-end LED strips where optical performance must be excellent at thicknesses of only 1-2 millimeters.
Ensuring mechanical strength: chemical strengthening technology Glass thinner than 3 millimeters is inherently fragile, but chemical strengthening (ion exchange) can dramatically improve its mechanical strength. The principle involves immersing the glass in a high-temperature molten salt bath, where smaller sodium ions near the glass surface exchange with larger potassium ions from the salt, thereby creating a compressive stress layer on the glass surface. This compressive stress layer resists external impacts and bending stresses, increasing the flexural strength by 3-4 times, with surface compressive stress reaching 300 to 2000 MPa. Chemically strengthened ultra-thin glass diffusers, even at thicknesses of only 2 millimeters, can withstand normal installation, cleaning, and minor impacts during use without breaking easily.
Ensuring mechanical strength: high-precision substrate and edge finishing In addition to chemical strengthening, the uniformity of the glass substrate itself is critical. Ultra-thin glass produced by the overflow downdraw or float process has a total thickness variation (TTV) controlled at the micron level, ensuring no local weak points. Furthermore, cutting and edge finishing techniques (such as laser cutting and edge chamfering) eliminate micro-cracks and stress concentration points. Combined with chemical strengthening, these processes give glass diffusers as thin as 0.5-2 millimeters sufficient toughness to withstand curved installation and long-term use with LED strips.
Integrated balance: design synergy Ultra-thin glass diffusers can simultaneously achieve diffusion uniformity and mechanical strength at thicknesses below 3 millimeters thanks to the synergy of materials science and micro/nano fabrication technologies. Internal scattering particles or surface microstructures handle optical performance, while chemical strengthening handles mechanical performance — the two do not interfere with each other. By optimizing the glass composition (for example, using lithium‑aluminosilicate glass instead of ordinary soda‑lime glass), the ion exchange efficiency can be further improved, achieving a deeper compressive stress layer at even smaller thicknesses. The final product delivers a uniform, spot‑free beam while operating reliably in various environments.
Summary The ability of an ultra‑thin glass diffuser to balance diffusion uniformity and mechanical strength at thicknesses below 3 millimeters relies on three key factors: first, internal scattering particles or surface microstructures that achieve efficient light mixing; second, chemical strengthening (ion exchange) that creates a surface compressive stress layer, greatly improving flexural and impact resistance; and third, high‑precision substrates and edge finishing that eliminate defects. The combination of these technologies makes ultra‑thin glass diffusers an ideal choice for LED strip lighting where both optical quality and reliability are required.
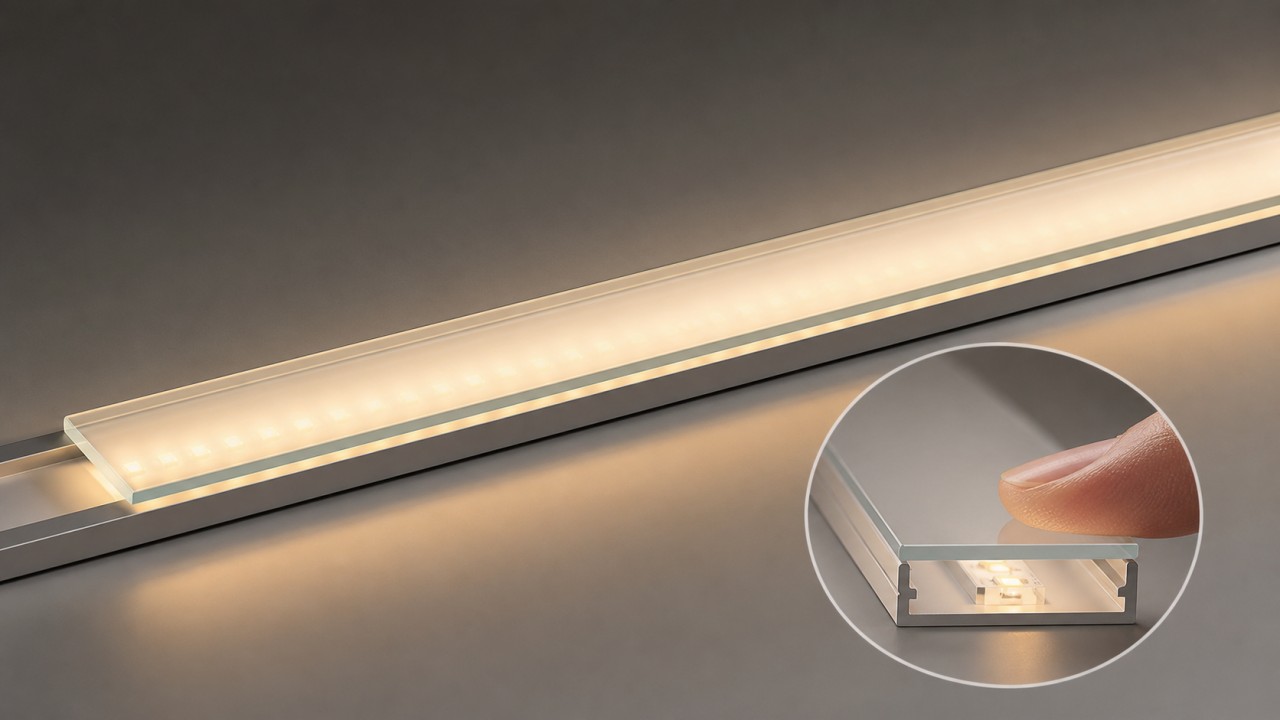
For toe-kick lights and cabinet linear lights, what load-bearing and waterproof sealing standards should tempered glass covers meet?
Load-bearing standards: anti-trampling and crush resistance requirements for ground recessed lights
Ground recessed lights are typically installed at the bottom of walls or embedded in floors, directly facing mechanical loads from pedestrian trampling, furniture rolling, or even cart wheels. According to GB/T 7000.213-2023 "Luminaires - Part 2-13: Particular requirements - Ground recessed luminaires" and IEC 60598-2-13, ground recessed luminaires must undergo rigorous mechanical strength testing, of which crush resistance is a core test item. The luminaire must withstand a specified vertical force for a certain duration, with common load ratings ranging from 1500N to 5000N (approximately 150 to 500 kg-force) depending on the nominal load class. The luminaire housing, transparent components (i.e., the tempered glass cover), and internal components must show no cracks, permanent deformation, or functional failure, and must still meet electrical safety requirements after the test. Furthermore, impact resistance testing is required, using a pendulum or drop hammer to strike the most vulnerable parts of the luminaire, such as the edges or center of the glass cover, with impact energy set according to IK ratings, typically ranging from IK07 (2 joules) to IK10 (20 joules). The luminaire should not break, or if it does break, it must meet fragment containment requirements. The impact strength of tempered glass itself is 5 to 10 times that of ordinary glass, and its flexural strength is 3 to 5 times that of ordinary glass, making it an ideal material for ground recessed light covers. For ground recessed lights installed only at the bottom of walls (non-flush with the floor), load-bearing requirements may be relaxed, but accidental trampling or kicking should still be considered, and a glass thickness of at least 4mm with tempering treatment is recommended.
Load-bearing standards: pressure and impact resistance requirements for cabinet linear lights
Cabinet linear lights are installed under shelves, inside side panels, or at the bottom of cabinets such as kitchen cabinets, wardrobes, and display cabinets. The main pressures they withstand come from items placed inside the cabinet, pressing during cleaning and wiping, and vibration transmitted during door opening and closing. They generally do not bear human trampling loads. However, for linear lights installed under shelves directly against glass shelves, when heavy items are placed on the shelf above, deformation of the shelf may impose indirect pressure on the light cover below. According to GB/T 26695-2011 "Tempered glass panel for furniture", tempered glass panels for furniture must undergo gravity impact resistance testing, bending strength testing, and fragment state inspection. A 5mm thick glass panel under specific support conditions has a load-bearing capacity of approximately 62.5 kg per square meter. The tempered glass cover for cabinet linear lights is typically 3mm to 5mm thick, with the main mechanical requirements being to prevent local breakage during daily cleaning pressing, to prevent fatigue cracking from vibration caused by cabinet door closing, and to prevent stress concentration breakage due to over-tightening of screws or frame deformation during installation. For linear lights installed inside drawers or in frequently touched positions, a glass cover thickness of at least 4mm with chamfered or rounded edges to reduce stress concentration is recommended.
Waterproof sealing standards: high-level ingress protection requirements for ground recessed lights
Ground recessed lights, due to their installation position near or flush with the floor, are subject to prolonged exposure to mopping water stains, cleaning agent splashes, condensation, and even short-term water accumulation. According to GB/T 4208-2017 "Degrees of protection provided by enclosure (IP code)" and IEC 60529, ground recessed lights require relatively high ingress protection ratings: general ground recessed luminaires need at least IP65 (complete dust protection plus protection against water jets), while more demanding environments require IP67 (temporary immersion) or even IP68 (continuous immersion). Waterproof sealing relies on the sealing structure between the tempered glass cover and the luminaire housing, common methods including pre-formed silicone gaskets (with compression ratio controlled at 20%-30% to ensure long-term elasticity), form-in-place sealants (such as silicone or polyurethane), and ultrasonic welding. The long-term reliability of the sealing structure must be verified through damp heat testing and thermal cycling testing, simulating outdoor environmental aging to evaluate performance changes such as seal aging and material embrittlement. Furthermore, corrosion resistance testing (such as neutral salt spray test NSS) is required to verify the corrosion resistance of metal components, preventing seal failure or structural safety issues due to rust. The cable entry seal at the wire outlet of the ground recessed light must also provide reliable waterproof performance to prevent moisture from penetrating into the luminaire along the cable.
Waterproof sealing standards: moderate ingress protection requirements for cabinet linear lights
Cabinet linear lights are installed inside kitchen cabinets, wardrobes, and display cabinets. Although they are not directly exposed to floor water stains, kitchen cabinet luminaires face steam, condensation, and cleaning agent splashes, bathroom cabinet luminaires face high-humidity environments, while ordinary wardrobes have essentially no moisture. Therefore, the ingress protection rating for cabinet linear lights should be selected based on the specific installation location: for those installed under kitchen hanging cabinets, near stoves or sinks, IP54 (dust protection plus protection against splashing water) is recommended; for those installed inside bathroom cabinets or around mirror cabinets, IP44 (protection against splashing water) is recommended; for those installed inside ordinary wardrobes or bookcases, IP20 (protection against solid foreign objects larger than 12mm, no waterproof requirement) is sufficient, although IP43 is recommended if there is a condensation risk. Waterproof sealing is typically achieved using silicone gaskets or sealant strip compression structures, forming a closed cavity between the tempered glass cover and the aluminum alloy frame of the luminaire. It should be noted that cabinet linear lights often feature ultra-thin designs with limited sealing space and short compression travel for the gaskets, thus placing high demands on the elastic retention of sealing materials and assembly precision. Additionally, the joint between the tempered glass cover and the luminaire housing should be coated or taped to prevent moisture from seeping in through the edges during cleaning. For linear lights installed inside refrigerators or freezers, seal material embrittlement and condensation freezing at low temperatures also need to be considered.
Performance standards for the tempered glass itself
Regardless of whether for ground recessed lights or cabinet linear lights, the tempered glass cover itself must meet the requirements of the national mandatory standard GB 15763.2-2005 "Safety glazing materials in building - Part 2: Tempered glass", including fragment state (the number of fragments within a specified area must be no less than the required value with no elongated fragments), surface stress (no less than 90 MPa), impact resistance (a 1040g steel ball dropped from a specified height onto the glass without causing breakage), and thermal shock resistance (withstanding temperature differences over 200°C without cracking). For thin tempered glass with thickness less than 3mm, the relevant requirements of GB/T 26695-2011 "Tempered glass panel for furniture" may be referenced. Furthermore, glass edges must be finely ground or chamfered to eliminate micro-cracks and stress concentration points, as edge defects are one of the primary causes of glass breakage. The glass surface should be free of visible defects such as scratches, bubbles, or stones, which could otherwise become starting points for crack propagation during long-term use.
The load-bearing and waterproof sealing requirements for tempered glass covers differ significantly between ground recessed lights and cabinet linear lights due to their different installation environments. Ground recessed lights need to withstand crush loads of 1500N or more and achieve IP65/IP67 high-level ingress protection, with tempered glass thickness typically ranging from 4mm to 8mm. Cabinet linear lights primarily withstand pressure from daily cleaning pressing and item placement, with ingress protection ratings ranging from IP20 to IP54 depending on installation location, and tempered glass thickness typically ranging from 3mm to 5mm. The common fundamental requirement for both is that the tempered glass itself must meet the core performance indicators such as impact resistance, fragment state, and surface stress in accordance with GB 15763.2 or GB/T 26695, and the sealing structure must remain reliable under long-term damp heat conditions. Correct standard selection and structural design are prerequisites for ensuring the long-term safe operation of these two types of luminaires.
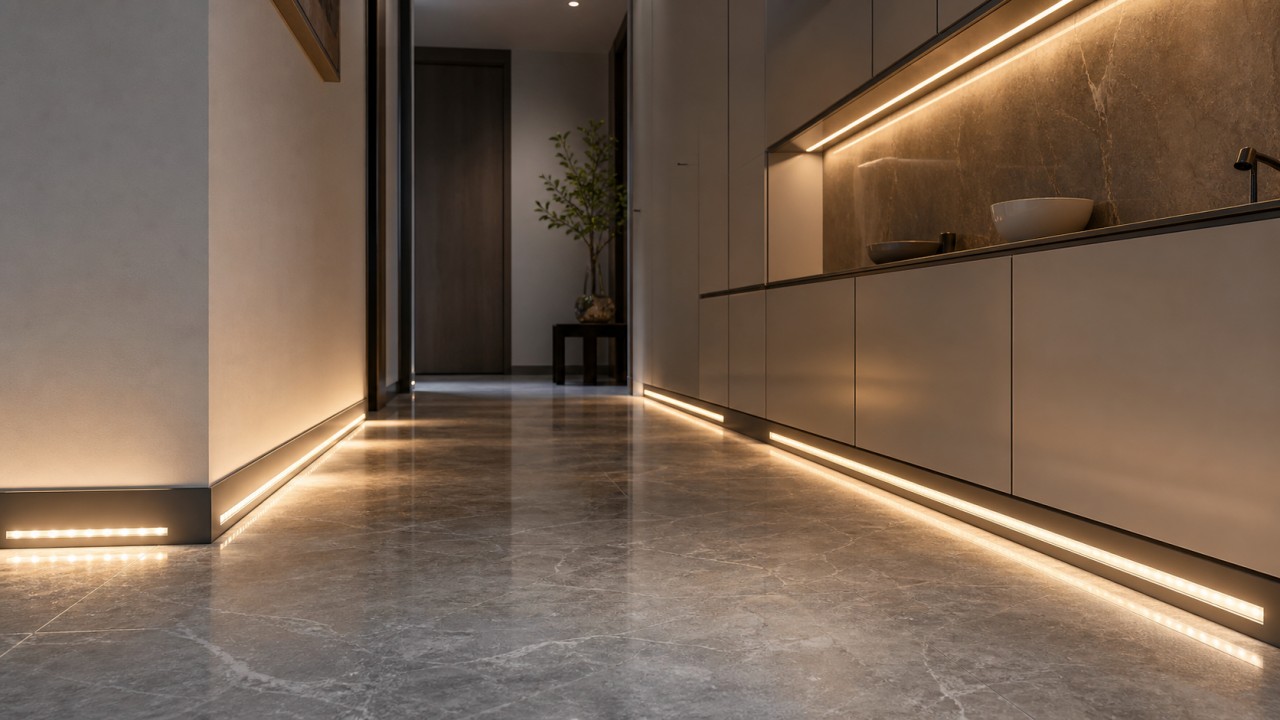
Why should kitchen and bathroom LED strips prioritize glass diffusers over PC covers, and how large is the difference in moisture resistance and yellowing resistance?
Special challenges of kitchen and bathroom environments Kitchens and bathrooms are characterized by high temperature, high humidity, grease, and cleaning agents. Kitchen light strips may be exposed to cooking steam, grease volatiles, and chemical reagents used during cleaning; bathroom light strips face high humidity from showers, condensation, and chemical volatiles from toiletries. These factors impose extremely high requirements on the aging resistance of diffusers. There are significant differences in long-term performance between glass diffusers and PC diffuser covers in such environments.
Difference in yellowing resistance PC (polycarbonate) is an organic polymer material. Its molecular chains undergo breakage or rearrangement under long-term exposure to UV radiation, high temperature, humidity, and chemicals, causing the material to gradually yellow. Ordinary PC may show visible yellowing within about one year in kitchen and bathroom environments, with significant transmittance loss. Even weather-resistant PC with UV stabilizers can only delay yellowing to five to ten years, and it remains a gradual, irreversible process. In contrast, glass diffusers are made of inorganic silicate materials. Their molecular structure lacks organic groups susceptible to UV and thermal oxidation, so they can theoretically maintain their initial clarity and transmittance permanently without yellowing. This fundamental difference gives glass overwhelming long-term optical stability in kitchen and bathroom environments.
Difference in moisture and chemical resistance PC is sensitive to moisture and chemicals. In the high-humidity environment of kitchens and bathrooms, water molecules can penetrate between PC molecular chains, causing hydrolysis reactions that lead to surface cracking, fogging, or loss of mechanical properties. Furthermore, alkaline components in kitchen cleaners and acidic or alkaline washes in bathrooms accelerate PC aging. Glass is a chemically inert material. Except for hydrofluoric acid, it has strong resistance to common acids, alkalis, grease, cleaners, and moisture. Glass diffusers do not swell or deform due to humidity and are not corroded by cleaning agents. Therefore, in kitchen and bathroom environments with long-term exposure to moisture and chemicals, glass offers far superior moisture and chemical resistance compared to PC.
Difference in high-temperature resistance Kitchen and bathroom light strips may be installed above stoves, near ovens, or inside bathroom ceilings, where ambient temperatures can be relatively high, and the light strips themselves also generate heat during operation. PC has a glass transition temperature of about 150°C, with a maximum long-term operating temperature typically not exceeding 120°C. Above this temperature, PC softens, deforms, and ages faster. Glass has a softening point typically above 550°C and undergoes no thermal deformation or thermal aging within the normal operating temperature range of light strips (usually below 80°C). Therefore, glass diffusers have an absolute advantage in high-temperature resistance, making them particularly suitable for light strips installed near heat sources.
Difference in optical performance retention After one year of use in a kitchen or bathroom environment, a PC diffuser may suffer a 10% to 30% loss in transmittance due to yellowing and surface fogging, resulting in significantly reduced brightness and a yellowish light color. Weather-resistant PC performs somewhat better but still exhibits gradual performance degradation. A glass diffuser, under the same environment for years or even a decade, maintains nearly unchanged transmittance and retains its initial light color. This difference is particularly important for kitchen countertops and bathroom mirror areas where high lighting quality is required. Choosing a glass diffuser is like pressing a "permanent pause button" on the optical performance of the light strip.
Advantages and applicable scenarios of PC diffusers Although glass is comprehensively superior to PC in long-term stability, PC diffusers still have two notable advantages: first, their impact resistance is far superior to glass—even under strong impact, they do not shatter into sharp fragments, making them suitable for low positions or cabinet edges where children may easily bump into them; second, their initial cost is lower, they are lightweight, and they are easy to process, making them suitable for cost-sensitive or short-term projects. If budget or installation constraints force the choice of PC, priority should be given to "weather-resistant PC" with UV and anti-yellowing additives, and they should be avoided in locations directly adjacent to stoves, steam outlets, or long-term direct sunlight.
Summary The fundamental reason for prioritizing glass diffusers over PC diffuser covers in kitchen and bathroom light strips is that glass offers permanent yellowing resistance, excellent moisture and chemical resistance, superior high-temperature stability, and lifelong optical performance retention. In contrast, PC gradually yellows, fogs, and loses transmittance over time in the complex kitchen/bathroom environment. The gap in moisture and yellowing resistance between the two can be summarized as: glass is a permanent "freshness‑locking" material, while PC is a progressively "expiring" material. For critical areas such as kitchen countertops and bathroom mirrors that require long‑term stable lighting, glass diffusers are the more reliable choice.
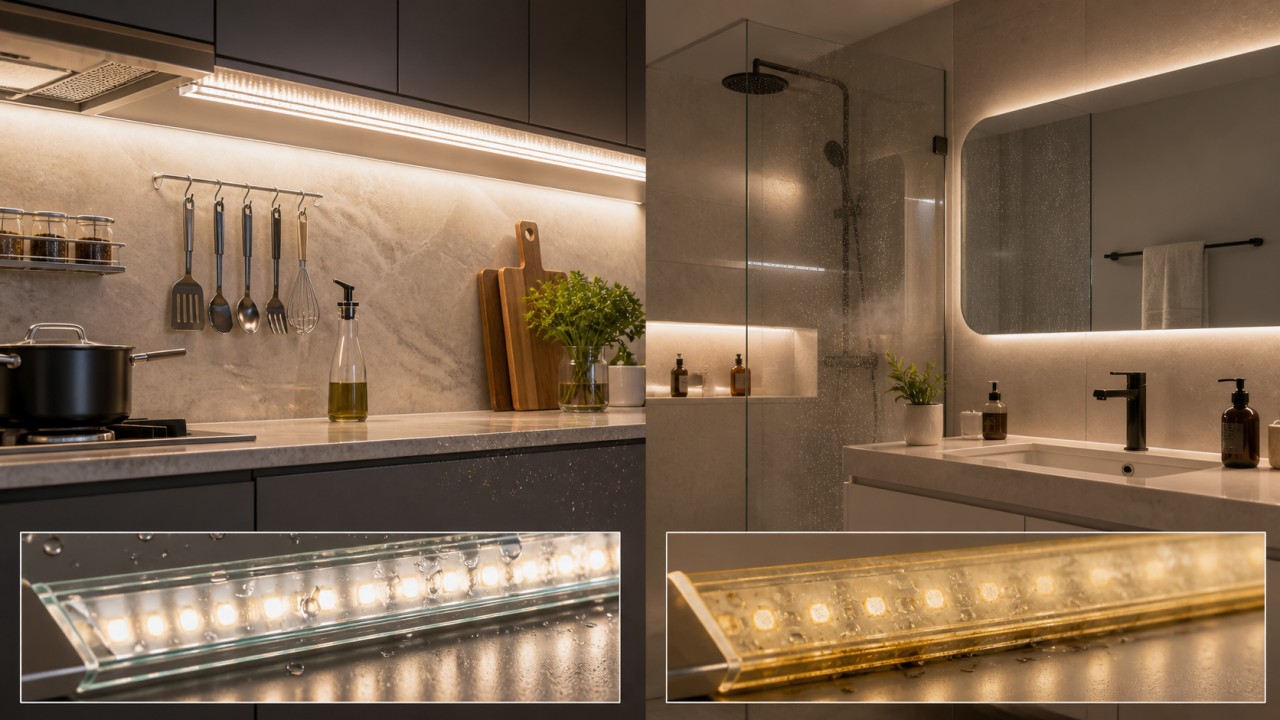
Glass Lampshade Selection Guide
Is there a golden ratio between transmittance and haze for glass diffusers, and what values are recommended for different scenarios?
There is no universal "golden ratio" between transmittance and haze for glass diffusers. The two parameters solve different problems. Transmittance tells you how much light passes through the glass, so it directly affects luminaire efficiency and room brightness. Haze tells you how much of that transmitted light is scattered, so it affects softness, glare control, and whether LED points remain visible. A good diffuser is not simply the clearest or the milkiest one. It is the one whose transmittance, haze, LED spacing, mixing distance, and use scenario work together.
For task lighting, such as study desks, kitchen countertops, workbenches, and makeup mirrors, high transmittance should be the priority. A practical range is about 85-92% transmittance with 5-25% haze. If the glass is clear or very low in haze, the fixture must include glare-control features such as a recessed light source, baffle, louver, cut-off angle, micro-prism, reflector, or lens. Otherwise the lamp may be efficient but visually harsh.
For general ambient lighting in living rooms, dining rooms, corridors, and ceiling lights, the best choice is usually a balance between brightness and softness. A useful range is about 70-85% transmittance with 30-60% haze. This can soften point-like LEDs into a more even luminous surface without wasting too much light. Opal glass, lightly frosted glass, and fine micro-textured diffusion glass are common solutions.
For bedrooms, relaxation areas, night lights, home-theatre support lighting, and mood lighting, visual comfort is usually more important than maximum output. A shade with about 50-70% transmittance and 70-90% or higher haze can create very soft light with weak directionality and gentle shadows. The trade-off is lower useful output, so this type of diffuser should not be the only source for high-illuminance tasks.
For LED strips, linear lights, and large ceiling panels, the diffuser often needs both high haze and acceptable transmittance. A common target is about 65-85% transmittance with 70-95% haze, depending on LED pitch and the distance between the LEDs and the diffuser. Dense LED spacing and a larger mixing distance allow lower haze. Sparse LED spacing and a shallow fixture require higher haze or a micro-structured diffuser to remove dots and hot spots.
Accent lighting and decorative lighting should be judged separately. Spotlights, wall washers, and display lights need beam direction and clarity, so they usually work best with glass above 90% transmittance and below 10-20% haze, or with proper optical lenses. Decorative pendants, vintage lamps, and bar or cabinet lighting can accept much lower transmittance, sometimes 30-70%, because the goal is sparkle, color, reflection, and atmosphere rather than maximum illumination.
In short, do not look for one magic ratio. Use high transmittance and low haze when efficiency and detail visibility matter; medium transmittance and medium-high haze when comfort and evenness matter; lower transmittance or high haze when atmosphere matters; and low haze with optical control when beam precision matters.
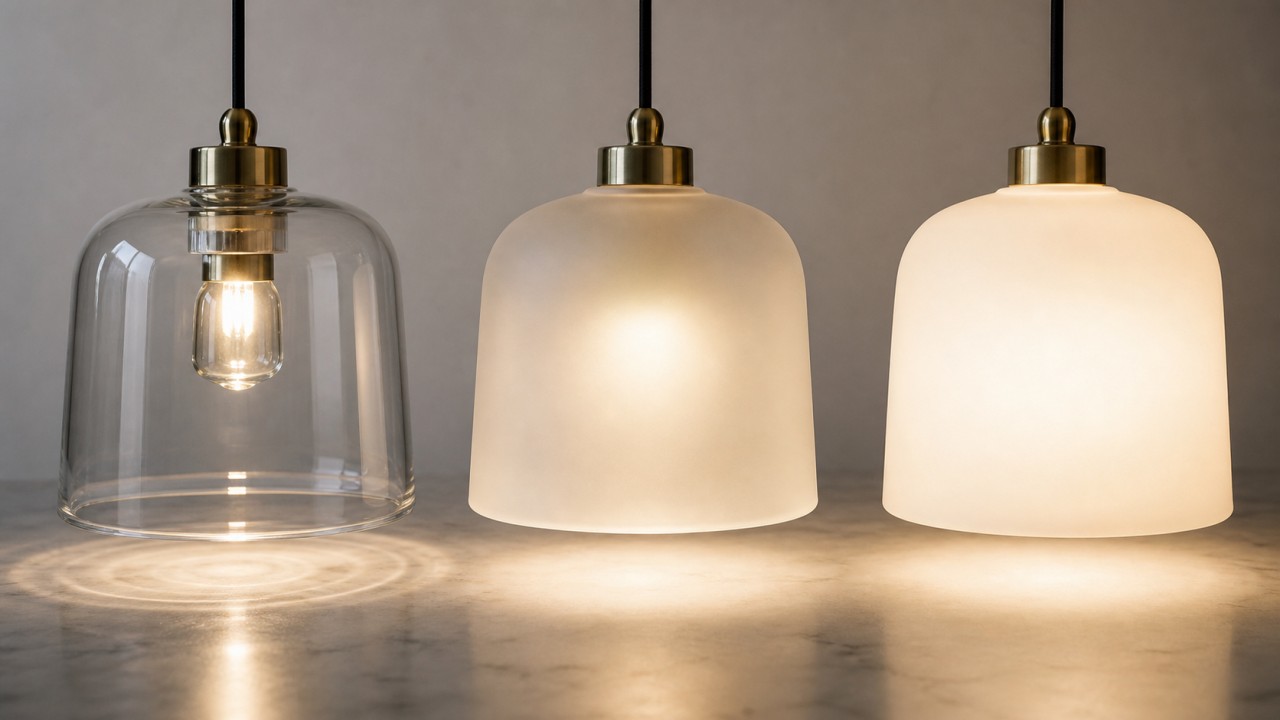
How should soda-lime glass, borosilicate glass, and crystal glass be selected for luminaires based on cost and performance?
The choice among soda-lime glass, borosilicate glass, and crystal glass depends mainly on four factors: budget, thermal environment, mechanical safety, and decorative effect. All three can be used in luminaires, but they are not interchangeable in every application.
Soda-lime glass is the most common and cost-effective option. It has a stable supply chain and is easy to press, blow, edge-grind, frost, print, coat, and temper. Ordinary clear soda-lime glass has enough transmittance for most residential shades. It is suitable for ceiling-light covers, wall-lamp shades, table-lamp shades, decorative pendant shades, and low-power LED covers. Its weakness is thermal shock resistance. Because its thermal expansion is higher than that of borosilicate glass, it is more vulnerable when the shade is close to a hot source, when the temperature difference is large, or when the wall thickness is uneven. In simple terms, soda-lime glass is best for moderate-temperature, cost-sensitive, general-purpose fixtures.
Borosilicate glass is stronger in thermal shock resistance, chemical stability, and dimensional stability. Its low coefficient of thermal expansion allows it to tolerate rapid heating and cooling much better. It is a better choice for high-power LED spotlight lenses, glass parts close to the light source, kitchen and bathroom fixtures, outdoor or semi-outdoor lamps, sealed shades, and fixtures that must remain stable at elevated temperatures. It costs more and is usually harder to process, but it offers better safety and long-term reliability. For sealed lamps, high-temperature lamps, or products that are difficult to service, borosilicate glass can be more economical over the full product life.
Crystal glass is valuable mainly for decoration rather than ordinary lighting efficiency. It usually has a higher refractive index and stronger sparkle, reflection, and prismatic effects. It is suitable for chandelier pendants, crystal arms, decorative prisms, and ornamental shade details. Crystal glass creates a luxurious visual effect, but it is heavier, more expensive, and can produce glare. Traditional lead crystal also raises environmental and heavy-metal compliance concerns, so many modern products use lead-free crystal or high-clarity glass. Crystal should not be treated as a universally "better" lampshade material. It is excellent for decorative layers, but not necessarily for large-area task lighting or high-temperature sealed shades.
A practical rule is: choose soda-lime glass for normal residential shades when cost matters and temperature is moderate; choose borosilicate glass for high heat, high power, thermal shock, sealed structures, or stricter safety requirements; choose crystal glass when sparkle, refraction, and decorative luxury are the main goals. Many fixtures combine materials, for example using soda-lime or borosilicate glass for the main shade and crystal glass for decorative pendants.
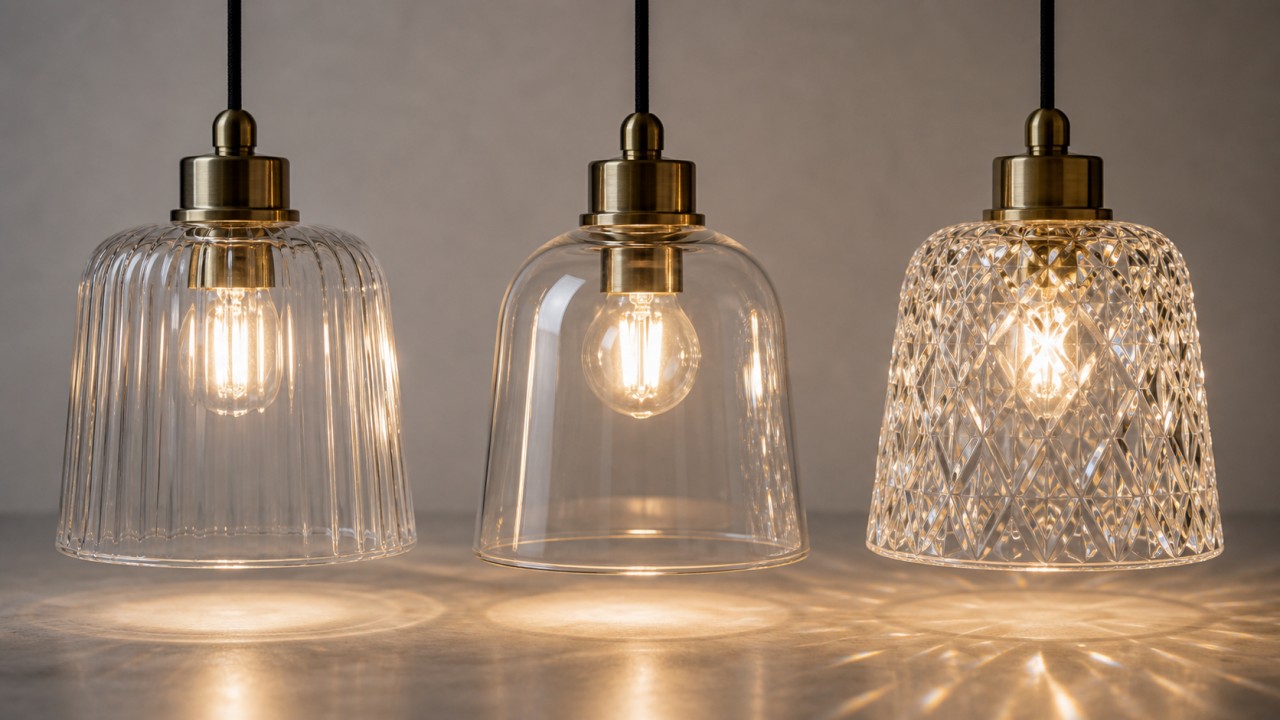
How do blown, pressed, and centrifugally formed glass shades differ in thickness uniformity and optical consistency?
Blown, pressed, and centrifugal-formed glass shades differ greatly in thickness control, optical consistency, dimensional repeatability, and decorative character. The forming method should be chosen not only for shape, but also for how strict the optical requirements are.
Blown glass offers the greatest freedom of form and the strongest handmade character. It is suitable for globes, teardrops, organic shapes, irregular art shades, and small custom batches. It can intentionally show natural flow, small bubbles, handmade ripples, and subtle variation, which are desirable in many decorative luminaires. However, blown glass is usually the hardest to control in thickness. The shoulder, neck, bottom, and curved transition areas may become thicker or thinner. In clear shades, this can cause local magnification, visual distortion, uneven brightness, or slight color variation. Blown glass is excellent for artistic pendants and wall lamps, but less ideal for strict beam control or highly uniform luminous surfaces.
Pressed glass is formed by pressing softened or molten glass into a mold. It is better for mass production and normally provides stronger repeatability than handmade blowing. It is suitable for ceiling-light panels, patterned shades, ribbed glass, lenses, diffusers, and shades with precise mounting features. Pressing can integrate textures, prisms, microstructures, and assembly edges directly into the glass, which is useful for optical control and mechanical positioning. The challenges are mold marks, parting lines, residual stress, and surface quality. If mold temperature, pressing pressure, or annealing is not stable, pressed glass can still show flow marks, waviness, or optical unevenness.
Centrifugal forming is commonly used for bowls, disks, domes, and other rotationally symmetrical shades. Molten glass spreads in a rotating mold under centrifugal force, creating a smooth continuous curved form. Its advantages are smooth surfaces, natural round geometry, and suitability for wide circular shades. Thickness distribution is usually more stable than handmade blowing, but the rim, base, and areas with rapid curvature changes can still become thicker or thinner depending on rotation speed, glass viscosity, and temperature. Centrifugal forming is good for decorative pendant shades, ceiling shades, and round diffusers, but not for very complex asymmetric shapes or high-precision lenses.
In general, for thickness uniformity and optical consistency, precision pressed glass tends to be the strongest, centrifugal forming is in the middle, and handmade blowing has the largest variation. This ranking is not absolute: automatic blowing, mold blowing, and high-quality centrifugal processes can all improve consistency. The final quality depends on mold accuracy, glass viscosity, forming temperature, rotation speed or pressure, annealing schedule, thickness inspection, and polariscopic stress inspection.
A practical selection rule is: use blown glass for artistic shape and handmade character; use pressed glass for batch consistency, controlled texture, and assembly precision; use centrifugal forming for large round curved shades and smooth decorative surfaces. If the shade is part of the optical control system or main lighting system, prioritize the process with better thickness and stress control.
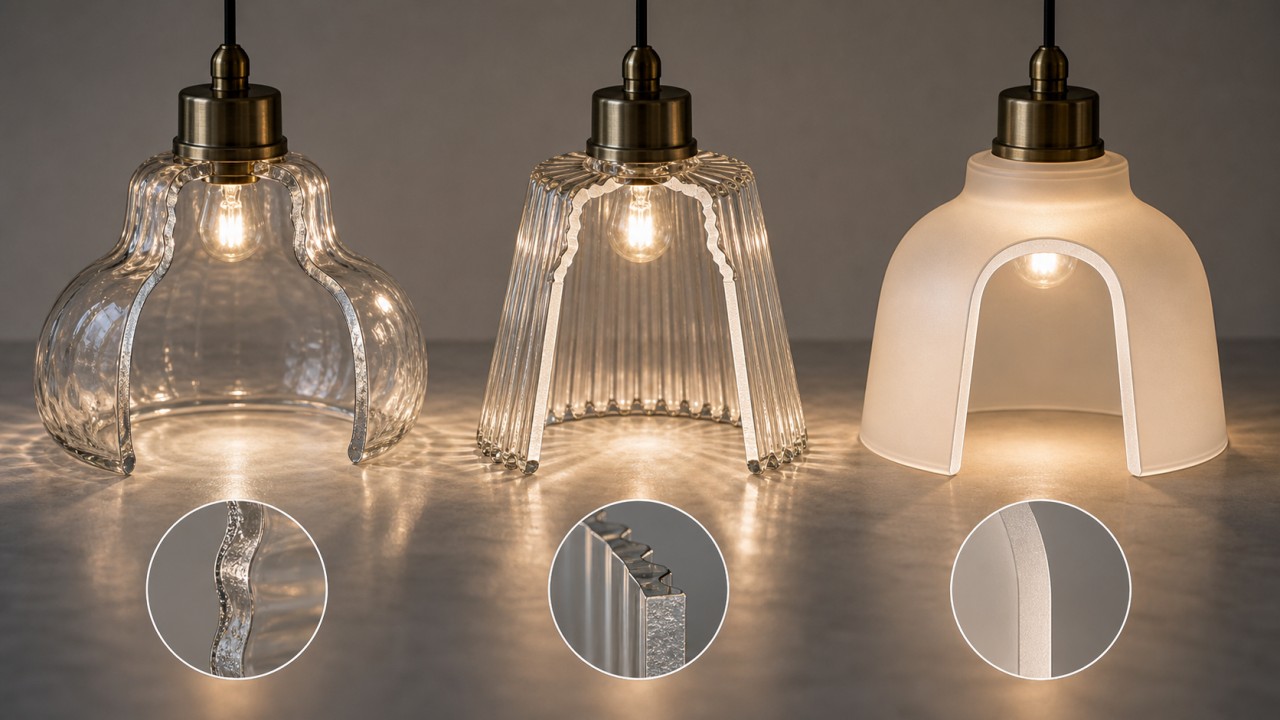
What are stress patterns in glass lampshades, and how can quality control reduce their impact on light efficiency?
"Stress marks" in a glass lampshade refer to visible patterns, rainbow-like bands, dark patches, or uneven brightness caused by residual internal stress or uneven stress distribution in the glass. They may not be obvious under normal room light, but they become easier to see when the lamp is switched on, when the glass is viewed through polarizing filters, or when a uniform light source is placed behind the shade. The root cause is related to cooling, annealing, tempering, wall-thickness variation, and local temperature differences.
After glass is formed at high temperature, it must cool in a controlled way. If cooling is too fast, if the wall thickness varies too much, or if some regions heat or cool differently, tensile and compressive stresses remain inside the glass. Tempered glass also intentionally contains surface compression and internal tension, which is necessary for safety behavior. But if the process is poorly controlled, visible stress patterns can appear. Stress can cause slight birefringence, changing the polarization of transmitted light and creating colored bands or patches under polarized viewing.
The effect on lighting performance is usually not a simple large loss of lumens. The bigger problem is uniformity and visual quality. Stress marks can create local brightness differences, color unevenness, distorted transmitted images, dirty beam edges, or cloud-like patches on large ceiling panels. In a decorative shade, slight stress may be acceptable. In a large uniform luminous panel, clear glass shade, optical lens, wall washer, or premium luminaire, it can seriously reduce the perceived quality.
Stress reduction should begin with product design. The shade wall should be as uniform as possible. Sudden thick areas, sharp corners, abrupt curvature changes, and local glass masses should be avoided. The mounting structure should also avoid excessive point pressure from metal clips, screws, or gaskets, because installation stress can combine with thermal stress.
The forming and annealing process is equally important. Forming temperature, mold temperature, cooling speed, and annealing schedule must be stable. Insufficient annealing leaves high residual stress; uneven annealing can create distortion and optical inconsistency. For tempered glass, heating uniformity, air-quench uniformity, roller marks, and edge stress must be controlled. Large glass panels especially require uniform heating and cooling.
Quality control should include polariscopic inspection or polarized-film sampling to check stress bands, stress concentration, and batch variation. For optical parts and high-end shades, the supplier should define acceptable stress levels, visible-defect zones, and stricter requirements for the main luminous area. Thickness tolerance, warpage, edge chips, and thermal-shock resistance should also be checked. Glass with obvious stress should not be used in the main luminous surface or lens area.
Finally, the luminaire structure must allow for thermal expansion. The glass should not be clamped too rigidly. Elastic gaskets, floating mounts, and proper clearance allow the glass to expand and contract slightly during heating and cooling. The practical solution is uniform thickness, controlled annealing or tempering, polariscopic inspection, and stress-friendly mechanical mounting.
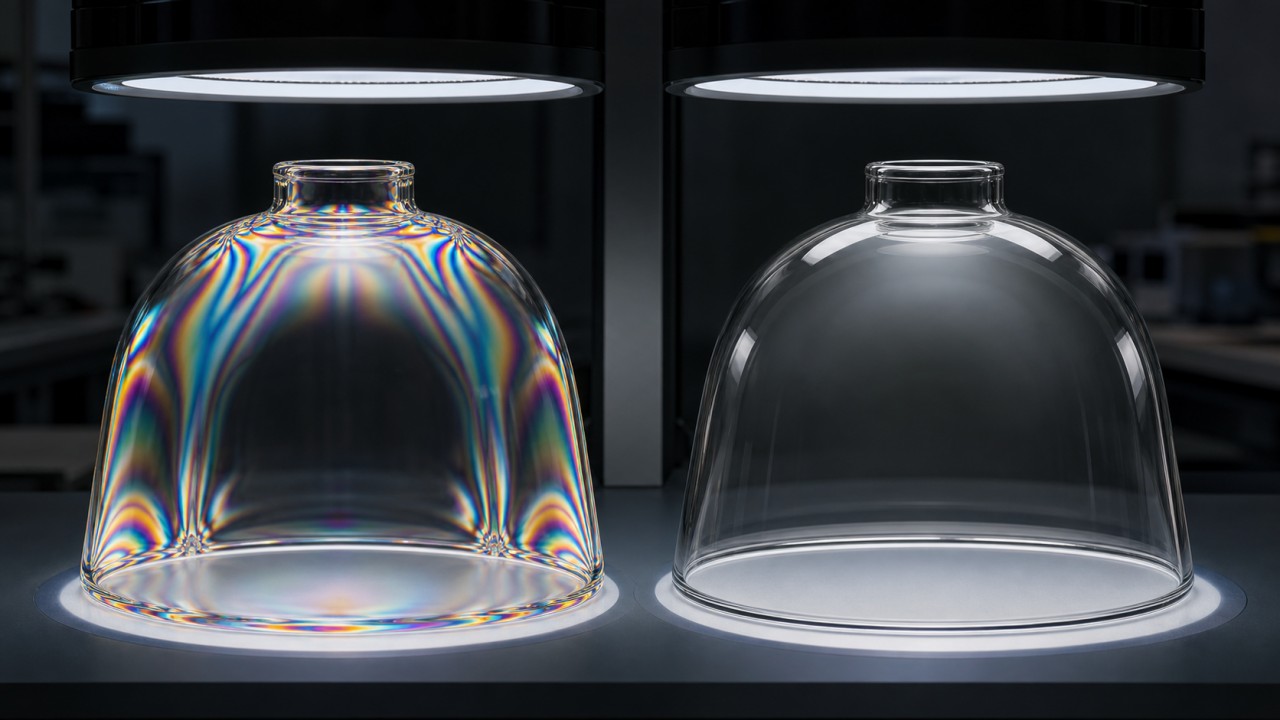
How do inner-surface treatments, such as internal sandblasting and internal coating, differ from outer-surface treatments in diffusion and anti-soiling effects?
Inner-surface treatment and outer-surface treatment may look similar, but they affect light, cleaning, touch, and durability in different ways. A simple rule is: the inner surface mainly treats the light source, while the outer surface mainly interacts with the environment and the user.
Inner sandblasting, inner frosting, or inner diffusion coating scatters the light early, close to the source. This helps hide LED beads, filaments, and local hot spots. Because the outer surface can remain smooth, it is easier to wipe clean and less likely to trap fingerprints, grease, dust, or water stains. For kitchens, bathrooms, wall lamps, and table lamps, an inner-frosted and outer-smooth shade is often easier to maintain than an outer-frosted shade. The weakness is that the inner surface is closer to heat and optical radiation. If an inner coating is used, heat resistance, yellowing resistance, and adhesion must be verified.
Inner coating is often used for reflection, semi-transparency, smoked effects, gradients, or special color effects. Its advantage is that the coating is not directly exposed to touch, wiping, or airborne contamination, so abrasion risk is lower. The outer surface can still feel like clean glass. The disadvantage is that the coating may age, discolor, or peel if it is too close to a hot source, especially in a sealed shade or high-power fixture. Temperature control and coating quality are therefore critical.
Outer sandblasting, acid etching, frosting, or embossing has a more direct visual and tactile effect. It gives the glass a soft matte appearance, reduces external reflections, and can make the shade look quieter. However, rough outer surfaces are more likely to collect fingerprints, oil, limescale, and dust. They are also harder to clean without leaving shiny rubbed areas or scratches. In kitchens, outer sandblasting or deep external texture is especially risky because oil can enter the microscopic roughness and gradually turn the surface yellow or dull.
Outer coatings are useful for AG anti-glare, AF anti-fingerprint, hydrophobic, oleophobic, metallic, or colored decorative effects. Because the coating faces touch, cleaning agents, friction, and humidity directly, it must be tested for abrasion resistance, chemical resistance, damp-heat resistance, and adhesion. The advantage of an outer easy-clean coating is obvious: it can directly improve anti-fouling performance. The disadvantage is that it is more exposed to daily damage than an inner coating.
Optically, inner diffusion is better for breaking up point sources before the light exits the shade, which reduces LED dot visibility. Outer diffusion acts more like the final softening layer and strongly affects the surface appearance and external reflection. For LED luminaires that require high uniformity, inner diffusion or internal glass diffusion combined with a smooth outer surface is often preferred. For decorative lamps, outer embossing or frosting can create touch and shadow effects. For kitchens, bathrooms, and children's rooms, the safer maintenance strategy is to keep the outside smooth and place diffusion, color, or texture on the inside or within the glass structure.
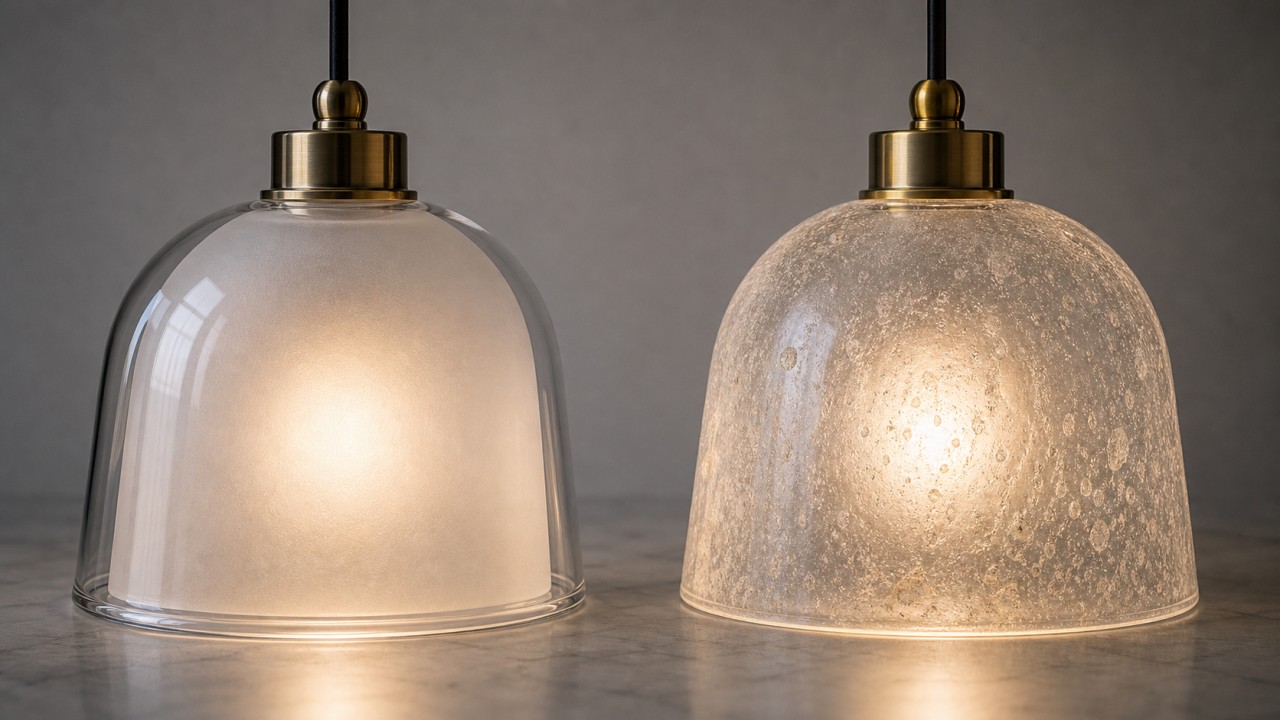
For the same luminaire, how much can actual light output differ between clear glass and fabric-textured embossed glass?
When the same luminaire changes from clear glass to fabric-pattern embossed glass, the optical efficiency usually drops noticeably. The exact amount depends on glass color, texture depth, thickness, haze, iron content, surface reflection, and the optical path of the fixture. The key is not simply whether the part is glass, but how much light it absorbs, reflects, and scatters.
Ordinary clear soda-lime glass usually has about 86-90% transmittance for a single sheet, while low-iron ultra-clear glass can reach about 91-92%. If the shade shape is simple, smooth, and not too thick, clear glass causes relatively small total lumen loss. Most loss comes from surface reflection and absorption in the glass. Its advantages are high efficiency, good beam preservation, and strong brightness. Its disadvantages are direct visibility of the light source, possible glare, double reflections, and a sharper lamp image.
Fabric-pattern embossed glass has surface relief and texture, so it increases scattering, internal reflection, and optical path length. If the texture is shallow, colorless, and thin, transmittance may still be around 75-85%. If the texture is deep, haze is high, the glass is thick, or the glass is tea-colored or grey, transmittance may fall to about 55-75%. Heavier decorative glass can even be below 50%. In practice, replacing clear glass with fabric-pattern embossed glass commonly reduces total light output by about 10-35%. Deep-textured or tinted versions may reduce it by 40-50%.
However, lower total efficiency does not automatically mean worse visual performance. Clear glass sends out more direct light and may create higher illuminance, but it also makes the source image clearer and glare more obvious. Fabric-pattern embossed glass spreads the light, softens the luminous surface, reduces LED dot visibility, and lowers direct harshness. Sometimes the measured illuminance is lower, but the room feels more comfortable. Therefore, the comparison should include total lumens, work-plane illuminance, glare, beam uniformity, and visual comfort.
For example, a 1000 lm LED module may deliver about 850-900 lm from the fixture with clear glass. With shallow fabric-pattern embossed glass, the output may be around 700-800 lm. With deep or tinted patterned glass, it may fall to 550-700 lm. Work-plane illuminance may change differently from total lumens because embossed glass spreads the beam: center brightness may drop, while surrounding brightness becomes softer and more even.
If the fixture is used for main lighting, task lighting, or a ceiling light that requires high illuminance, the design should reserve extra lumen output when using patterned glass. A common allowance is about 15-40% more LED lumens or additional fixtures, depending on the texture. If the fixture is a bedside lamp, dining pendant, wall lamp, or mood light, the efficiency loss may be acceptable because it buys softness, decorative texture, and source hiding.
The most reliable method is measurement: use an integrating sphere for total luminous flux, a photometric test for light distribution, and a lux meter for actual desk or floor illuminance. The material name alone is not enough, because "fabric-pattern embossed glass" can range from a very light texture to a heavy decorative surface.
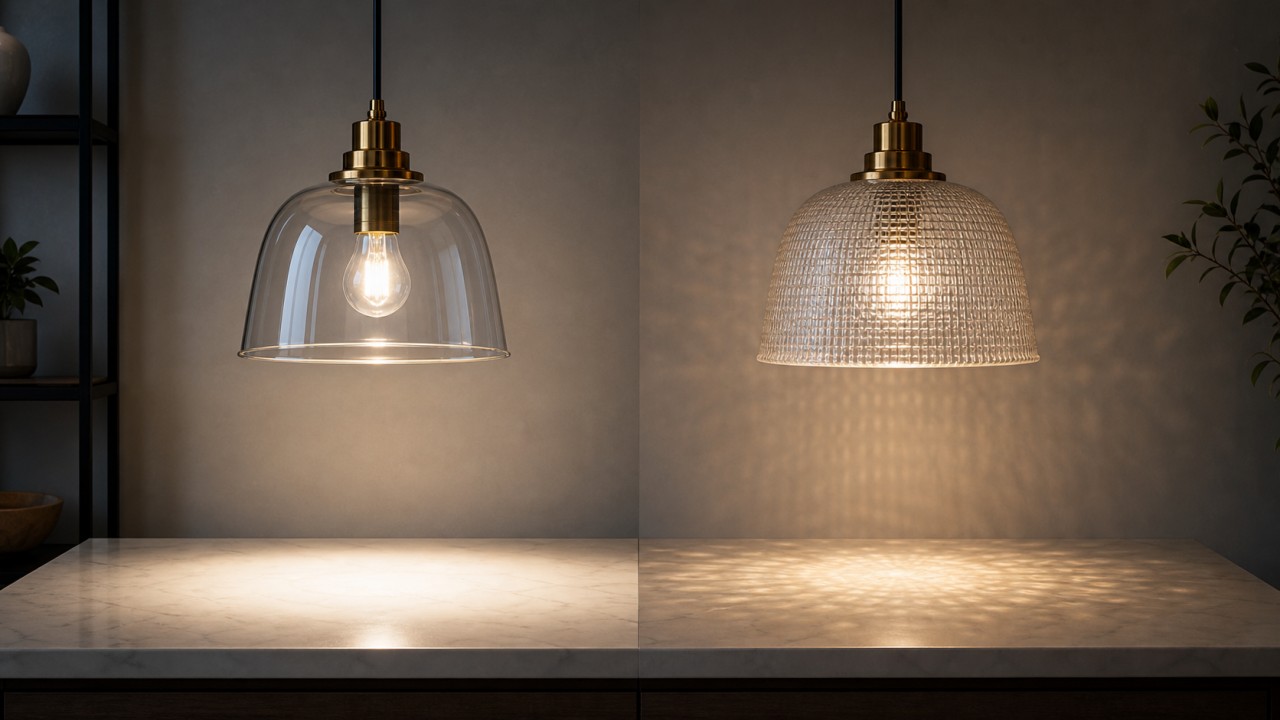
Functions and performance requirements of lighting glass
Lighting glass is a key material for manufacturing electric light source devices and electrical components. It is mainly used to produce lamp tubes, bulb envelopes, stems, exhaust tubes, lamp reflectors, discharge tubes, etc. In recent years, the amount of glass used in electric light source production has far exceeded that of any other material.
Glass has become one of the essential materials for electric light source manufacturing due to its transparency, hardness, excellent corrosion resistance, heat resistance, electrical and optical properties, its ability to be shaped by a wide range of forming and processing methods, and the possibility of tailoring its properties by adjusting the chemical composition. Materials for electric light sources are also evolving with the continuous improvement in material performance and preparation techniques. Advances in light source technology have led to the constant upgrading of lighting products, with a variety of energy-saving electric light sources now flourishing. This, in turn, places higher demands on the glass used in electric light source materials.
Glass exhibits many physical and chemical properties. Depending on the application requirements, the main properties of electric light source glass include mechanical properties, thermal properties, electrical properties, vacuum-related properties, and chemical stability. As glass for electric light sources, it should generally meet the following requirements:
High light transmittance: the lamp should transmit all wavelengths in the visible spectrum. In the ultraviolet region, it should transmit the required UV radiation. Furthermore, the glass should not discolor or darken under irradiation.
Good thermal stability: it must withstand the thermal shock caused by switching the light on and off.
Good airtightness: the light source is either evacuated or filled with a certain amount of working gas, so the glass structure must be dense and gas-tight. The glass should also be easy to clean and outgas, and must be capable of forming a hermetic seal with metal lead wires without leakage.
Good mechanical strength at working temperature: it should be able to withstand the gas pressure generated during lamp fabrication and ignition.
Good electrical insulation properties: high electrical resistivity and low dielectric loss are required.
Good chemical stability: this is typically evaluated by weight loss upon exposure to alkali, acid, or water. In practice, it is often required that the glass material does not precipitate alkalis, lose its transparency, and maintain its properties for at least half a year. It is also expected that the bulb will not be corroded by the surrounding atmosphere or by the metal vapor introduced into the lamp at its working temperature.
Good sealing and processing performance: the glass should have an appropriate coefficient of thermal expansion and softening point, with only a small fluctuation range. It should also be easy to outgas in vacuum.
Minimal visible defects in the glass: bubbles, striae, crystals, and sand particles in the glass must be strictly controlled within acceptable limits.
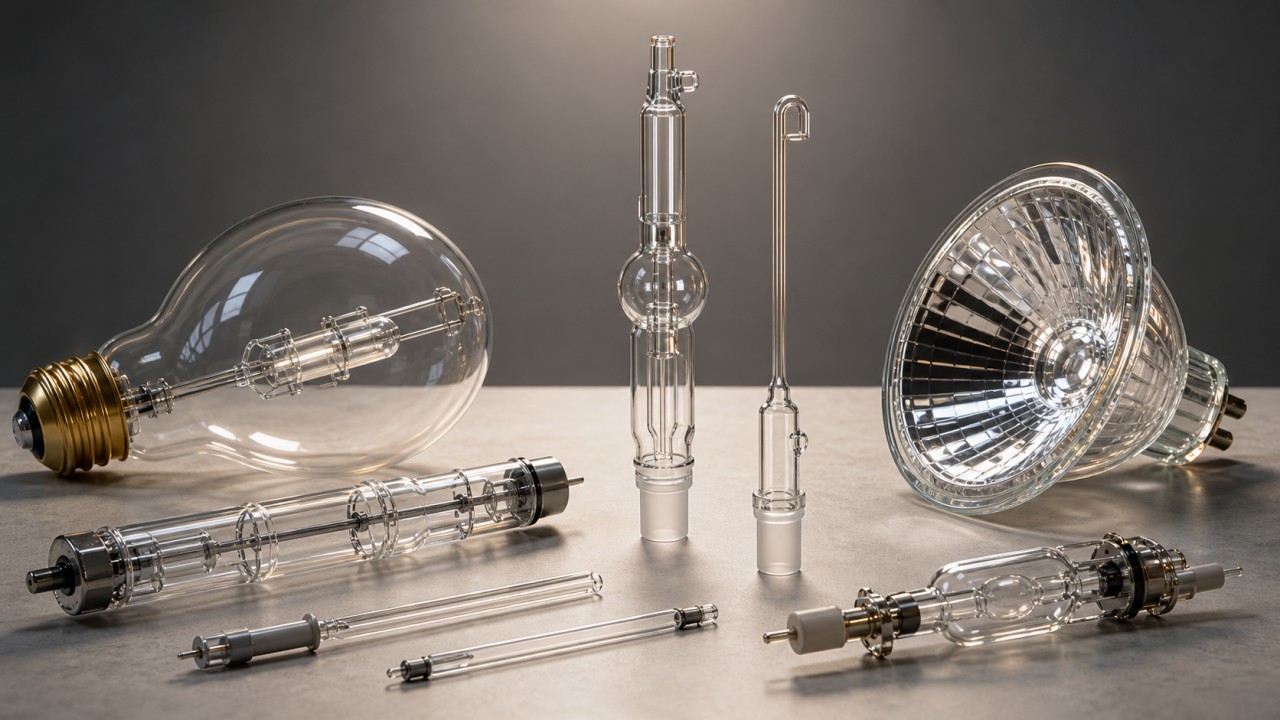
How can glass lampshade transmittance and haze be determined according to space function?
When choosing a glass shade for a lighting fixture, transmittance and haze should not be treated as abstract laboratory numbers. They should be selected according to what the room actually needs the light to do. Transmittance describes how much visible light passes through the glass. Haze describes how much of that transmitted light is scattered. In simple terms, high transmittance gives more usable brightness, while higher haze makes the light softer, more diffused, and less likely to expose the LED points or bulb image directly.
For task-oriented spaces, transmittance should be the priority. Examples include kitchen countertops, reading desks, study rooms, dressing mirrors, workbenches, and laundry areas. In these places, users need to see edges, textures, ingredients, documents, or facial details clearly. Clear glass, low-iron glass, lightly frosted glass, or fine micro-textured glass is usually suitable. A practical target is high transmittance, often above 80-90%, with low to moderate haze. If the glass is completely clear, however, the fixture must control glare by using a recessed light source, a baffle, a reflector, a lens, or a sufficiently large luminous surface. Clear glass alone gives efficiency, but not comfort.
For ambient lighting in bedrooms, living rooms, corridors, and general ceiling lights, the goal is not maximum sharpness but visual comfort. These spaces benefit from medium to high haze because the glass has to hide bright LED beads, reduce the harsh contrast between the light source and the ceiling, and spread light more evenly. Opal glass, frosted glass, acid-etched glass, and high-quality diffusion glass are common choices. A typical design direction is moderate transmittance, roughly 60-85%, with medium or high haze. The light may lose some efficiency, so the lamp may need more lumen output, but the perceived comfort is usually much better.
For accent lighting, such as illuminating a painting, a sculpture, a dining table, a display shelf, or a textured wall, the requirement is different again. Accent lighting needs direction and contrast. If the shade has too much haze, the beam becomes blurred and the highlight loses focus. In this case, the glass should have high transmittance and low haze, or a controlled optical texture such as ribbed glass, a micro-lens pattern, or a precise glass lens. The aim is to preserve the beam shape while slightly softening the edge and reducing distracting secondary glare.
For decorative lamps, the shade itself is part of the visual object. Here the right answer depends on the intended atmosphere. Transparent glass creates sparkle, reflections, and a visible bulb effect; smoked glass reduces brightness and adds depth; amber or champagne glass adds warmth; opal glass creates a calm glowing volume. In decorative lighting, lower transmittance can be acceptable if the lamp is not expected to be the main light source. The important point is to decide whether the shade is supposed to "show the light source" or "hide the light source."
Bathrooms and kitchens also require functional corrections. In bathrooms, high humidity makes anti-fogging, sealing, and easy cleaning important, so high-transmittance tempered glass with an anti-fog or hydrophobic coating is often better than heavy frosted glass. In kitchens, oil and vapor can quickly reduce effective transmittance, so smooth glass with an oleophobic coating may perform better in real life than a beautiful textured shade that traps grease.
Overall, the safest rule is this: use high-transmittance, low-haze glass where people need precision; use medium-transmittance, high-haze glass where people need comfort and softness; use low-haze or controlled optical glass where beam direction matters; and use tinted or highly decorative glass mainly where atmosphere matters more than brightness. Good shade selection is always a balance between brightness, glare control, diffusion, maintenance, and the visual role of the fixture.
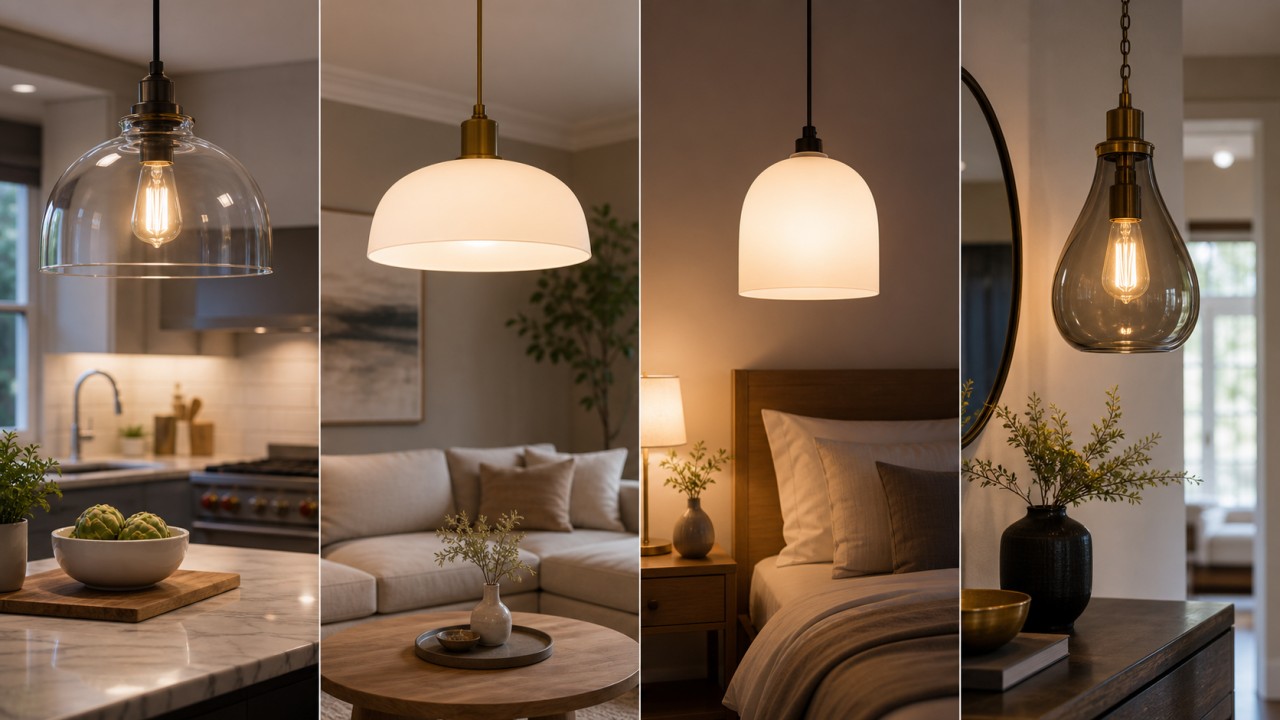
For spaces with different color-temperature preferences, what base-colored glass lampshades should be paired with them?
The base color of a glass shade should be matched with the desired feeling of the space and with the color temperature of the light source. The shade is not only a decorative shell. It acts like a filter: it can absorb some wavelengths, shift the perceived color temperature, reduce brightness, and change the way skin, wood, fabric, food, and wall colors appear. Therefore, choosing the wrong glass tint can make even a good LED lamp look dull, dirty, or unnatural.
For warm spaces using 2700-3000K light, such as bedrooms, dining rooms, lounge corners, and relaxed living rooms, warm or neutral-warm glass is usually the best match. Suitable options include clear low-iron glass, light amber glass, champagne glass, tea-colored glass, warm smoked glass, and milky opal glass with a warm LED source inside. These shades reinforce the cozy feeling and make wood, warm fabrics, and food look more inviting. However, strongly amber or brown glass should be used carefully. It may look beautiful as a decorative object, but it can reduce transmittance significantly and make the room too dim if used as the main light.
For neutral and practical spaces using 3500-4000K light, such as general living areas, hallways, open kitchens, wardrobes, and study-adjacent rooms, the safest choices are clear glass, low-iron glass, opal white glass, and very light grey glass. These shades do not strongly change the original light color, so the lamp remains visually stable. They are especially useful when the room contains many materials and colors, because they avoid pushing everything too yellow, too blue, or too green.
For cool or clean-looking spaces using 4000-5000K light, such as home offices, modern kitchens, utility rooms, and minimalist interiors, clear glass, low-iron glass, pale grey glass, lightly smoked glass, or very subtle blue-green glass can be used. These choices keep the light crisp and relatively neutral. But deep blue, deep green, and heavy smoke glass should not be used for general lighting unless the lamp is intentionally decorative. They reduce brightness and can distort color rendering.
The most common mistake is mixing strong tints against the intended color temperature. A cool white LED behind amber glass often does not become pleasantly warm; it may become grey-yellow and muddy because the glass absorbs part of the spectrum while the LED still has a cool spectral structure. Similarly, a warm LED behind blue or green glass can produce an unpleasant olive, dirty grey, or weak cyan tone. If the goal is simply to keep the original light color, use clear low-iron glass or opal glass rather than a saturated tinted shade.
Color rendering should also be considered. If the room needs accurate color judgment, such as a kitchen, dining area, makeup area, wardrobe, art corner, or study, the glass should not damage the lamp's CRI performance too much. Deeply colored glass may make red meat, green vegetables, skin tones, or clothing colors look inaccurate. For these rooms, use light-tinted or neutral glass and choose a high-CRI light source, preferably Ra 90 or higher.
In short, warm rooms can use warm or neutral glass; neutral rooms should use clear, opal, or light grey glass; cool modern rooms can use clear or subtly cool-toned glass. Deeply tinted glass is best treated as decorative accent lighting rather than main lighting. The shade color should support the desired atmosphere while preserving enough brightness and color fidelity.
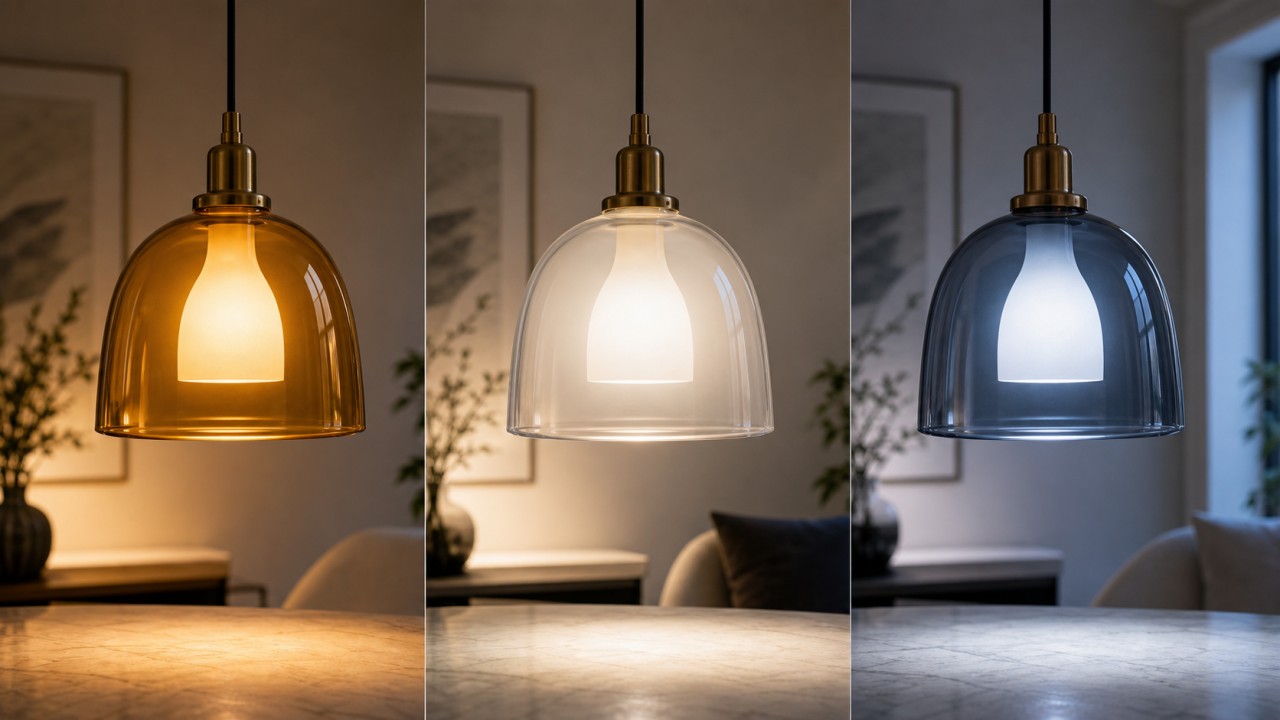
In layered lighting, which glass surface finishes are best suited for ambient lighting, accent lighting, and task lighting?
Layered lighting works because each layer has a different job. Ambient lighting provides the general brightness of the room, accent lighting creates focus and hierarchy, and task lighting supports a specific activity such as reading, cooking, writing, applying makeup, or doing handwork. The surface treatment of the glass should follow these different jobs instead of using the same finish everywhere.
For ambient lighting, the best glass treatments are those that diffuse light widely and reduce the visibility of the light source. Opal glass, frosted glass, acid-etched glass, sandblasted glass, and fine ceramic diffusion glass are common choices. These finishes increase haze, scatter light in many directions, and make the lamp surface look more even. They are suitable for bedrooms, living rooms, corridors, ceiling lights, and wall washers where the goal is a comfortable base layer of light. The advantage is softness and low glare. The trade-off is lower transmittance, so the fixture may need more LED output or a larger luminous area.
For accent lighting, the goal is almost the opposite. Accent light should be controlled, directional, and visually intentional. It is used to highlight art, plants, shelves, dining tables, sculptures, wall textures, or architectural details. The glass surface should therefore preserve beam control. Clear glass, low-haze glass, optical lenses, ribbed glass, micro-prismatic glass, or controlled micro-lens textures are more appropriate. These treatments can keep the beam clear while slightly softening the hard edge or removing small optical defects. Heavy opal or thick frosted glass is usually not ideal for accent lighting because it spreads the light too much and weakens the focal effect.
For task lighting, the glass has to balance brightness with eye comfort. A reading lamp, kitchen under-cabinet light, desk lamp, or mirror light should deliver enough illuminance to the work surface, but it should not expose a harsh LED point to the user's eyes. Good choices include clear glass combined with a deep shade or anti-glare baffle, lightly frosted glass, fine ribbed glass, low-haze diffusion glass, and micro-prismatic glass. The surface should maintain relatively high transmittance, often above 80%, while providing just enough diffusion to soften direct glare. Very milky glass can look comfortable at first glance, but if it scatters too much light away from the work plane, it can reduce useful brightness and make edges appear less crisp.
Decorative lighting is a special layer. It is often used to create atmosphere, sparkle, shadow patterns, or a visible glowing object. Here, textured glass, hammered glass, fluted glass, seeded glass, colored glass, gradient glass, and coated glass can all be appropriate. The decision depends on whether the designer wants clear sparkle, soft glow, patterned shadow, or colored ambience. However, decorative glass should not be confused with task glass. A beautiful heavily textured shade may be visually rich, but it may not provide enough clean light for reading or cooking.
Maintenance also matters. Smooth frosted or opal glass is easier to keep visually clean in bedrooms and living rooms, while textured glass can collect dust. In kitchens and bathrooms, surface treatment should be chosen more conservatively: smooth, coated, and easy-clean glass usually performs better than deep textures. For a practical home, a good layered strategy is to use soft diffusion glass for ambient light, controlled clear or micro-optical glass for accent light, efficient low-glare glass for task light, and expressive textures only where the lamp is primarily decorative.
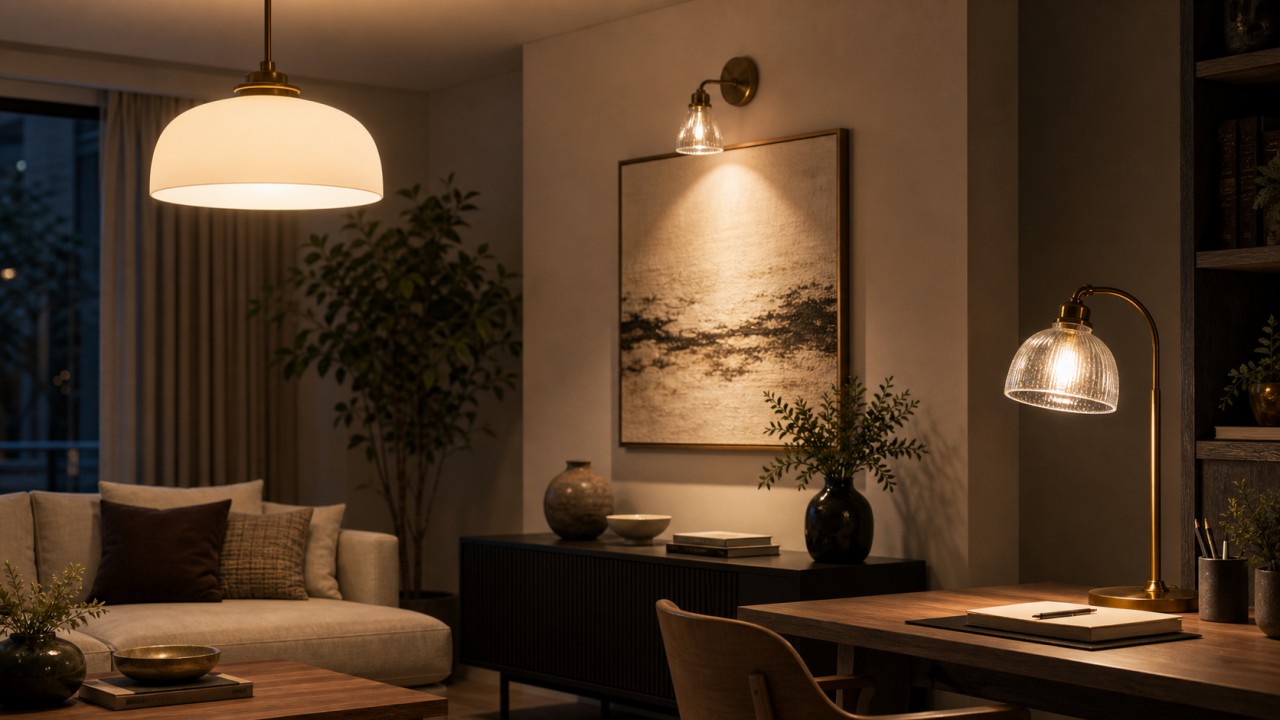
When evaluating the optical quality of decorative glass lampshades, what metrics besides transmittance should be considered?
When evaluating the optical quality of a decorative glass lampshade, transmittance is only one part of the answer. A shade can transmit a lot of light and still look poor if the light is uneven, if the color is patchy, if the glass distorts the view in an uncontrolled way, or if internal defects become obvious when the lamp is switched on. Decorative glass should therefore be judged by a group of indicators rather than by brightness alone.
The first indicator is haze and diffusion behavior. Haze describes how much transmitted light is scattered. High-haze glass, such as opal or frosted glass, can hide the bulb or LED points and create a soft glowing surface. Low-haze glass keeps the view clearer and allows sharper shadow edges. For decorative lamps, neither high nor low haze is automatically better. The correct value depends on the intended visual effect. A pendant lamp meant to glow softly should have even diffusion. A clear glass chandelier meant to sparkle should preserve clarity and reflections. What matters is whether the diffusion is smooth and whether it avoids hot spots, bright dots, and uncomfortable glare.
The second indicator is color uniformity. Decorative glass often uses amber, smoke grey, blue-green, champagne, gradient color, metallic coating, or painted layers. The shade should maintain consistent color across the luminous area. If glass thickness, pigment distribution, coating thickness, or firing quality is uneven, the lamp can show color bands, stains, local patches, or unwanted shifts in color temperature. For gradient or coated glass, the transition should look intentional and smooth, not accidental or blotchy.
The third indicator is optical clarity and controlled distortion. Transparent and semi-transparent shades should be checked by looking through them at a straight line, a grid, or a point light source. Poor glass may create a funhouse-mirror effect because of uneven thickness, surface waviness, or internal stress. Some distortion is acceptable if it is part of the design, such as ribbed glass, hammered glass, or water-ripple glass. But the distortion should be consistent, repeatable, and visually pleasing rather than random.
The fourth indicator is internal defects. Bubbles, stones, cords, streaks, unmelted inclusions, and dense seed clusters can all affect appearance and light distribution. Some small bubbles may be intentional in handmade or vintage-style glass, but large bubbles, sharp inclusions, heavy streaks, or defects located in the main luminous area reduce quality. Defects are especially visible when the glass is backlit, so the shade should be inspected both with the lamp off and with the lamp on.
The fifth indicator is surface-treatment consistency. Sandblasting, acid etching, screen printing, ceramic frit, metallic coating, iridescent coating, embossing, and polishing should be even and durable. Look for streaks, missing areas, drips, scratches, uneven gloss, poor edge finishing, or coating that can be rubbed off during cleaning. In printed or patterned glass, the pattern should align with the lamp structure and should not create unwanted dark zones or irregular shadows.
Finally, thermal and mechanical stability also affect long-term optical quality. Glass that is not properly annealed or that has poor thermal-shock resistance can develop cracks, stress marks, or permanent deformation near the heat source. For higher-power lamps, borosilicate glass or properly tempered and annealed glass may be required. A high-quality decorative shade should therefore combine the intended visual style with controlled haze, stable color, acceptable clarity, low visible defects, durable surface treatment, and enough heat resistance for long-term use.
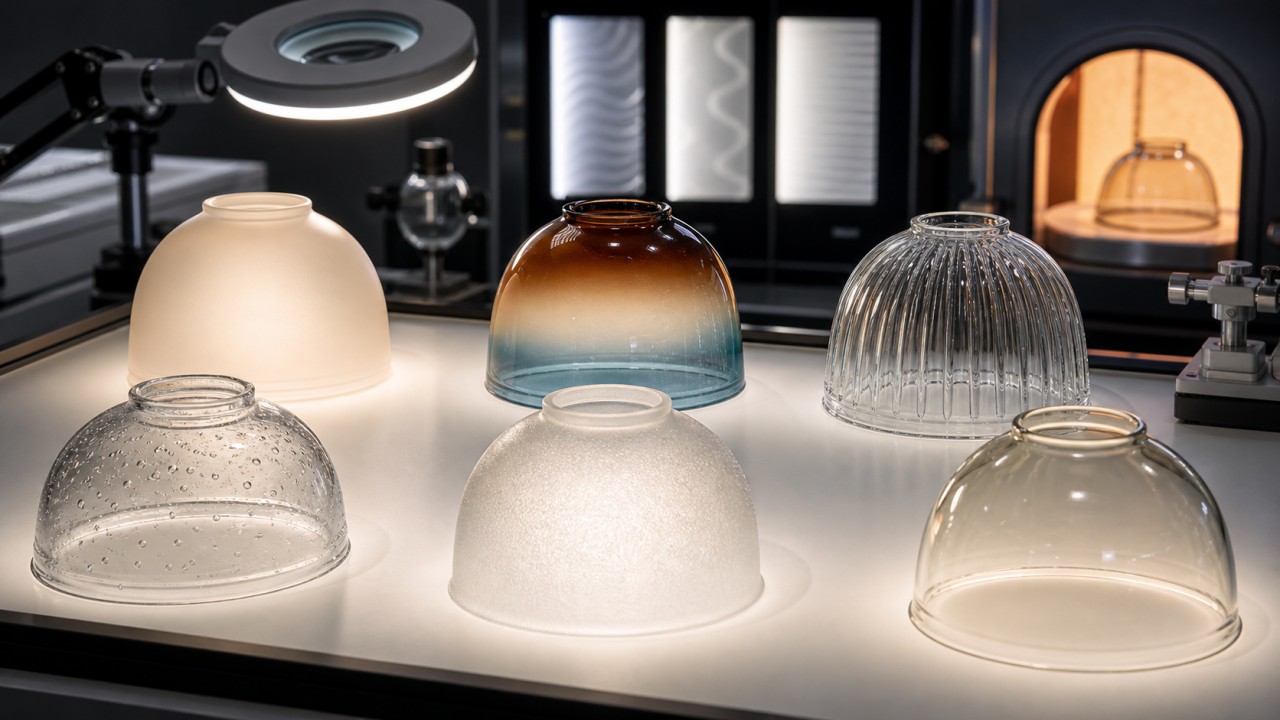
Solving Common Lighting Pain Points
When kitchen fumes turn a glass lampshade yellow, is it glass aging or oil carbonization, and how can it be prevented?
When a kitchen glass shade turns yellow, the cause is usually not the glass itself aging. In most cases, it is a yellow-brown film formed by cooking oil, steam, dust, and heat on the glass surface. Soda-lime glass, borosilicate glass, and tempered glass are chemically stable under normal kitchen-lighting temperatures. Unlike many plastics, they do not normally yellow significantly by themselves. The real causes are grease deposition, oxidation and polymerization of oil under repeated heating, and in some hot areas, partial carbonization of oil residue.
Kitchen fumes contain fine oil droplets, moisture, smoke particles, and decomposed cooking residues. At first, they form a nearly transparent oily film. With repeated heat from the lamp and cooking, the film oxidizes, becomes sticky, attracts dust, and gradually changes from pale yellow to brown-yellow. Near a stove or high-temperature zone, the grease can even carbonize and create darker stains that are much harder to remove. So the problem is usually aged surface contamination, not failure of the glass material.
Prevention starts with the glass surface. Kitchen shades should use smooth, glossy, low-porosity glass with no deep texture. Low-iron tempered glass or borosilicate glass with an oleophobic and hydrophobic outer coating is a strong choice. Avoid external sandblasting, rough frosting, fabric texture, hammered texture, and deep embossing in oily areas, because these microstructures trap grease. If soft light is needed, place the diffusion treatment on the inner side or use an internal diffusion structure while keeping the outside smooth.
The second step is position and structure. Do not place decorative open shades directly in the strongest upward path of cooking fumes. For countertop lighting, linear lights, under-cabinet lights, or enclosed easy-clean fixtures are usually better. The shade shape should be simple, with fewer grooves, inner corners, and decorative lips. A removable shade is also valuable because it can be soaked and cleaned periodically.
Finally, cleaning frequency matters. For light cooking, wipe the glass shade about once a month. For heavy cooking or open kitchens, clean lights near the stove every one to two weeks. Use warm water with neutral dish detergent or a glass cleaner to soften the oil film, then wipe with a microfiber cloth. Avoid steel wool, strong alkali, abrasive powder, and hard scrapers, because they can damage coatings or create fine scratches.
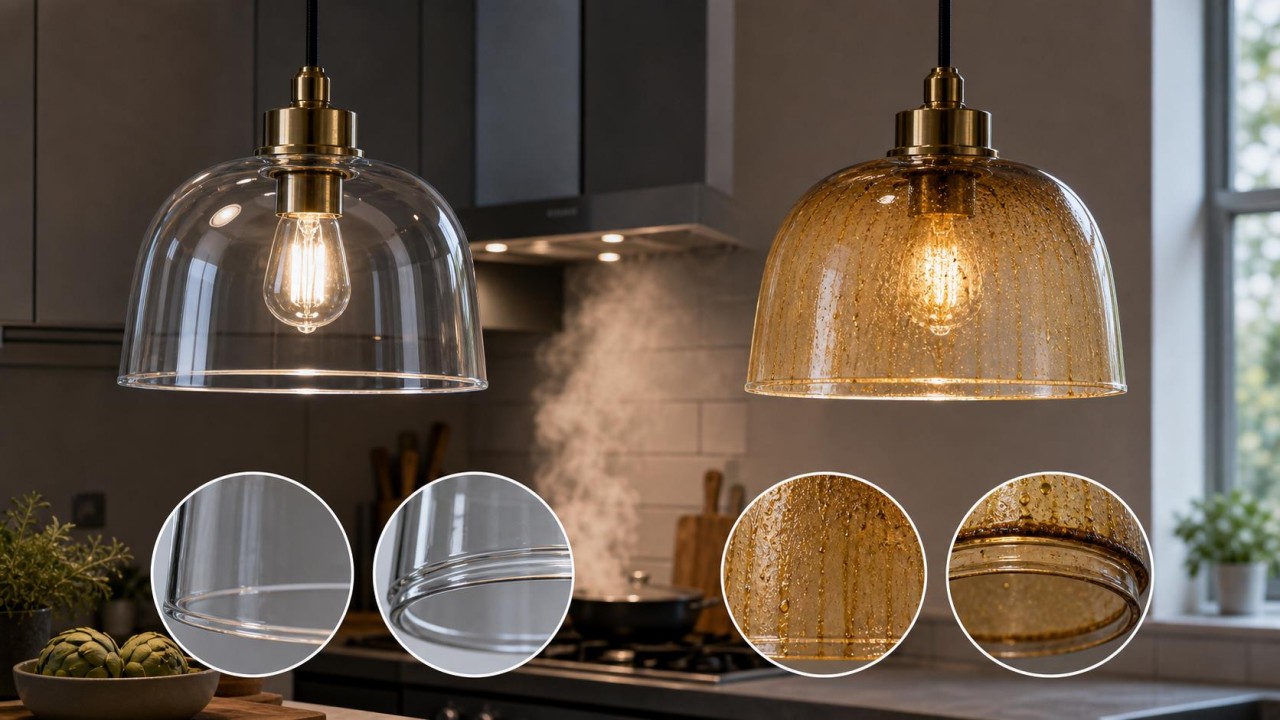
In coastal or high-humidity environments, metal fittings on glass lampshades corrode easily; how should compatible sealing processes be selected?
In coastal or high-humidity environments, the glass shade itself is usually not the first component to fail. The vulnerable parts are metal clips, screws, retaining rings, rods, rivets, springs, and sealed joints. Salt mist, moisture, and cleaning chemicals accelerate corrosion. Once metal parts corrode, the fixture may show staining, reduced holding force, seal failure, uneven stress on the glass, or even loosening of the shade.
Material selection is the first line of defense. For indoor damp areas, 304 stainless steel, anodized aluminum, powder-coated aluminum, or high-quality plated hardware may be acceptable. For coastal homes, semi-outdoor areas, bathrooms, balconies, and sea-view rooms, 316 stainless steel, marine-grade aluminum, fluorocarbon-coated aluminum, or coatings verified by salt-spray testing are safer. Ordinary iron, low-grade plated steel, unsealed aluminum, and thin decorative plating should not be used as critical fixing parts in long-term humid environments.
The sealing process should avoid rigid glass-to-metal locking. Glass and metal have different thermal expansion behavior. If they are clamped together too rigidly, temperature changes can create stress concentration, edge chipping, or seal cracking. A better approach is to use an elastic transition layer such as silicone gaskets, EPDM gaskets, fluorosilicone rings, PTFE pads, or structural adhesive. The gasket cushions stress and also helps isolate galvanic corrosion and capillary water ingress.
For moisture-resistant luminaires, use a full-perimeter seal that still allows stress relief. Transparent silicone, hydrolysis-resistant silicone, MS polymer adhesive, or suitable UV adhesive can bond glass to the frame, but compatibility with glass, metal coating, and cleaning chemicals must be confirmed. Bathroom and semi-outdoor fixtures should also use labyrinth joints, overlapping lips, waterproof breathable vents, and drainage paths, rather than depending on a single bead of sealant.
Galvanic corrosion must also be considered. Stainless screws in direct contact with aluminum, or copper parts mixed with zinc-plated parts, can create galvanic corrosion in a wet electrolyte environment. The structure should reduce direct contact between dissimilar metals. Insulating washers, coatings, or sealants can be used where contact is unavoidable.
For quality control, request salt-spray testing, damp-heat testing, coating adhesion testing, and seal-aging testing from suppliers. A normal indoor product may use 24-48 hours of neutral salt-spray testing as a basic reference. Coastal or semi-outdoor products should use higher levels, such as 96 hours, 240 hours, or more depending on product positioning. The core rule is: use elastic sealing for glass, corrosion-resistant metals and coatings for hardware, and structural drainage, ventilation, and capillary-blocking details for the whole fixture.

How can fingerprints or oil stains be cleaned from frosted or sandblasted glass shades without damaging the surface texture?
The challenge with frosted or sandblasted glass is that its surface is not fully smooth. It contains tiny roughness, pores, and micro-valleys that can trap fingerprints, cooking grease, limescale, and dust. If you rub it hard with a dry cloth, you may spread the oil more evenly and create shiny patches. If you use a hard brush, abrasive powder, or strong alkaline cleaner, you may permanently change the matte texture.
Before cleaning, identify the surface type. Acid-etched glass is usually finer and more resistant to wiping than mechanically sandblasted glass. Sandblasted surfaces are rougher, trap dirt more easily, and can be polished shiny by repeated friction. If the shade has an anti-fingerprint, anti-stain, or oleophobic coating, avoid alcohol, strong alkali, strong acid, and abrasive cleaners unless the supplier confirms compatibility.
For normal fingerprints, use warm water with a small amount of neutral dish detergent. First wet the surface thoroughly with a spray bottle or damp cloth to soften the oil. Then wipe gently with a microfiber cloth in one direction. Do not start with dry wiping, because that can push grease deeper into the microtexture. After cleaning, wipe again with clean water to remove detergent residue, then blot dry with a soft clean cloth. For stubborn local fingerprints, repeat with a neutral glass cleaner or diluted mild soap solution.
For kitchen grease, softening is better than scrubbing. If the shade is removable, soak it in warm water with neutral detergent for 10-20 minutes, then wipe with a soft sponge. If it cannot be removed, place a warm damp cloth over the stain for a few minutes before wiping. Avoid steel wool, the rough side of scouring pads, abrasive powder, and long rubbing with melamine foam, because they can change the local roughness and create visible patches.
For limescale, a low-concentration citric-acid solution or white vinegar can be used briefly, but with caution. Test in an inconspicuous area first. After treatment, wipe thoroughly with clean water so acid residue does not corrode metal parts.
Drying is also important. If frosted glass air-dries naturally, water droplets can leave marks. Use a lint-free cloth to blot it dry gently, without polishing hard. In the long term, it is better to avoid externally sandblasted shades in kitchens and bathrooms. If they are already installed, clean them more frequently so grease and limescale do not harden permanently.
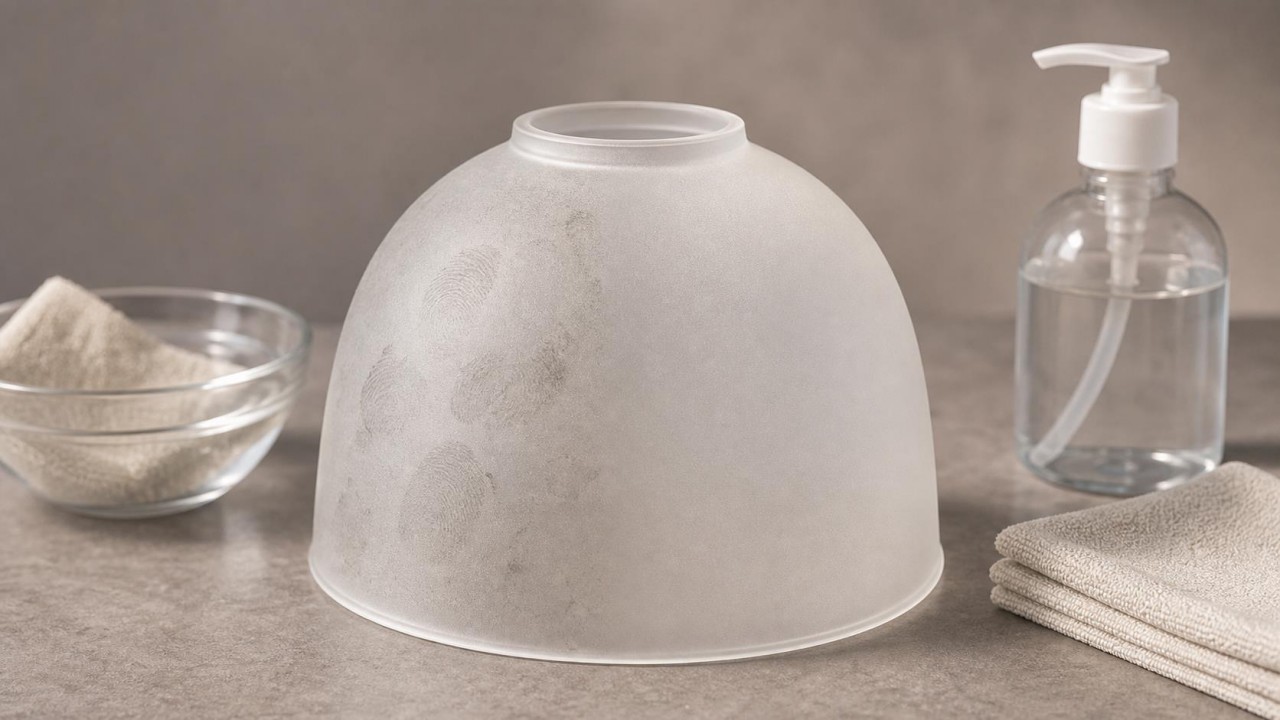
How long can nano oleophobic coatings last on glass lampshades, and will daily wiping make the coating fail?
The lifetime of a nano oleophobic coating on a glass lampshade has no single fixed value. It depends on coating chemistry, application method, curing quality, glass-surface preparation, use environment, and cleaning method. In most lighting applications, the coating is an extremely thin low-surface-energy film that prevents oil and water from spreading and sticking strongly. It is not a permanent shield. It is a functional layer that gradually weakens with use.
In low-contamination areas such as living rooms, bedrooms, and corridors, a good coating may last two to five years or even longer if it is rarely touched and cleaned gently. In kitchens, bathrooms, coastal homes, or hot and humid environments, oil, limescale, cleaning chemicals, and frequent wiping may reduce the effective life to six months to two years. A simple spray coating without proper curing may last even less. A factory-applied, chemically bonded, heat-cured coating with abrasion testing will perform much better.
Daily wiping does gradually wear the coating, but correct wiping will not destroy it immediately. The real enemies are abrasion, strong alkali, strong acid, aggressive solvents, hard brushes, steel wool, and particle-based cleaners. Frequent dry rubbing with rough paper or cloth also increases wear. The right method is to soften dirt first with warm water or neutral detergent, wipe gently with a microfiber cloth, rinse with clean water, and blot dry.
You can judge whether the coating is still active by observing water and oil behavior. On a fresh coating, water should bead up and roll easily, and oil should not spread quickly. If water forms a flat film and oil spreads immediately with obvious stains, the coating has weakened. Comparing frequently wiped areas with rarely touched areas can also reveal coating degradation.
When purchasing, ask suppliers for abrasion, detergent resistance, damp-heat, and contact-angle test data. For example, after a specified number of wiping cycles with a clean cloth, the water and oil contact angles should remain within the target range. The coating should also survive neutral detergent and relevant kitchen-cleaner tests. For kitchen shades, resistance to grease and dish detergent is more important than an impressive initial contact angle.
In short, nano oleophobic coatings can greatly reduce cleaning difficulty, but they do not remove the need for maintenance. To extend their life, choose a durable factory-cured coating, avoid harsh or abrasive cleaning, and follow the rule of cleaning early, gently, and with moisture rather than dry force.
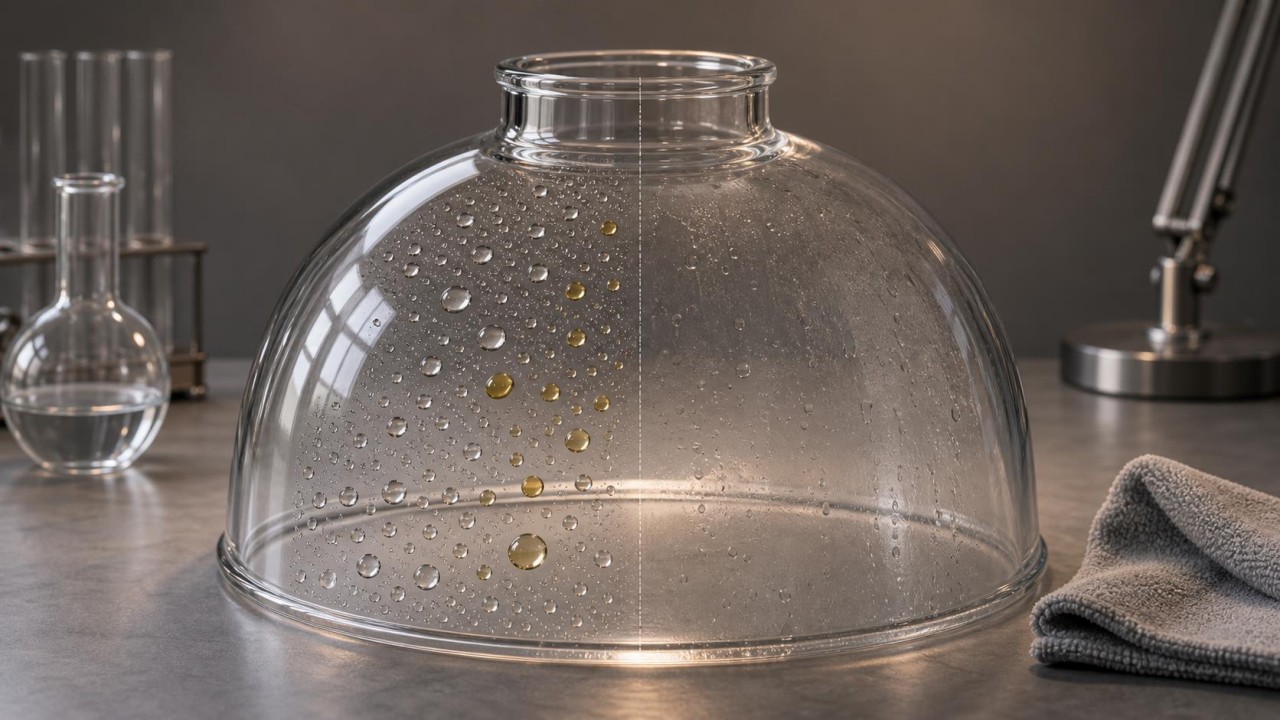
How can lampshades be sealed structurally against dust and insects without affecting heat dissipation?
Dust or insects inside a glass lampshade are usually not a glass problem. They come from gaps in the fixture structure, negative-pressure suction during cooling, unsealed cable holes, untreated mounting openings, or poorly designed ventilation slots. To block dust and insects without harming heat dissipation, the fixture should not simply be sealed blindly. It should block particles, allow controlled pressure or air exchange, and manage heat through a designed thermal path.
First, control the gap geometry. Dust and insects enter through the joint between the shade and body, cable entries, clip openings, ventilation holes, and removable interfaces. The shade-to-body joint should use a continuous gasket, labyrinth overlap, or stepped interface instead of a straight-through gap. Cable entries should use rubber grommets, silicone plugs, potting compound, or sealed cable glands. A removable shade can use a twist-lock and compression gasket, allowing cleaning while still sealing reliably when closed.
Second, heat dissipation should not depend on random leakage gaps. LED fixtures should conduct heat through the PCB, heat sink, metal backplate, or housing. If the thermal path is well designed, the shade cavity can be relatively closed. If ventilation is necessary, use a dustproof breathable membrane, insect screen, or folded air path in a non-visible location so that air can exchange but particles and insects cannot easily enter.
Breathable membranes such as ePTFE are useful for pressure balance. When the lamp is on, internal air expands. When the lamp turns off and cools, negative pressure can pull dust or insects through small gaps. A breathable membrane allows slow pressure equalization while blocking droplets and particles, reducing suction through uncontrolled gaps.
If ventilation holes are required, avoid straight holes directly into the shade cavity. Use downward-facing openings, return paths, honeycomb screens, insect mesh, or removable filters. The mesh should be fine enough to stop small insects but not so dense that it blocks heat dissipation. In kitchens and bathrooms, grease and moisture may clog filters, so filter parts should be cleanable.
Different applications need different strategies. Ceiling lights and bathroom lights are better with higher-IP enclosed structures. Pendants and wall lights can use labyrinth joints plus insect mesh. Toe-kick lights and cabinet lights must pay special attention to cable holes and installation gaps. Outdoor or semi-outdoor fixtures must also handle water, dust, ventilation, and condensation.
The core principle is: heat should leave through metal thermal paths, air should move only through controlled breathable paths, and dust or insects should be blocked by gaskets, labyrinth structures, mesh, and membranes. Do not simply glue every gap shut, because that can cause heat buildup, condensation, and poor serviceability.
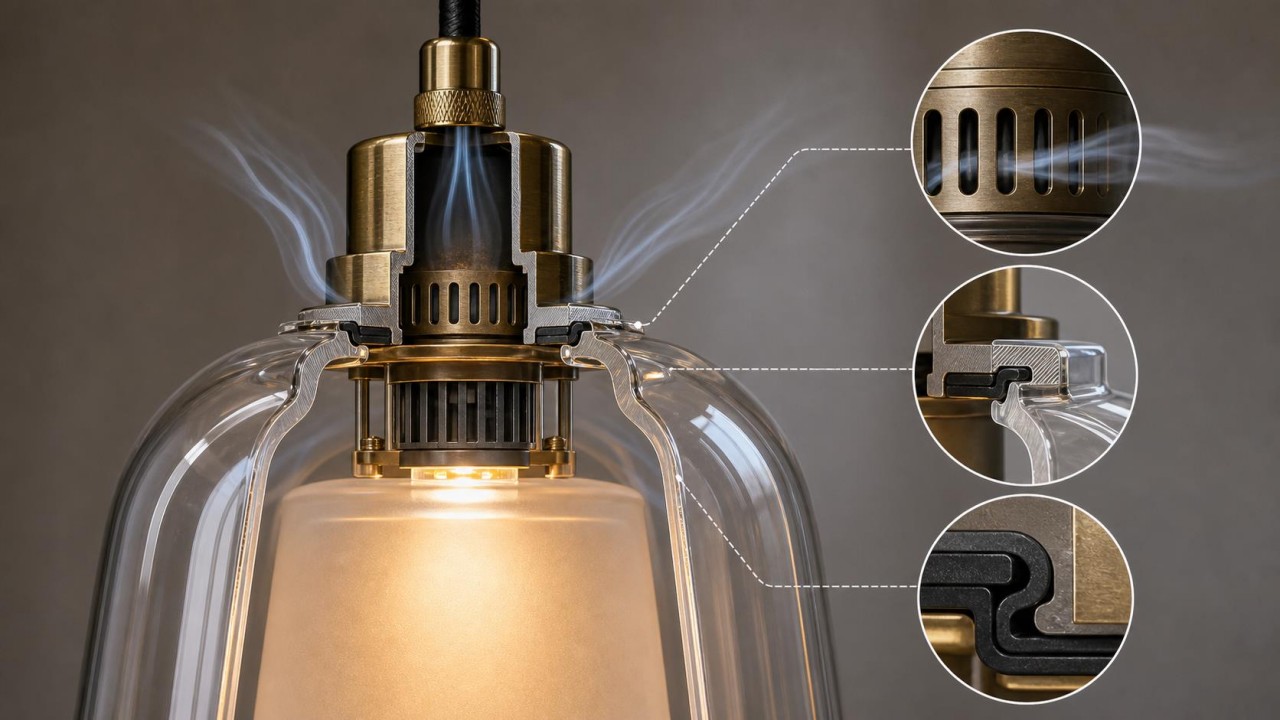
How serious is lumen depreciation in lamps that are not cleaned for a long time, and how should different fixtures be cleaned and how often?
Long-term uncleaned luminaires suffer from two kinds of lumen loss. One is real LED lumen depreciation over operating hours. The other is maintenance-related light loss caused by dust, grease, limescale, insects, and dirt on shades, lenses, reflectors, and heat sinks. In homes, when users feel a lamp has become dim, the cause is often not only LED aging. The fixture may simply be dirty.
In normal bedrooms and living rooms, one year without cleaning may reduce effective light output by about 5-15% because of dust on shades and surfaces. Kitchen fixtures are more serious. In oily environments, light output may drop 15-30% within a few months, and even more near heavy cooking areas. Bathroom lights can lose output through limescale, soap residue, and condensation marks. Outdoor or balcony lights can suffer from dust, rain deposits, insects, and salt mist; one year without maintenance can easily cause more than 20% effective light loss.
Cleaning frequency should follow the pollution level. Ceiling lights, pendants, and table lamps in living rooms, bedrooms, and studies can be wiped every three to six months, with a more complete cleaning once a year. Kitchen lights, especially near stoves and countertops, should be lightly wiped every two to four weeks and deep-cleaned every one to three months if removable. Bathroom lights should be cleaned every one to two months to remove limescale and fog residue. Wardrobe lights, cabinet linear lights, and toe-kick lights should be checked every three to six months. Outdoor, balcony, and coastal-area lights should be inspected every one to three months for seal condition, insects, and corrosion.
Cleaning methods depend on materials. Clear glass can be cleaned with glass cleaner or neutral detergent and a microfiber cloth. Frosted, sandblasted, or embossed glass should be wetted first, then wiped gently without abrasion. Crystal pendants can be removed, washed with mild solution, and fully dried to avoid water marks. Metal reflectors should not be rubbed with rough cloth or corrosive liquids, because the reflective layer can be damaged. LED strip diffusers and linear-light covers must be cleaned without letting water enter electrical parts.
Always turn off power and wait for the fixture to cool before cleaning. Removable shades should be taken off according to the manual, without forcing clips. After washing, dry all parts completely before reinstalling, especially in bathrooms, kitchens, and sealed fixtures. If electrical components are inside the shade, do not spray water directly; use a slightly damp cloth and soft brush.
From a lighting-design perspective, maintenance is part of performance. A fixture that is easy to remove, wipe, and keep clean may maintain better real brightness over time than a fixture with excellent initial data but poor maintainability. When specifying lights, consider removability, anti-fouling surfaces, sealing level, and maintenance instructions.
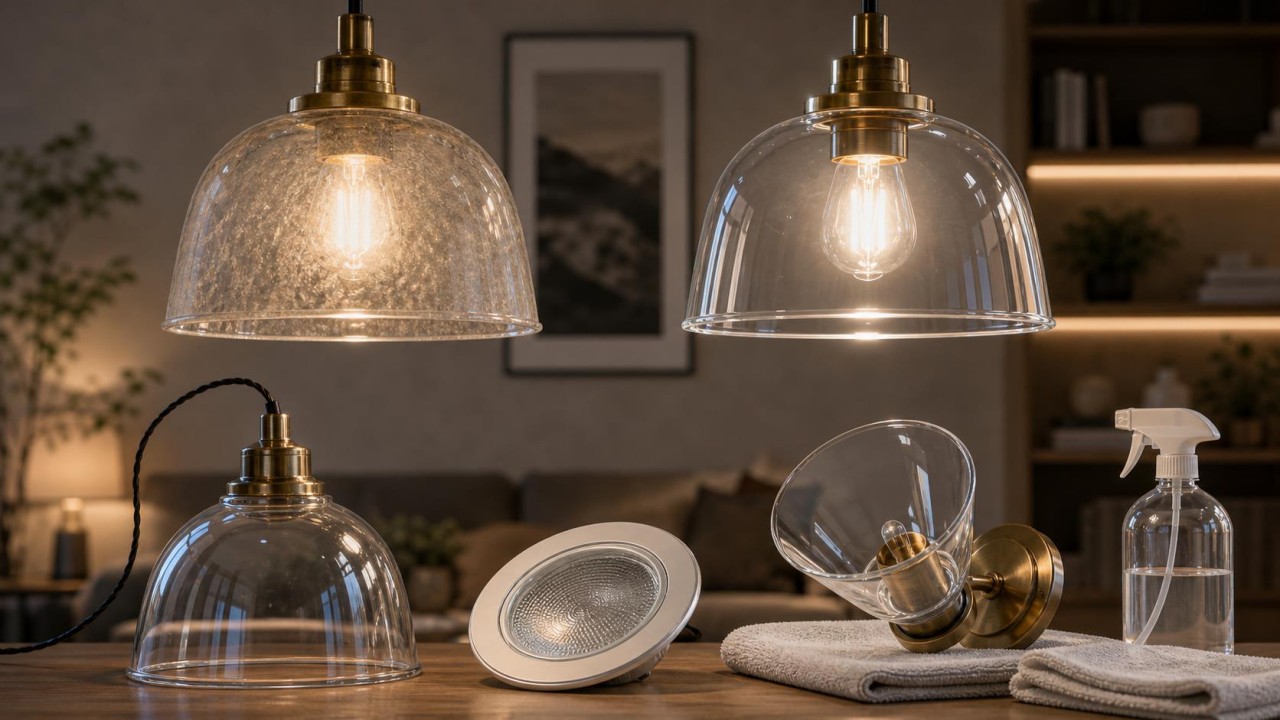
In minimalist main-light-free design, how can nearly invisible glass lampshades be selected so luminaires have minimal visual presence?
Minimalist no-main-light design is not about having no lamps. It is about making the fixtures recede into the architectural background so that only clean light remains. If a glass shade is poorly chosen, it can become visually obvious because of reflection, edge color, thickness, frame detail, or shiny highlights. To make the shade almost invisible, control material, color, reflection, mounting, and light distribution together.
First, the glass color should be as neutral as possible. Clear low-iron glass, light opal glass, pale neutral-grey glass, and high-uniformity diffusion glass are suitable for minimalist interiors. Avoid amber, tea-colored, dark smoked, strongly coated, or saturated colored glass, because these turn the fixture into a decorative focus. If the ceiling or wall is white, the shade should visually blend with that surface. If the interior uses grey plaster or microcement, low-reflection pale grey glass may work better.
Second, surface reflection should be low. Glossy clear glass reflects windows, furniture, and people, making the fixture noticeable in daylight. Low-reflective coated glass, AG anti-glare glass, fine acid-etched glass, or subtle matte glass can reduce mirror-like reflections when the lamp is off. However, the matte finish should not be too rough or it may become a visible white patch.
Third, reduce visible thickness and edge presence. Thick glass, greenish edges, protruding frames, and exposed screws all increase visual weight. Minimalist designs should use thin glass, low-iron glass, narrow frames, concealed clips, and no visible screws. Edges should be polished or chamfered but not turned into bright outlines. Ceiling lights and linear lights are best designed as recessed, semi-recessed, or flush-mounted elements.
Fourth, the light itself must be uniform and dot-free. Minimalist spaces are easily disturbed by visible LED points, small harsh apertures, or bright spots on the ceiling. The glass shade should use appropriate haze or microstructure to turn point sources into continuous luminous surfaces. For downlights and spotlights, use recessed anti-glare cups, low-brightness apertures, micro-prismatic glass, or honeycomb louvers rather than a shiny transparent cover.
Finally, layout affects invisibility. Fixtures should align with walls, cabinets, beams, or functional zones instead of forming a visually loud grid in the middle of the ceiling. Shade size, color, and spacing should be consistent. The real minimalist effect comes from fixtures that do not compete for attention, light that has layers, and materials that stay quiet.

For vintage industrial pendant lights, are aged, tea-colored, or amber glass shades coated or body-tinted, and how can fading be prevented?
The tea, amber, smoky, or aged look of vintage industrial pendant glass can be produced either by body-colored glass or by surface coating, spraying, glazing, or post-treatment. These methods differ in cost, stability, and visual effect, so photos alone are not enough to judge quality.
Body-colored glass means colorants or metal oxides are added to the glass batch, so the color exists throughout the glass itself. Its advantages are strong color stability, wash resistance, and low fading risk. Even if the surface receives a fine scratch, it does not reveal a different base color. Amber, tea, smoke grey, green, and blue glass can all be made this way. The disadvantages are less flexibility in fine color adjustment and lower transmittance for darker colors. Batch production also requires strict control of formula and melting conditions; otherwise color depth can vary.
Surface coating or spraying can create richer effects, such as gradient smoke, metallic reflection, mirror finish, iridescent film, partial aging, mottled rust-like effects, or handmade patina. The advantage is high design freedom and layered appearance. The disadvantage is that the film or coating is on the surface and can be affected by wiping, cleaners, humidity, heat, and UV. Poor coatings may fade, peel, become patchy, lose adhesion, or show uneven color.
Some vintage fixtures also use paint, baked coating, glaze, acid etching, hand-rubbed color, or chemical silvering to create an aged look. The more complex the aged effect, the more important it is to confirm whether the color is inside the glass or on the surface. An external aged layer has the highest wear risk if users clean it often. An internal coating is less exposed to touch, but it must tolerate lamp heat.
To prevent fading, first identify the process. If long-term stability and easy cleaning are priorities, body-colored glass or a laminated structure with protected internal color is preferred. If coating or spraying is necessary, ask the supplier for adhesion, damp-heat, UV resistance, detergent resistance, and wiping-durability test data. Kitchens, bathrooms, and balconies should not use unverified external decorative coatings.
Color control is also necessary. Use L*a*b* color tolerances or approved master samples for acceptance. For multi-light pendant installations, color difference must be controlled more tightly; otherwise one shade may look tea-colored, another reddish, and another grey. In short, body coloring is more durable, while coating and spraying are more flexible. Vintage industrial design must make a conscious trade-off between visual richness and long-term durability.
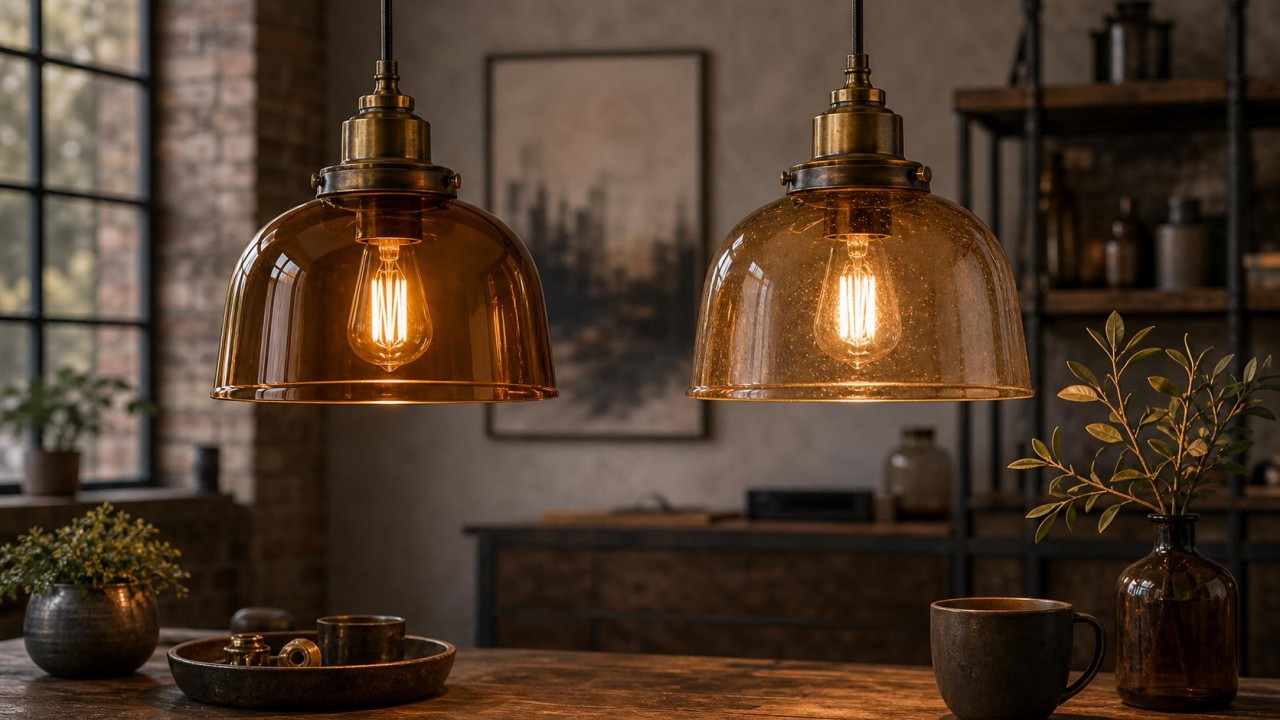
In light-luxury interiors with many metal elements, how should glass shade transparency and reflectivity match brass or brushed nickel?
Light luxury interiors are not about making every material shiny. The goal is controlled layers of sheen among metal, glass, stone, and fabric. If the glass shade is too reflective, it competes with brass, brushed nickel, and polished metal. If it is too dark, the space feels heavy. Therefore, transparency and reflectivity should be matched to metal color, surface finish, and room brightness.
Warm metals such as brass, champagne gold, and bronze work well with warm-clear or semi-transparent glass. Good options include light tea-colored glass, pale champagne glass, low-iron clear glass, warm smoked grey, and opal glass. Brass already reflects warm tones. If it is paired with very strong amber glass, the room can become too yellow. If it is paired with cold grey glass, the warmth may be weakened. A safe approach is to use high-transparency low-iron glass for lightness, or a light tea/champagne tint for subtle warmth, while avoiding overly dark shades.
Brushed nickel, chrome, stainless steel, and cool silver metals pair better with neutral or cool-neutral glass. Low-iron clear glass, light smoke grey, pale grey, opal glass, and subtle matte glass can maintain a clean look. Brushed nickel has a softer sheen than mirror chrome, so it can accept slightly reflective clear glass. But if the room already contains glossy stone, mirrors, and metal strips, the shade should be low-reflective or softly matte to avoid too many reflections.
For transparency, main lighting or dining pendants that need enough brightness can use higher-transmittance glass, but they should include anti-glare bulbs or internal diffusers. Decorative wall lamps, bedside lamps, and mood pendants can use semi-transparent smoke, champagne, or opal glass for softer light. Dark smoked glass is suitable as an accent, but not as the main source for general lighting.
For reflectivity, the main risk in light luxury design is excessive sparkle everywhere. If the metal is high-gloss brass or mirror nickel, the glass should reduce reflection through a subtle matte surface, low-reflective coating, or soft opal finish. If the metal is brushed and muted, the glass can be clearer and glossier to add refinement. A good balance is to let metal define outlines and details while glass softens the light.
Color temperature also matters. Brass usually looks more natural under 2700-3000K light, while brushed nickel looks cleaner under 3000-4000K. CRI should preferably be Ra 90 or higher; otherwise metal finish, stone texture, and fabric color may look cheap. The final goal is glass that does not overpower the metal, metal that does not glare, and light that makes materials look delicate rather than flashy.
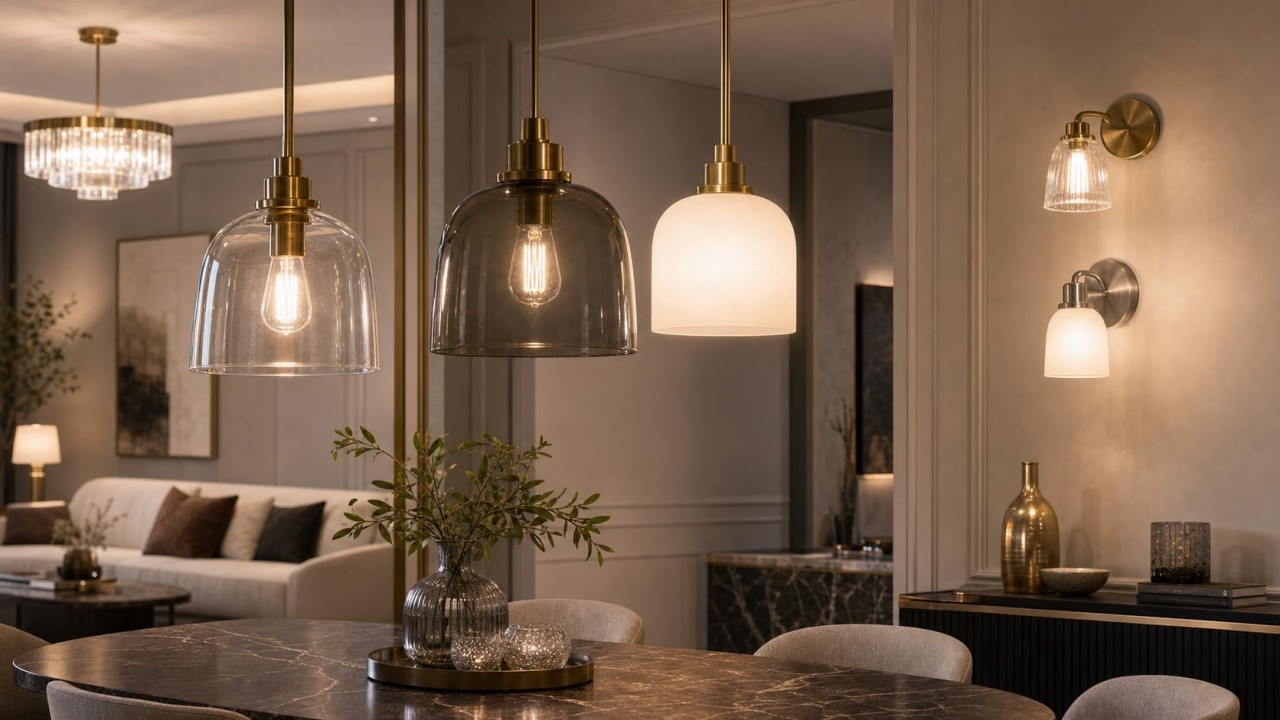
For irregular glass shades such as water-ripple forms, how can shape and optical consistency be ensured between batches?
For irregular glass shades, the hardest part is not making one beautiful piece. It is making many pieces look like the same product. Irregular water-ripple glass, handmade waves, twisted textures, bubbles, and organic curved surfaces all contain some randomness. Without clear process control and acceptance criteria, different batches can vary in texture depth, shape, transmittance, beam effect, and even mounting dimensions.
The first step is to define what "acceptable irregularity" means. The designer should not rely only on a rendering. Key control items must be specified: overall dimensions, mounting opening size, wall-thickness range, weight range, texture depth, texture direction, ripple density, transmittance, haze, color range, and allowed bubble size and distribution. For water-ripple glass, it is useful to provide a master sample and boundary samples, showing the shallowest and deepest acceptable texture.
The second step is to stabilize molds and forming parameters. If the irregular shade is mold-pressed or mold-blown, mold accuracy, mold temperature, glass temperature, pressing pressure, blowing pressure, rotation speed, and cooling rate all affect the final texture. First-article approval should be performed before each production batch, followed by regular sampling during production. If the shade is handmade blown glass, the process card should control gob weight, blowing time, rotation speed, time in mold, and annealing curve.
The third step is to control thickness and stress. If part of a water-ripple shade becomes too thick, it may act like a lens and create abnormal bright streaks. If it becomes too thin, strength and color depth may be insufficient. Thickness gauges, weight checks, and polariscopic stress inspection should be used to keep each batch within range. For clear or translucent irregular shades, residual stress and thickness variation directly affect optical consistency.
The fourth step is optical verification, not just appearance inspection. Use a standard light source, fixed distance, and standard background board to photograph the lit effect. Compare beam range, brightness distribution, texture projection, and glare points. For premium projects, photometric testing or image analysis can quantify uniformity. This ensures that pieces are consistent not only when switched off, but also when illuminated.
The fifth step is batch management. Each batch should record glass batch number, mold number, process parameters, production date, and inspection results. Projects with many lamps installed side by side should use the same production batch where possible, or be matched and grouped before shipment. Irregular glass can have natural variation, but the variation must stay within the design intent. Randomness should not become uncontrolled quality fluctuation.
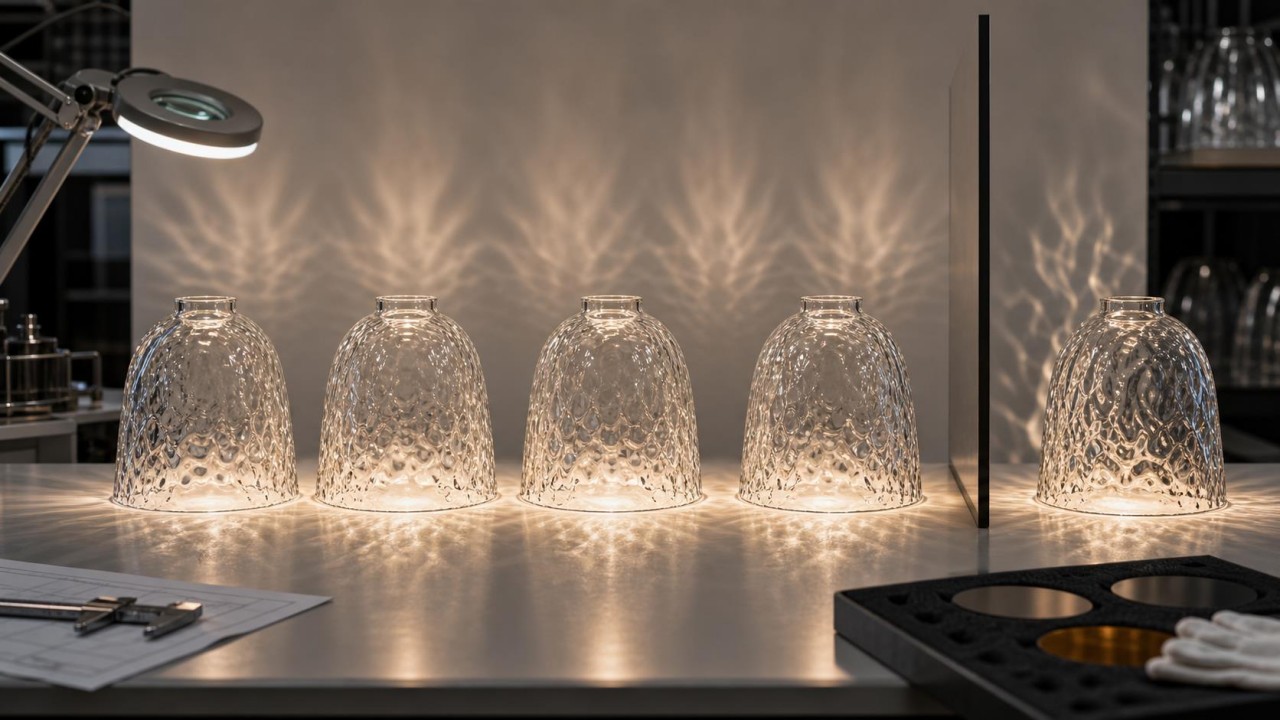
Can glass sample kits with different transmittance and colors be provided so designers can compare on site during the concept stage?
Yes, and for lighting projects, a glass sample kit with different transmittance levels and colors is extremely useful. The effect of a glass shade is difficult to judge from parameters or photos alone. Two glasses both labeled as 70% transmittance can look very different under different color temperatures, wall colors, LED spacing, and room brightness. On-site comparison helps designers evaluate brightness, softness, color shift, reflection, and material compatibility earlier in the design process.
A practical sample kit should include several dimensions. The first is a transmittance gradient, such as 90%+ ultra-clear glass, 80-85% light haze glass, 70-75% opal diffusion glass, 50-60% high-haze soft glass, and 30-40% decorative smoked or dark glass. The second is a haze gradient: low haze, medium haze, high haze, and micro-structured diffusion. The third is a color series: clear, low-iron, opal, light grey, smoke grey, tea, amber, champagne, blue-green, and so on. The fourth is surface treatment: smooth outside, inner frosted, outer acid-etched, embossed, fabric texture, AG anti-glare, and oleophobic coating.
Each sample should be clearly labeled with material type, thickness, transmittance, haze, color code, surface treatment, tempering status, coating status, recommended application, and cleaning notes. A QR code linking to full test reports or a digital catalog is helpful. For B2B customers, the label can also include MOQ, processable size range, mold requirements, lead time, and production tolerances.
During on-site comparison, designers should not only view samples flat on a desk. They should test with a light source and distance close to the real project. At minimum, use 2700K, 3000K, and 4000K sources, and observe the samples near white walls, dark walls, wood finishes, and metal materials. Both the switched-off appearance and switched-on effect should be checked. Some glass looks beautiful when off but becomes too dark, too colored, or patchy when lit.
Sample size also matters. A very small piece can show color but not uniformity or texture scale. A standard sample should preferably be at least 100 x 100 mm. Textured, gradient, and water-ripple glass should be shown in larger pieces or curved samples. For pendants, wall lamps, and ceiling lights, a small mock-up fixture is even better than a flat sample because it represents the real optical effect more accurately.
In short, a sample kit is not just a sales tool. It is a design decision tool. It reduces misjudgment, lowers sampling rework, and helps designers, clients, and suppliers share the same standard for brightness, haze, color shift, reflection, and cleanability.
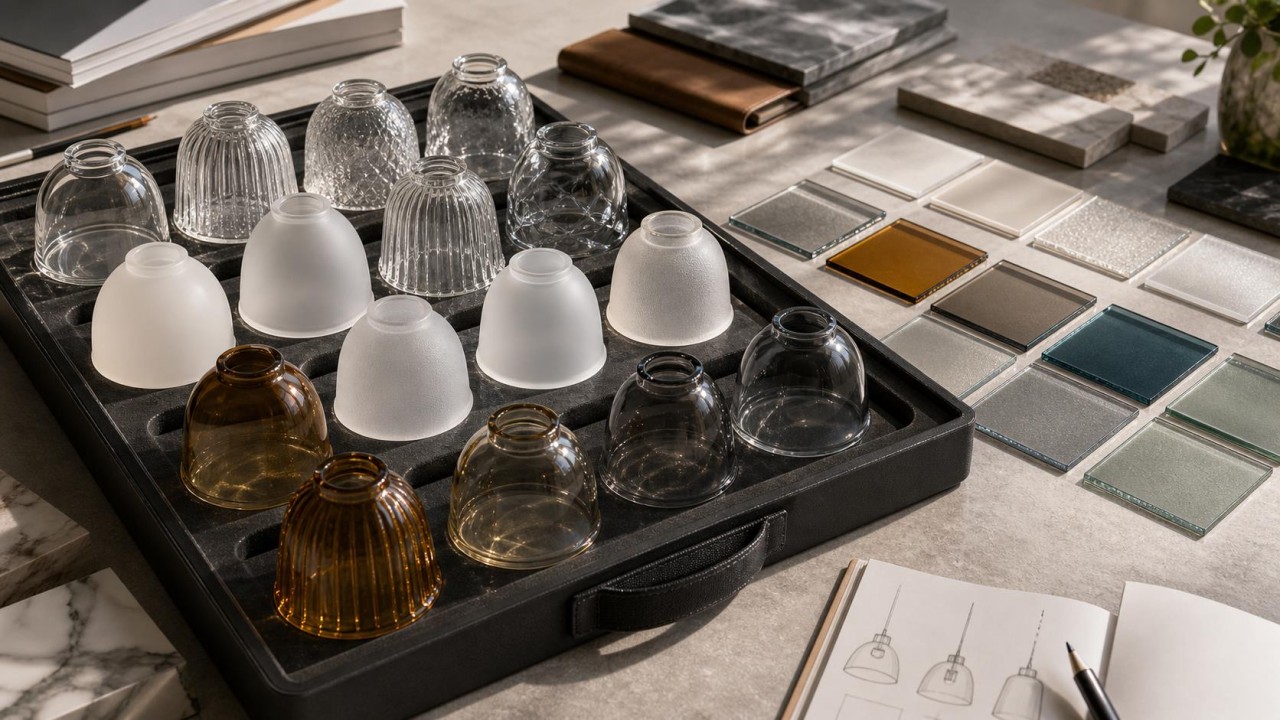
How can bathroom glass lampshades meet both moisture-proof sealing and high transmittance?
Bathroom lighting is difficult because the shade must resist moisture while still allowing enough light to pass through. A bathroom contains steam, condensation, water splashes, cleaning chemicals, and repeated temperature changes. If the shade is poorly sealed, moisture can enter the lamp body, causing fogging, corrosion, short circuits, yellowing, or failure of the LED driver. But if the sealing structure is too thick or placed in front of the luminous area, it blocks light and reduces the effective optical aperture. The design therefore has to solve both problems at the same time.
The most important principle is to place the sealing interface outside the main light path. The gasket, adhesive, frame, and compression structure should sit on the side wall, flange, or hidden edge of the glass shade rather than across the central luminous area. Transparent silicone gaskets, high-transparency formed-in-place silicone seals, UV-curing optical adhesive, or full-perimeter bonding can be used to create a continuous seal with minimal optical loss. For bathroom lamps, an IP65 or higher protection level is usually a sensible target, especially near shower areas or basins where splashing is possible.
The glass substrate should have high transmittance and good safety performance. Low-iron tempered glass is a strong choice because it can reach about 91-92% visible-light transmittance while providing better breakage behavior than ordinary annealed glass. Borosilicate glass is also useful where thermal shock is a concern, because bathroom fixtures can experience repeated heating and cooling. If softer light is desired, it is better to use micro-prismatic glass or a controlled diffusion texture rather than very heavy frosted or opal glass. Heavy diffusion can hide the light source, but it may reduce useful output too much.
Condensation control is just as important as waterproof sealing. Even a well-sealed lamp may contain a small amount of air, and when the lamp cools, moisture inside can condense on the glass surface. A permanent anti-fog coating on the inner surface can help water spread into a transparent film instead of forming visible droplets. The coating should be thin, durable, and compatible with heat and cleaning chemicals. A hydrophobic or easy-clean coating on the outer surface can also reduce water marks and limescale.
The lamp body should also manage pressure and heat. A waterproof breathable vent, often based on an ePTFE membrane, allows pressure equalization while blocking liquid water. This reduces the vacuum effect that can draw moisture through weak seals during temperature changes. At the same time, the LED module should be thermally connected to a heat sink, and the driver or electronic components should be isolated in a separate sealed compartment. The glass shade should function mainly as the optical outlet, not as the only barrier protecting all electronics.
Long-term reliability depends on material durability. Ordinary rubber may harden, crack, or lose compression after long exposure to warm steam and cleaning agents. Fluorosilicone, high-quality silicone, or other hydrolysis-resistant sealing materials are safer choices. The structure should also allow inspection or replacement if the seal ages. If a bathroom lamp shows internal fogging, water droplets, corrosion, or visible coating failure, that indicates the sealing or anti-fog system is no longer working.
In summary, a bathroom glass shade can achieve both moisture protection and high transmittance by combining high-transmittance safety glass, transparent sealing located outside the optical path, an anti-fog inner surface, a water-repellent outer surface, pressure-balanced waterproof ventilation, and proper thermal separation of LEDs and electronics. The goal is not simply to seal everything tightly, but to create a controlled moisture-resistant optical system that stays bright and clear over time.
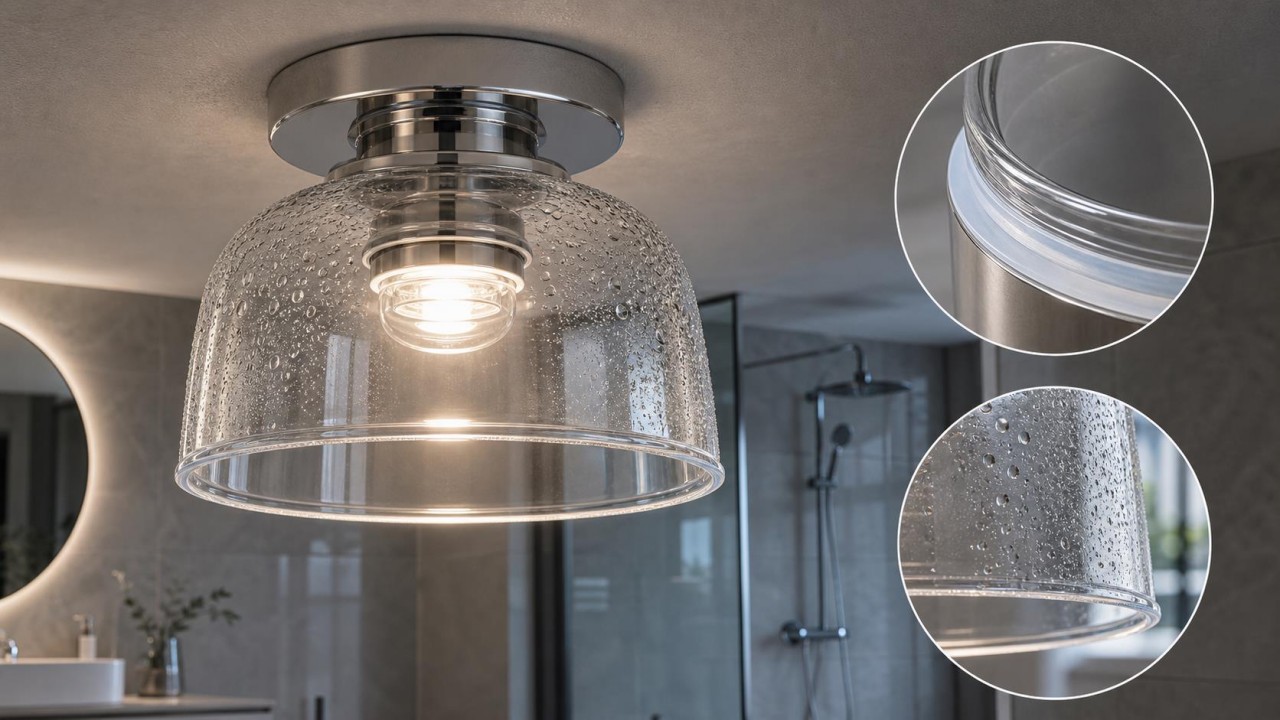
In greasy kitchen environments, are stain resistance and easy cleaning more important than optical performance for glass lampshades?
In a kitchen full of cooking fumes, stain resistance and easy cleaning are often more important in real use than an impressive optical specification on paper. The reason is simple: the optical performance that matters to the user is not only the initial transmittance of a new shade, but the maintained transmittance after weeks and months of cooking. Oil vapor, steam, smoke particles, and dust settle on the glass surface and form a sticky film. This film reduces light output, makes the shade look yellow or grey, attracts more dirt, and can be surprisingly difficult to remove if the surface is rough.
Therefore, in kitchen lighting, the first priority should be a surface that does not hold oil easily and can be wiped clean quickly. Smooth glossy glass is much better than deep textured glass. A transparent oleophobic and hydrophobic coating is useful because it reduces the adhesion of grease and water stains. A simple flat, shallow dome, or shallow bowl shape is easier to clean than a deep narrow cylinder, a complex fluted form, or a shade with many grooves. Internal corners should be minimized because oil accumulates there and becomes hard to reach.
This does not mean optical performance can be ignored. A kitchen still needs enough brightness, uniformity, and glare control. Countertops usually need strong and even task lighting, and cooking areas need good visibility for cutting, seasoning, checking food color, and judging doneness. If the glass is too dark, too heavily frosted, or too decorative, the initial brightness may be insufficient. A good practical solution is low-iron tempered glass with high base transmittance, combined with a smooth easy-clean coating and moderate diffusion if glare control is needed.
The balance between transmittance and haze should follow the fixture location. For under-cabinet or countertop task lighting, the glass should keep relatively high transmittance and avoid wasting light. A fine diffusion texture or micro-prismatic surface can soften LED dots without scattering too much light away from the work plane. For general kitchen ceiling lights, medium haze may be acceptable because it creates a more even luminous surface. For decorative pendants above an island or dining counter, tinted or textured glass can be used, but it should still be easy to clean and should not be relied on as the only task light.
Material and coating durability are important. Kitchen shades are exposed to heat, oil, detergent, acidic food vapor, and repeated wiping. A coating that looks good when new but wears off after cleaning is not suitable. The coating should be tested for heat aging, detergent resistance, abrasion resistance, and long-term adhesion. If the shade is removable with clips, a twist-lock structure, or a simple tool-release mechanism, users can wash it periodically in warm soapy water. This greatly improves maintained performance.
Avoid sandblasted, rough frosted, hammered, porous, or heavily embossed glass in heavy-cooking zones. These finishes may look soft and decorative, but their microscopic surface area holds oil. Once grease penetrates the texture, the shade becomes permanently dull or requires aggressive cleaning that may damage the surface. If a frosted appearance is needed, a smoother acid-etched finish or internal diffusion structure is better than a rough external texture.
In conclusion, for kitchen glass shades, easy cleaning and anti-fouling performance are indeed more critical than chasing the absolute highest initial optical value. The best design is not purely optical and not purely maintenance-oriented; it combines high-transmittance safety glass, a smooth geometry, oleophobic and hydrophobic surface treatment, moderate glare control, and a removable or accessible structure. That way the lamp remains bright in actual kitchen conditions, not only in a showroom.
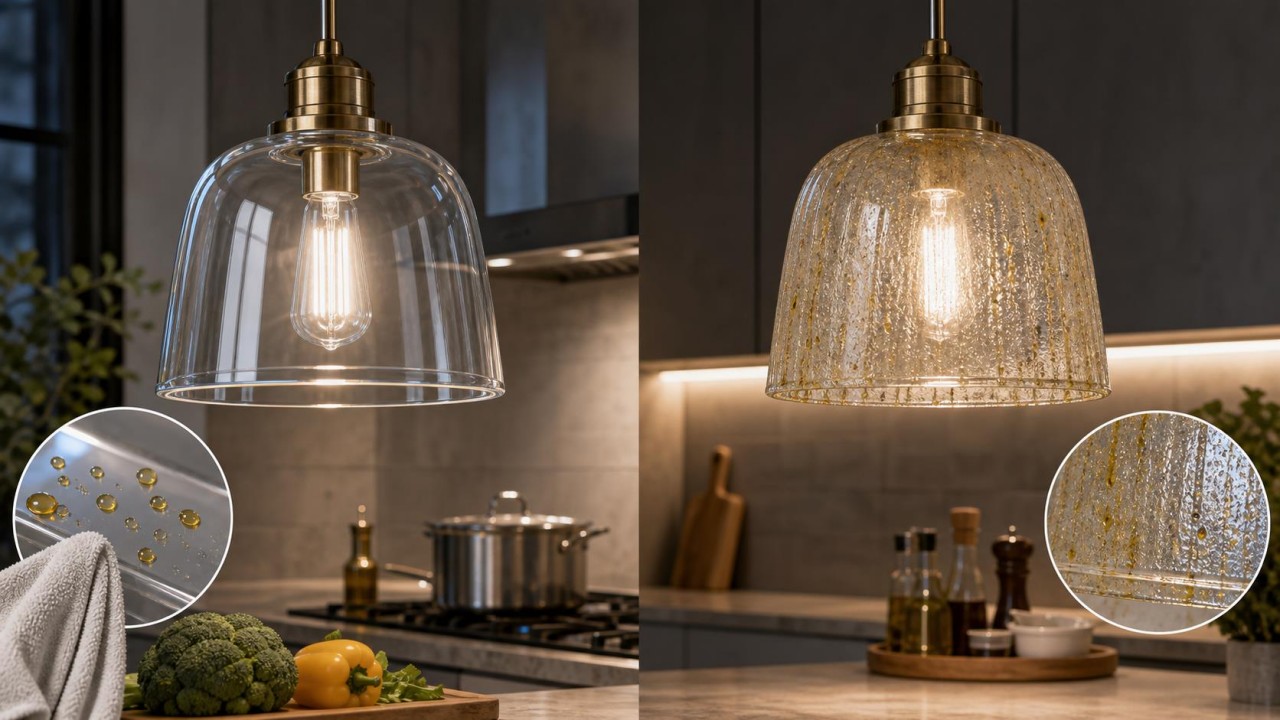
What specific requirements do children's room glass lampshades have for impact resistance and blue-light protection?
For children's room lighting, the glass shade must be designed around safety first. Children may throw toys, swing objects, climb furniture, or accidentally hit a low fixture. For this reason, ordinary annealed glass should not be used in reachable or impact-prone locations. When annealed glass breaks, it can form sharp fragments that create a serious cutting hazard. Tempered glass is the minimum safer option because it has much higher impact strength and breaks into small blunt granules rather than long sharp shards.
Laminated safety glass is an even stronger choice for risk reduction. It uses an interlayer, usually PVB or SGP, between two glass layers. If the glass cracks, the fragments remain bonded to the interlayer instead of falling. The interlayer also helps absorb impact energy. For low fixtures, wall lamps, bedside lamps, play-area lamps, or any lamp within a child's reach, laminated glass or tempered laminated glass is preferable. All glass edges should be chamfered, rounded, or fully enclosed by the fixture frame so there are no sharp exposed edges. A protective ring, recessed mounting position, or impact-resistant outer guard can further reduce the chance of direct impact.
Mechanical safety also includes mounting stability. The shade should be securely locked so a child cannot easily twist it loose. Screw threads, bayonet locks, clips, or retaining rings should be designed so that maintenance is possible for adults but accidental removal is unlikely. If the fixture is above a bed, desk, or play area, the shade should have secondary retention so that it will not fall even if one fastening point fails. Surface temperature should also be controlled. Reachable glass should not become hot enough to cause burns; low-temperature LED sources and proper heat sinking are important.
Blue-light protection should be handled carefully and scientifically. The purpose is not to remove all blue light. Some blue content around the longer blue-cyan range is important for brightness perception and circadian rhythm regulation during daytime. The concern is mainly excessive short-wavelength blue light, especially roughly in the 415-455 nm range, which is more strongly associated with photochemical retinal risk. For children's rooms, the complete lamp should ideally meet a low blue-light risk category, preferably RG0 under appropriate photobiological safety testing.
The glass shade or optical system can reduce harmful blue light in two main ways. One method is intrinsic absorption: selected additives are incorporated into the glass composition so the material itself absorbs part of the short-wavelength blue range. This approach is stable because the effect is inside the glass and does not peel off. Another method is a coating, such as a multilayer optical film, that selectively reflects or absorbs specific wavelengths. Coatings can be very effective, but they must pass abrasion, cleaning, heat, humidity, and aging tests. In a children's room, intrinsic blue-light-control glass is often more robust, especially when combined with tempering or lamination.
Blue-light protection should not come at the cost of poor color quality. If the filter is too aggressive, the room may look yellow, grey, or unnatural, and children's books, toys, skin tones, and drawings may lose color accuracy. A good target is to maintain high color rendering, preferably Ra 90 or higher, while reducing the risky short-blue component. The light should also be flicker-controlled, because flicker can contribute to visual fatigue. Although flicker is mainly a driver issue rather than a glass issue, it is part of the overall child-friendly lighting requirement.
Glare control is another essential requirement. Children often look upward directly at lamps while lying down, playing, or climbing. A shade with sufficient haze, an opal diffuser, a micro-prismatic structure, or a recessed source can reduce direct view of bright LED points. However, the diffuser should not be so dense that the room becomes dim and users respond by installing overly powerful lamps. The design should provide enough illuminance for reading and play while keeping luminance comfortable.
Finally, all materials must be non-toxic and durable. The glass and any coating, printing, adhesive, or interlayer should not contain harmful heavy metals such as lead, cadmium, or mercury. The product should comply with relevant safety certification requirements, such as CCC in China or applicable EN 60598 requirements for children's luminaires where relevant. In short, a children's room glass shade should use tempered or laminated safety glass, rounded and protected edges, secure retention, low surface temperature, selective short-blue reduction, high color rendering, low glare, and non-toxic materials. Impact safety and optical health have to be designed together, not treated as separate afterthoughts.
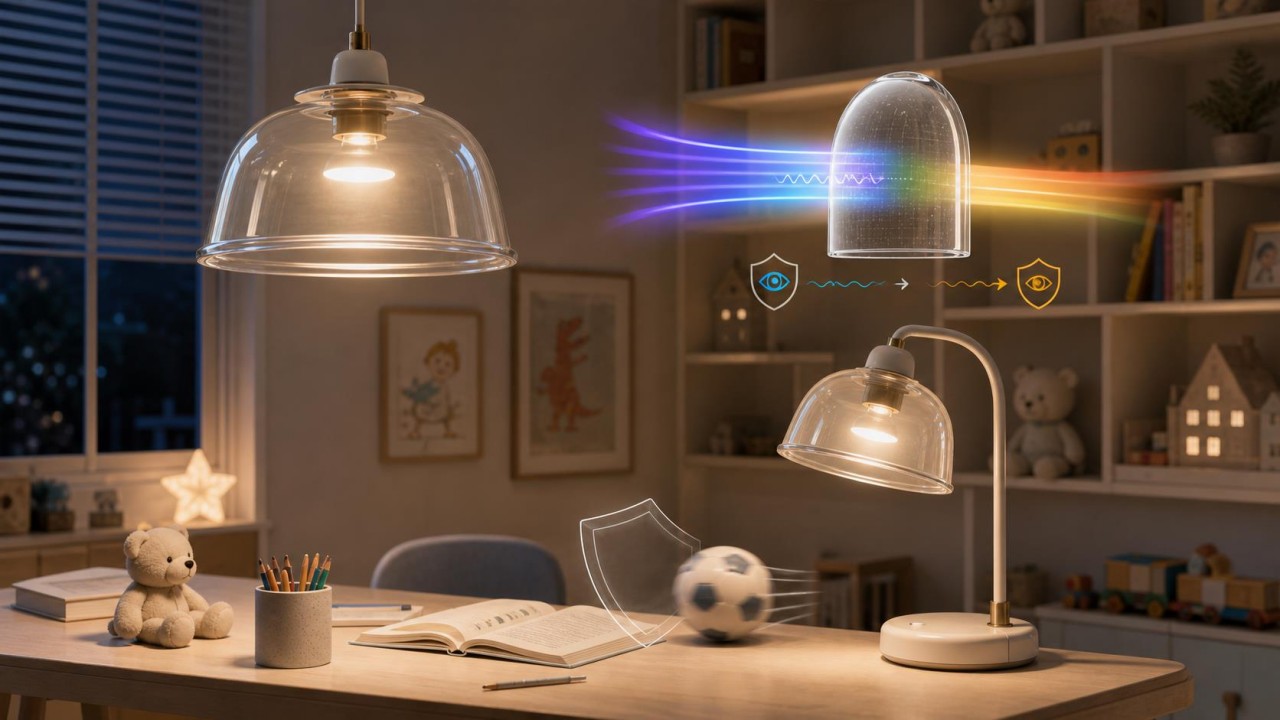
Optical Quality and Visual Comfort
What is UGR (Unified Glare Rating), and what reference limits apply to different residential spaces?
UGR means Unified Glare Rating. It evaluates discomfort glare in a lighting environment. A lower value means less glare; a higher value means the lighting is more likely to feel harsh, visually oppressive, or tiring. UGR is not a fixed value of a single bulb. It depends on luminaire luminance, luminous area, installation position, viewing direction, room size, and surface reflectance. The same luminaire can produce different glare impressions in a white living room and a small dark room.
Homes do not need to follow office limits mechanically, but reference values are useful. For study desks, children's learning areas, kitchen countertops, and mirror areas, aim for UGR <= 19 where possible. For living rooms, dining rooms, and general bedroom lighting, UGR <= 22 is usually acceptable. For corridors, entryways, and storage spaces where people stay briefly, UGR <= 25 can be acceptable. For bedside reading, TV-wall lighting, and movie-mode support lighting, the direct-view risk is higher, so values below 19 are preferable.
Reducing UGR is not just dimming the lamp. The key is to keep small high-luminance sources out of the eye. Use recessed anti-glare downlights, louvers, honeycomb grids, micro-prismatic glass, low-luminance diffusers, larger emitting surfaces, and proper cut-off angles. In homes, glare often comes from bad viewing geometry: a spotlight above the sofa aimed at the eyes, a pendant too low near the bed, or an exposed bulb above the dining table. Always check the lighting from sitting, lying, and walking positions, not only from a ceiling plan.
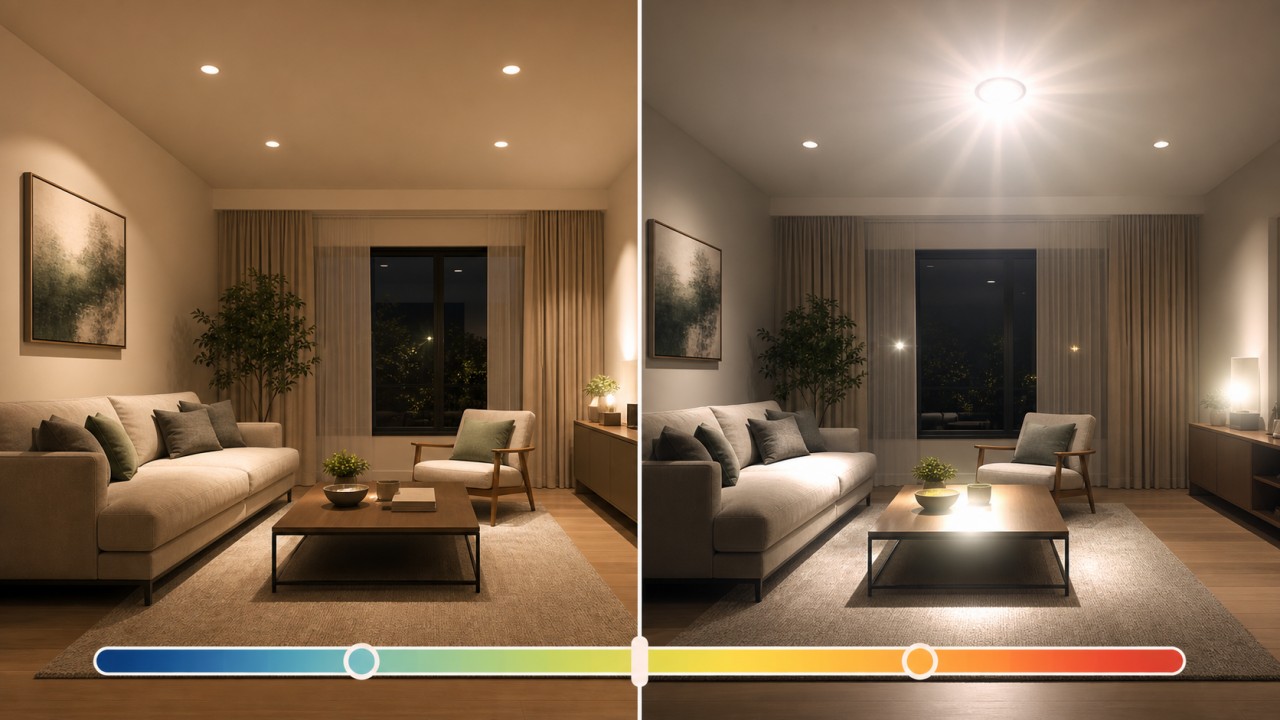
Why do some luminaires look comfortable at first, but still cause eye fatigue after a long stay?
A lamp that does not look glaring at first glance can still cause eye fatigue over time. "Not dazzling" only means there is no strong immediate discomfort when you look at it. Long-term fatigue is often caused by subtler issues: insufficient illuminance, uneven brightness distribution, flicker, poor color rendering, unsuitable color temperature, incomplete glare control, or excessive contrast between the task area and surroundings.
For example, a lamp with a thick opal shade may not look harsh, but if the desk receives only 150 lx, your eyes must work harder while reading. A very bright desk in a dark room forces your eyes to adapt repeatedly between bright and dark zones. Low-frequency flicker may not be obvious to the naked eye but can still increase visual stress. Low CRI can also make text, skin tones, and object edges less clear, causing the viewer to unconsciously strain.
The solution is to evaluate overall visual quality. Reading and study areas should generally reach 300-500 lx or more; detailed work may need higher levels. The surrounding ambient light should not be too dark, and the brightness ratio between the desk and background should be gentle. Choose low-flicker drivers, Ra >= 90 light sources, and color temperatures suited to the activity. Glare should be controlled by optics and structure, not only by a frosted cover. Good lighting lets people see clearly, steadily, and comfortably for a long time.
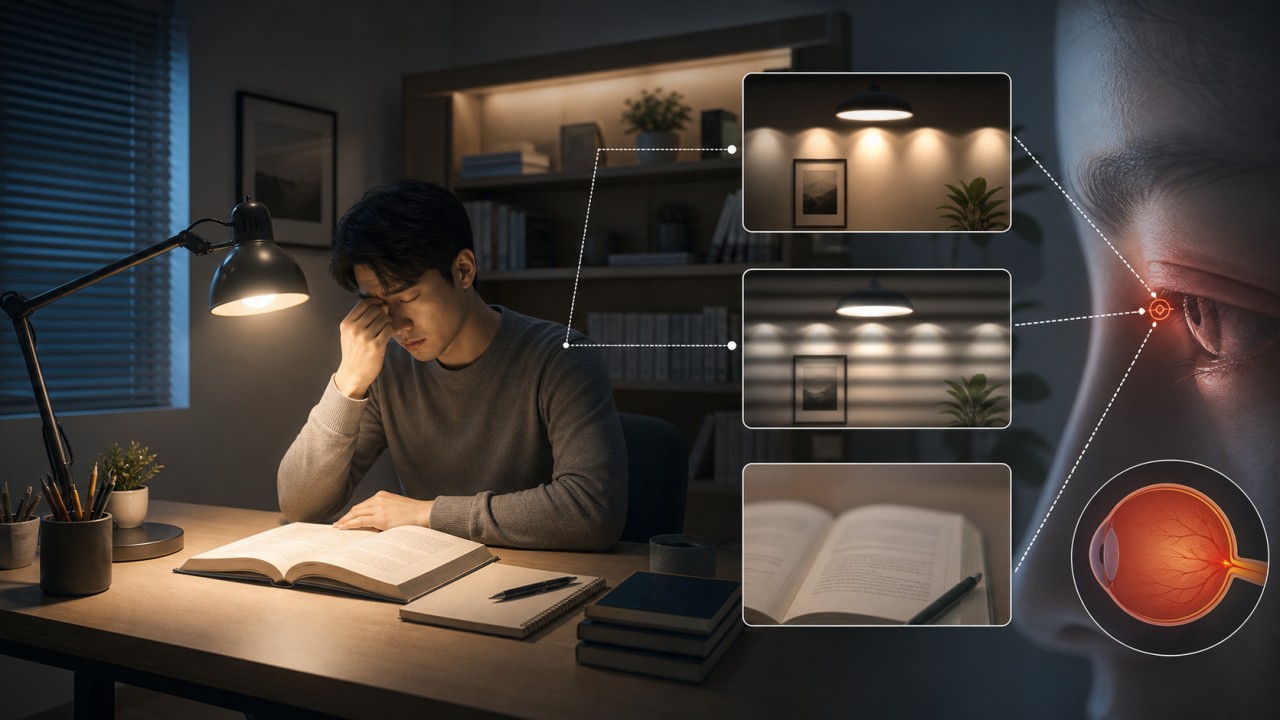
What causes double images or multiple reflections in glass lampshades, and how can the structure avoid them?
Double images and multiple reflections in a clear glass lampshade come from the two reflective interfaces of the glass. When light reaches the outer surface, part of it reflects. The rest enters the glass and part of it reflects again at the inner surface. If the glass is thick, the two surfaces are parallel, the source is bright, or the viewing angle is oblique, the reflected images separate and appear as ghost images. Curved glass, coated glass, and laminated glass can create even more secondary reflections.
The structure can reduce this problem in several ways. First, avoid direct view of small high-luminance sources. Use a diffuser, internal softening plate, or larger luminous surface so reflected images are less sharp. Second, avoid large parallel clear glass surfaces facing the viewer. Slight curvature, tilted installation, or non-parallel geometry can send reflections away from the main viewing direction. Third, use low-reflective coating or AG anti-glare treatment to reduce surface reflection. Fourth, control glass thickness and avoid unnecessary laminated layers or air gaps.
If clear glass is essential, as in vintage bulb pendants or display lights, treat ghosting as part of the design. Use lower-luminance filaments, frosted bulbs, smoked glass, or internal shields instead of exposing bright LED points. Clear flat glass should be used carefully in mirror lights, desk lamps, and TV-wall lighting because reflections can directly reduce visual comfort.
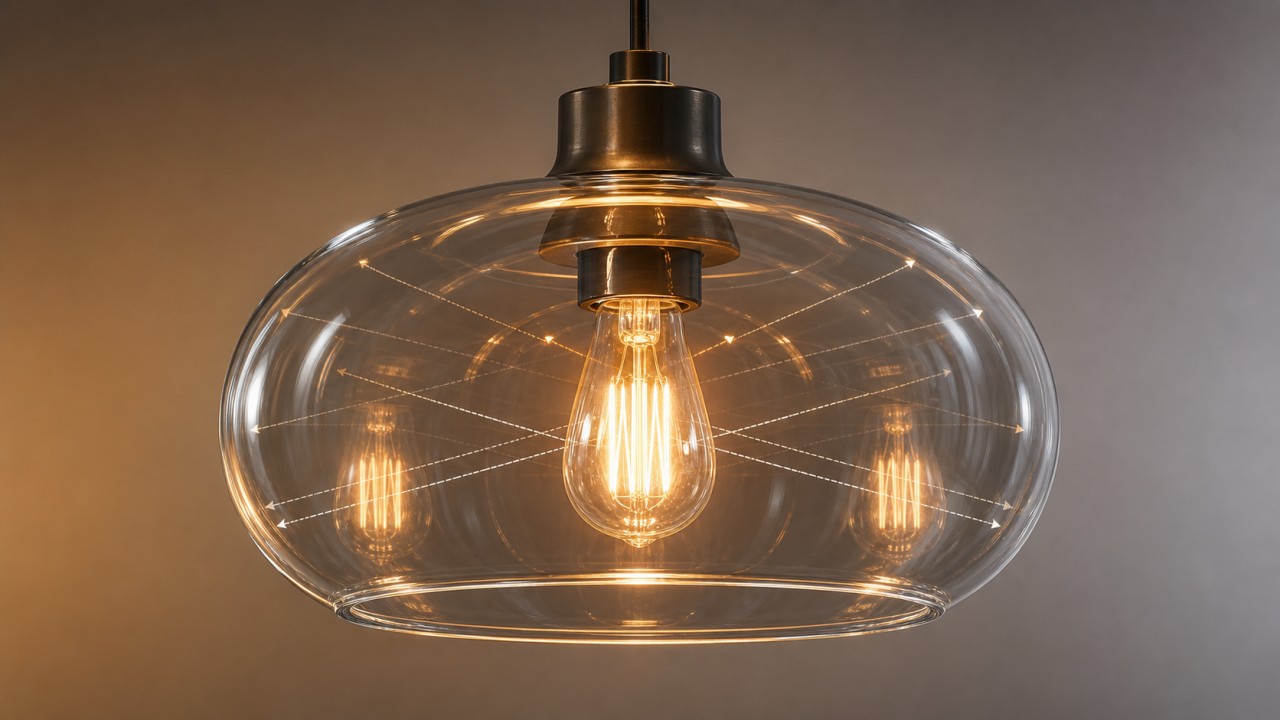
What are the key evaluation parameters for anti-glare glass lampshades, and how can they create a comfortable light environment?
Anti-glare glass should not be evaluated only by how frosted it looks. Key parameters include transmittance, haze, surface reflectance, luminance uniformity, cut-off angle, UGR or equivalent glare evaluation, beam quality, and color shift. Too little transmittance makes the lamp dim. Too much haze wastes light and reduces detail. High reflectance creates mirror glare. Poor uniformity creates bright dots and hot spots.
Comfortable anti-glare design is usually a combination of material, optical structure, and installation angle. The glass may use AG treatment, micro-prisms, fine frosting, internal diffusion coating, or low-reflective coating. The luminaire can use a recessed source, reflector, honeycomb grid, shielding ring, louver, or large-area luminous surface. Installation should avoid common viewing directions, especially from sofas, beds, dining tables, desks, and TV-viewing positions.
A good anti-glare shade should hide high-luminance LED points, provide enough task illuminance, maintain surrounding ambient light, preserve natural color, and keep the shade surface soft and uniform. The best anti-glare design does not simply scatter all light. It keeps useful light where it is needed while preventing high-brightness light from entering the eyes directly.

How can clear glass luminaires avoid visual discomfort caused by transparent glare?
Clear glass luminaires are attractive because they feel transparent, light, and reflective. The risk is that the light source is almost unshielded and can create "transparent glare." This glare usually does not come from the glass alone, but from the bright filament, LED chip, reflector, or multiple reflections behind the glass.
To avoid transparent glare, first reduce source luminance. Do not place exposed high-power LED points inside a clear shade. Use frosted bulbs, lower-luminance filament lamps, opal inner sleeves, or shielded light engines. Second, control viewing angle. The bulb should not be directly visible from common sitting, lying, or walking positions. A dining pendant should direct light toward the table rather than people's eyes. A bedside pendant should not expose the bulb from the pillow position.
Third, reduce reflection through glass detail. Low-reflective glass, light smoked glass, subtle ripple glass, or partial frosting can help. An internal diffuser, small shield cup, or reflector can also be added. Clear glass is best used as an outer decorative layer, while the real anti-glare function is handled by an inner optical structure. This preserves transparency while preventing bright points from attacking the eye.

What are the different roles of softening panels, diffusion plates, and light guide plates in luminaires?
Softening panels, diffusion plates, and light guide plates all make light softer, but they do different jobs. A softening panel mainly reduces harshness and makes direct light feel gentler. A diffusion plate breaks up point or line sources and mixes LEDs into a more uniform luminous surface. A light guide plate transports and redistributes light, often in edge-lit panel lights.
A diffusion plate usually uses scattering particles, frosted surfaces, or microstructures. Its main purpose is to hide LED dots, reduce hot spots, and widen the beam. It sacrifices some efficiency but greatly improves uniformity. A softening panel may be a diffuser, but it can also be fabric, opal glass, micro-prismatic material, or any translucent layer focused on visual comfort.
A light guide plate is usually made from clear acrylic, PC, or glass. Light enters from the edge and exits gradually through printed dots, microstructures, or surface treatment. It is suitable for thin panel lights, linear lights, and backlight systems. The challenge is avoiding dark ends, bright centers, or bright input edges. This requires dot-density design, reflector film, and diffuser layers. In short: a softening panel improves comfort, a diffuser improves uniformity, and a light guide converts edge light into surface light.
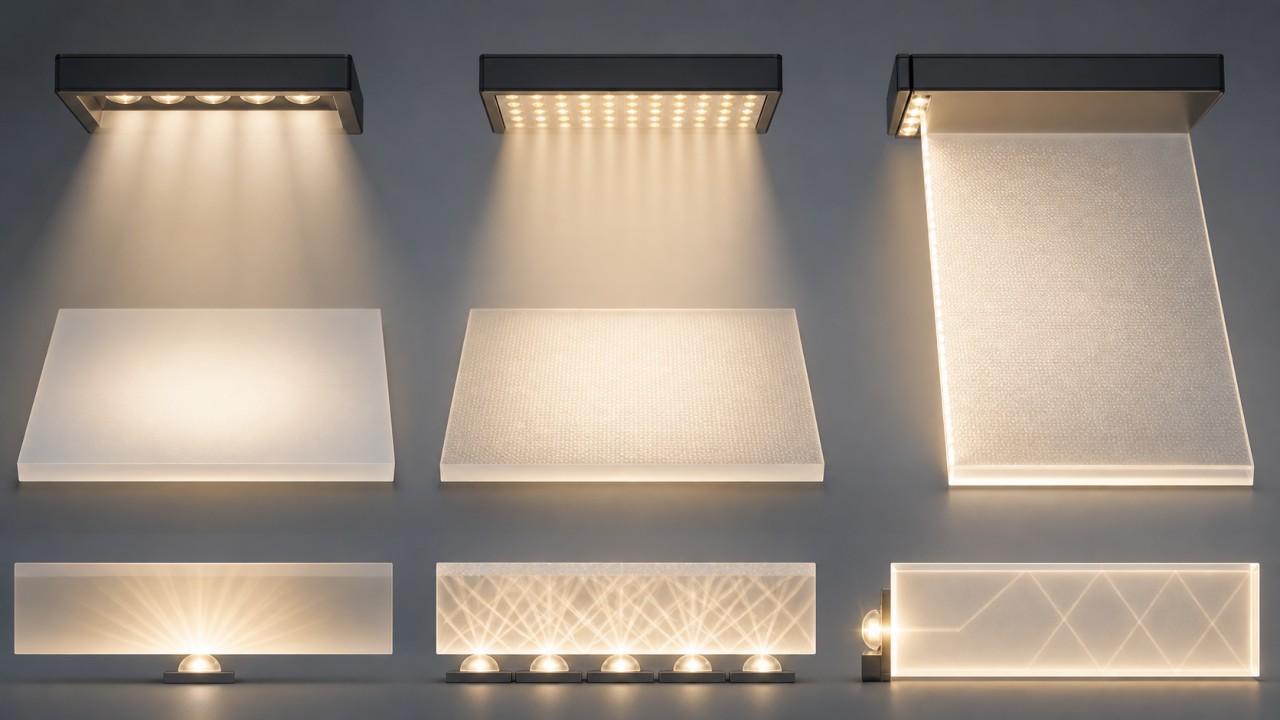
How can secondary spots and stray light be reduced through luminaire structure and optical design?
Secondary spots and stray light appear when light exits through paths that were not intended in the optical design. Common causes include lens-edge leakage, uneven reflectors, LED misalignment, internal reflection in glass, secondary reflection from the housing, uneven diffuser texture, and insufficient shielding. They can create extra rings, colored edges, ghost images, or dirty beam patterns on a wall.
Structurally, the first step is to control alignment. The LED, lens, reflector, and glass cover must share the same optical center, and assembly tolerances should be tight. Next, unwanted light needs absorption or blocking paths: matte black inner walls, shielding rings, ribs, honeycomb grids, and deep baffle structures. Bright exposed edges of reflectors or lenses should be avoided.
Optically, use precision lenses, micro-structured diffusers, secondary optics, gradient diffusion layers, or anti-glare glass to make the transition from center light to edge light smoother. Wall washers especially need controlled cut-off and edge light. Offset lenses or shields may be required. The goal is not to make the beam boundary disappear completely, but to create a clean main beam, natural edge transition, and no messy ghost patterns on the illuminated surface.
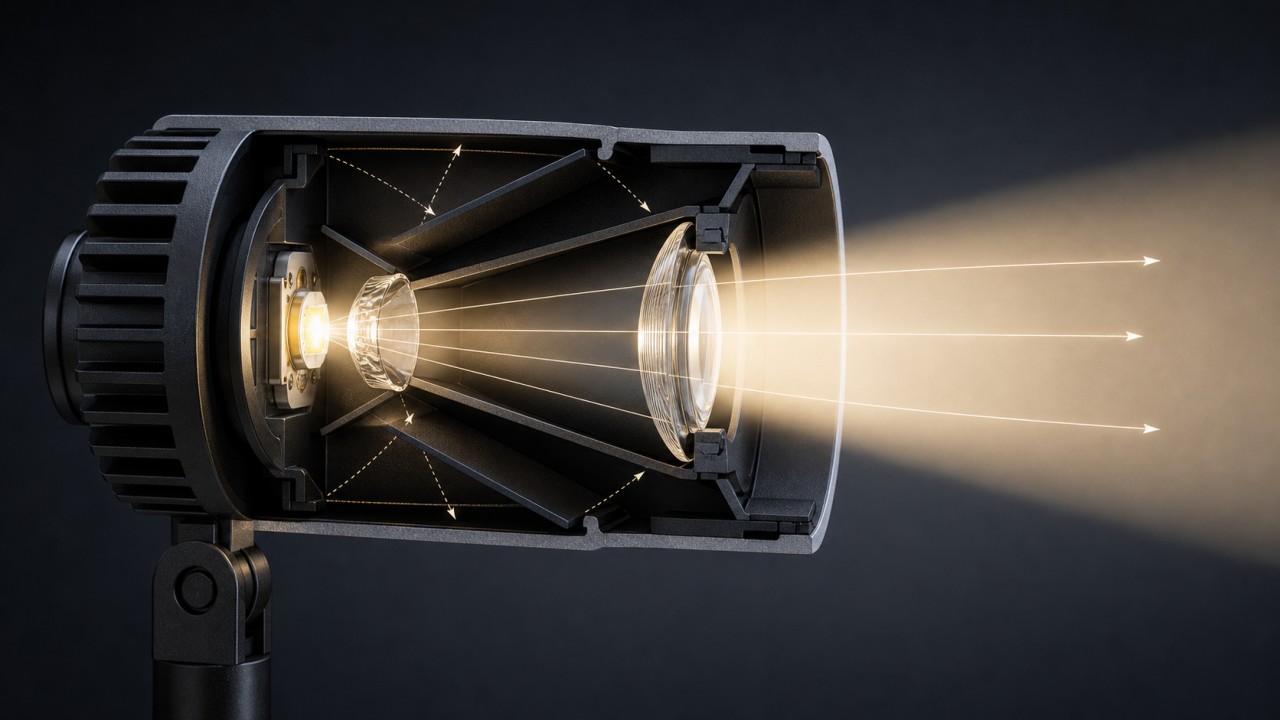
Why do some opal glass lampshades cause color-temperature shift, making a 3000K source look green or red?
When opal glass makes a 3000K source look greenish, reddish, or overly yellow, the cause is usually the interaction among glass formula, diffusion material, thickness, coating, and the LED spectrum. The milky effect often comes from opacifiers, microcrystals, bubbles, or diffusion layers. These structures do not scatter and absorb all wavelengths equally, so they can change the spectral balance of the LED.
If the glass absorbs more blue light, 3000K may become warmer or redder. If red transmission drops or blue-green components become relatively stronger, the light can shift green. Uneven thickness creates different CCT in different areas: thicker regions may appear warmer or dimmer, while thinner regions appear whiter. Low-quality coatings or diffusion powders may also age under heat, increasing color shift over time.
To avoid CCT drift, choose optically neutral opal glass and test it with the actual LED source, not just by looking at the glass alone. Suppliers should provide transmitted spectrum, chromaticity shift, color difference after thermal aging, and batch color-difference data. The luminaire design should also control glass thickness, LED operating temperature, and mixing distance. For high-quality residential lighting, test the complete luminaire for CCT, Duv, and CRI, not only the bare LED.

For tunable-white luminaires, how can glass shades remain optically neutral from 2700K to 6500K?
The challenge for tunable-white luminaires is that the spectrum changes while the shade should not favor one wavelength range too strongly. If the glass has a strong tint, selective absorption, or unstable coating, the color shift at 2700K, 4000K, and 6500K will not be consistent. Users may see warm light as dirty, cool light as greenish, or neutral light as unnatural.
To keep optical neutrality, choose low-iron clear glass, neutral opal glass, or diffusion glass verified by spectral testing. Avoid deep tea, amber, blue-green, heavy smoke, and strong iridescent coatings. If diffusion is needed, use a material with relatively smooth transmittance across the visible spectrum, rather than diffusion powders that strongly absorb blue or red light.
Verification should not be done at only one CCT. Test transmitted CCT, Duv, Ra/R9, and chromaticity shift at the lowest, middle, and highest color-temperature settings. Also test dimmed states, because some drivers change the mixing ratio at low output. For premium products, define shade-plus-luminaire color-tolerance requirements, such as acceptable Duv shift across the tunable range. In simple terms, the shade for tunable-white lighting should express itself as little as possible and let the source's intended color temperature appear faithfully.
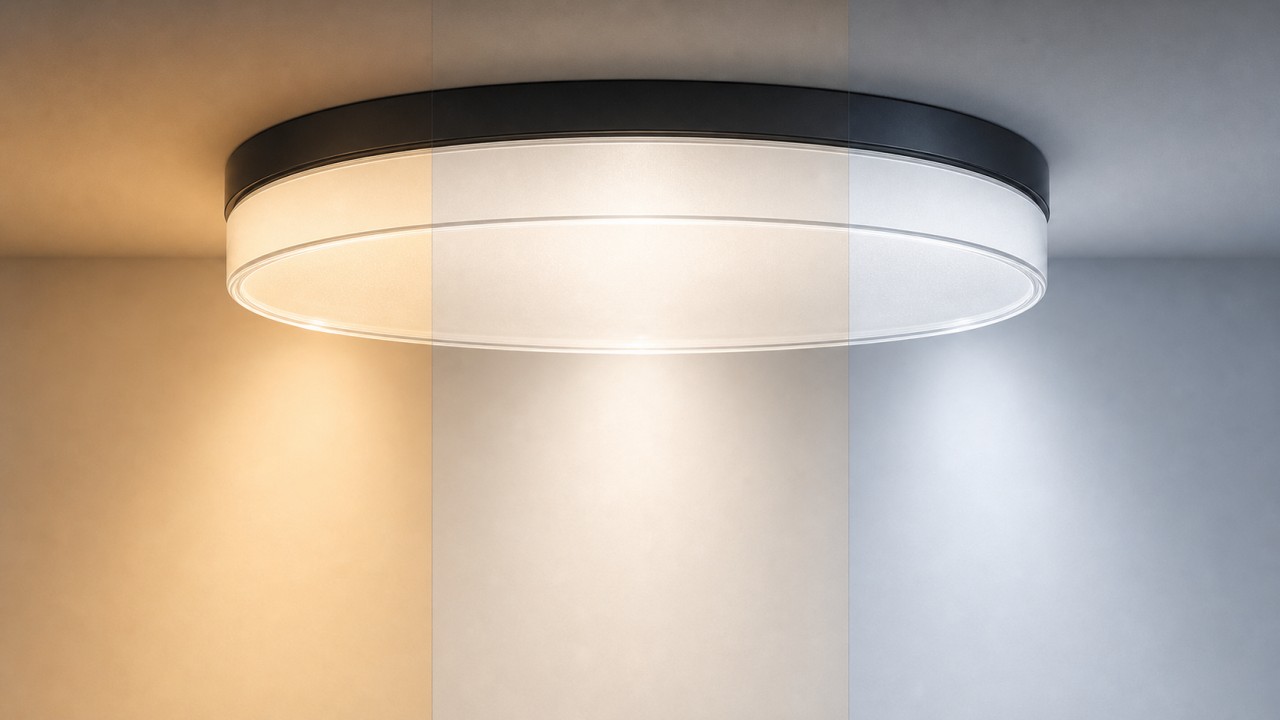
How can long glass diffusers in LED linear lights avoid dark ends and a bright center?
Dark ends and a bright center in LED linear lights usually come from LED layout, light input, mixing distance, reflector cavity, and diffuser design. A linear light looks simple, but uniformity requires the source, cavity, reflector film, diffuser, and end structure to be designed together.
First, LED spacing should be consistent, and the ends should not have long non-luminous zones. If end caps require empty space, add end compensation LEDs, increase end reflectance, or adjust LED pitch near the ends. Second, the distance between LEDs and the diffuser must be sufficient. If it is too shallow, LED dots and hot spots remain visible even with high-haze glass. Third, the inner cavity should use high-reflectance diffuse material so light can mix through multiple reflections.
The glass diffuser can also use gradient microstructures or gradient printed dots. Lower transmittance near bright zones and higher transmittance near dark ends can balance the luminance. End structures can include angled reflectors, white reflective end caps, or light-guide transition zones to reduce edge darkening. The final design should be verified by scanning luminance along the whole luminaire, not by measuring only the center point.
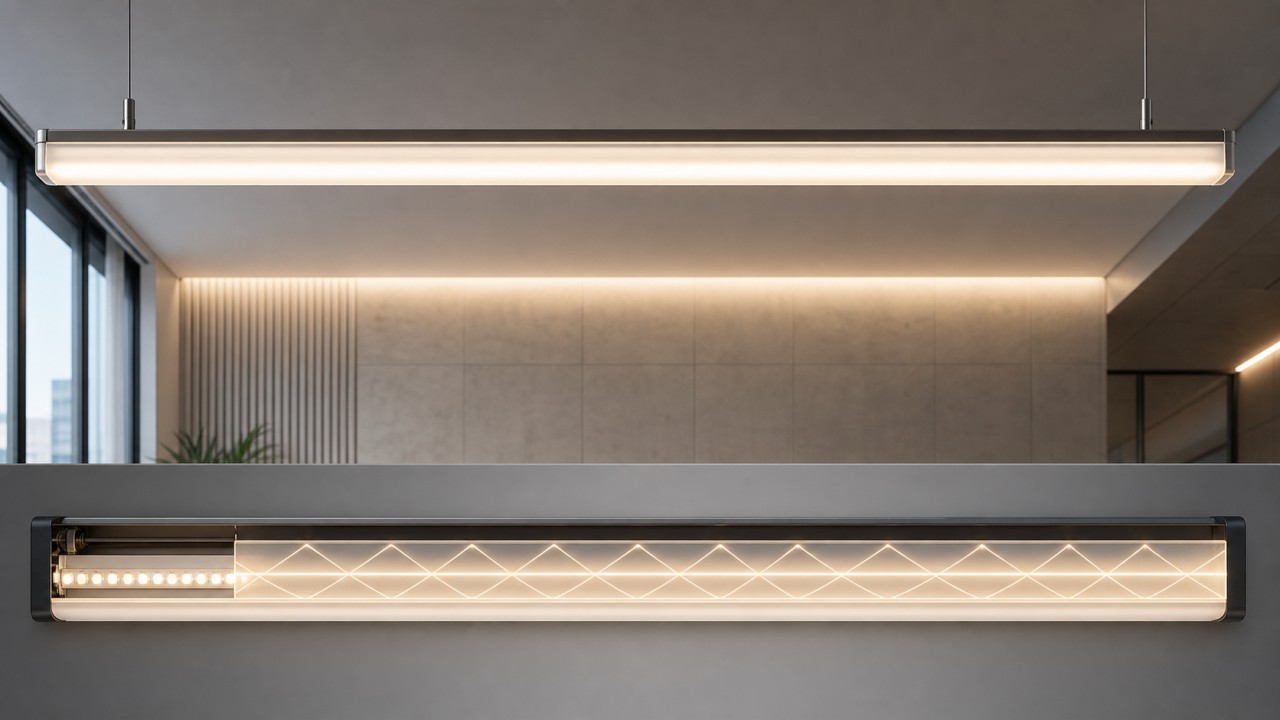
How much beam-angle deviation can glass-lens focal-length error cause, and how does it affect wall washing?
Focal-length error in a glass lens directly affects beam angle, center intensity, and beam-edge quality. The error can come from curvature radius, thickness, refractive index, assembly distance, and the position of the LED emitting surface. If the focal length becomes shorter or the LED shifts away from the focal point, the beam may widen and center intensity may drop. If the focal length becomes longer or the LED is positioned incorrectly, the beam may narrow and create hot spots.
The amount of deviation depends on the lens design and mounting distance, so there is no single universal number. Narrow-beam spotlights are more sensitive. For a 10-15 degree lens, a small focal or assembly error can shift the beam by several degrees and noticeably change center intensity. Wider beams such as 40-60 degrees are more tolerant. Wall washers are especially sensitive because the wall magnifies edge defects and unevenness. Focal error can cause inconsistent throw height, uneven scallops, bright-dark bands, and secondary spots.
Control methods include precision molds, curvature inspection, refractive-index batch control, tight LED-to-lens positioning tolerance, foolproof locating features, and complete luminaire photometric testing. Wall washers should be tested on an actual wall at the specified distance, checking start line, uniformity, edge transition, and overlap between adjacent fixtures. For projects, lens data alone is not enough; the complete luminaire optical effect must be verified.
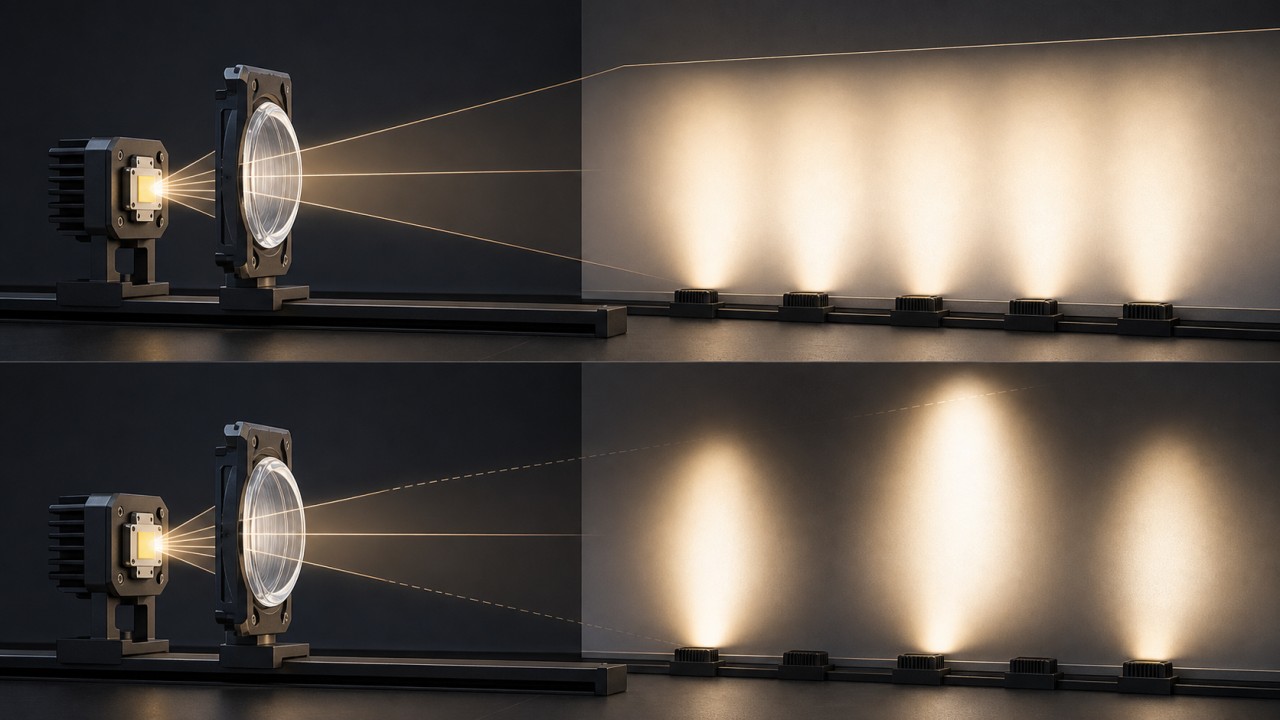
How do reflector materials such as aluminum, plastic, and coatings affect light quality?
Reflectors collect, redirect, and shape light, so they affect efficiency, beam angle, glare, color shift, and long-term stability. Aluminum reflectors are common in downlights, spotlights, and commercial luminaires. They offer good heat resistance, high reflectance, and stable geometry. Anodized aluminum, mirror aluminum, and matte aluminum behave differently. Mirror aluminum gives high efficiency and crisp beams, but may increase glare. Matte or micro-textured aluminum softens the beam but slightly reduces efficiency.
Plastic reflectors are low-cost, lightweight, and easy to mold into complex shapes. They are suitable for low-power LED fixtures. However, ordinary plastics have weaker heat resistance, UV resistance, and dimensional stability. Under heat, they may yellow, deform, or lose reflectance. If plastic reflectors are used, choose heat-resistant engineering plastics and control LED temperature.
Coated reflectors can use glass, plastic, or metal substrates with high-reflectance, selective-reflection, or anti-glare films. High-quality coatings can improve efficiency and spectral control, but they require good process control and durability. Poor coatings may peel, oxidize, become patchy, or introduce color shift. When selecting reflectors, do not look only at initial reflectance. Check heat resistance, humidity resistance, cleaning resistance, and long-term lumen maintenance.
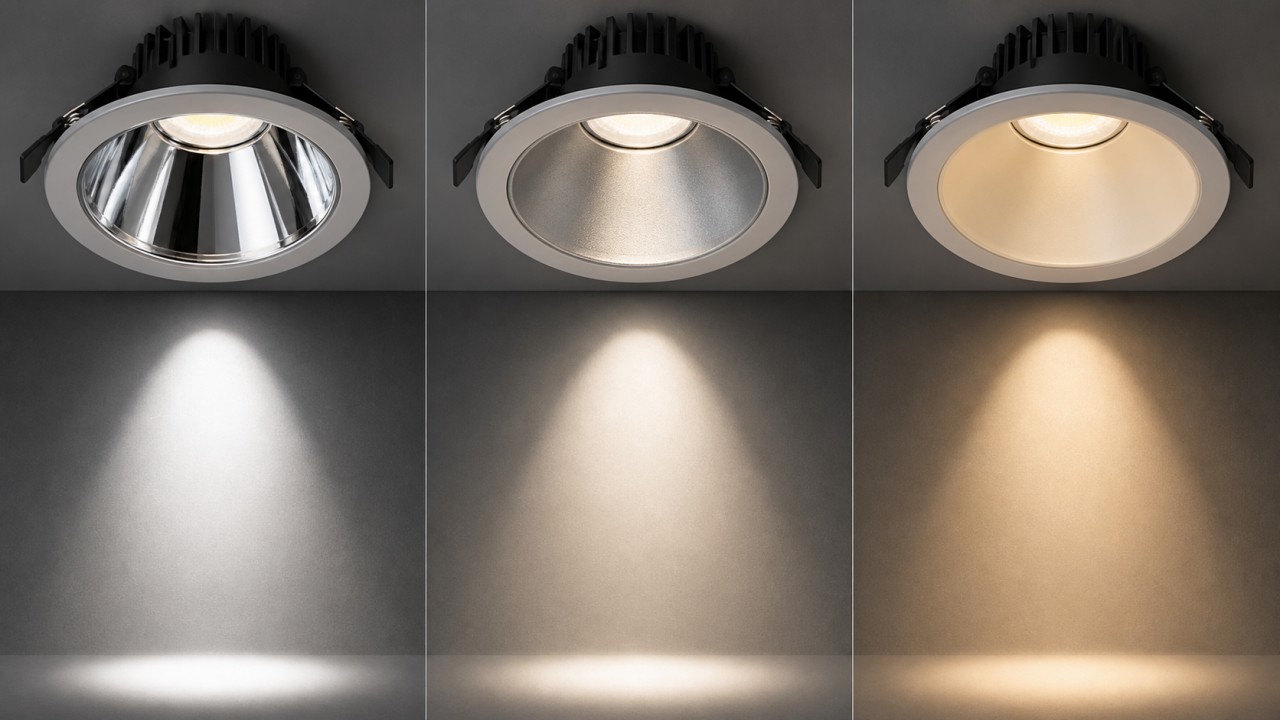
What optical design methods do low-glare luminaires use besides relying on a glass cover?
Low-glare design cannot rely only on a frosted glass cover. A frosted cover reduces source clarity, but if the emitting surface remains very bright or faces the eyes directly, glare still exists. True low-glare lighting needs multiple optical strategies.
Common methods include recessing the light source so the LED sits behind a cut-off angle; using reflectors or lenses to control the beam; adding honeycomb grids, louvers, shielding rings, black cups, or low-brightness apertures to reduce high-angle light; using micro-prisms, light guides, or secondary diffusion to turn bright points into a uniform surface; and applying matte black treatment inside the fixture to absorb stray light.
Installation and dimming also matter. Spotlights should not aim directly into common viewing directions. Wall washers should control reflected glare. Dining pendants should shield the direct view of the bulb where needed. Dimming can reduce brightness for different scenes, but it cannot replace optical glare control. A good low-glare luminaire controls source luminance, beam angle, reflection paths, fixture position, and surrounding brightness together.

How can you quickly judge whether a lamp has serious flicker using simple methods?
The simplest method is to use a phone camera. Point the camera at the lamp or at a white wall lit by the lamp. If you see obvious rolling bands, dark stripes, or flicker on the screen, the lamp may have significant flicker. However, phone testing is affected by shutter speed, frame rate, and exposure, so it is only a rough screening method, not a precise measurement.
Another quick method is to wave a finger or pencil under the light. If you see segmented afterimages, like separated frames, the light may have low-frequency flicker or large ripple. A third method is to record the lamp in slow motion and check for moving brightness bands. If flicker becomes worse at certain dimming levels, the driver or dimmer compatibility may be poor.
Accurate flicker evaluation requires instruments measuring flicker percentage, flicker index, modulation depth, frequency, SVM, or Pst LM. For home use, choose products labeled as having no visible flicker, using high-quality constant-current drivers, and with clear dimming compatibility. Study rooms, children's rooms, kitchen task areas, and long-stay spaces should avoid low-cost lamps with unknown flicker performance.
Why do some lamps flicker clearly in a phone camera while the human eye barely notices it?
A phone camera shows flicker because the camera scans the image line by line while the light output changes over time. Many LED lamps are powered by rectified AC and drivers, so their brightness may fluctuate at 100 Hz, 120 Hz, or higher. Human eyes are not very sensitive to high-frequency fluctuation, especially when modulation is small. A phone's electronic shutter can convert that time variation into visible bands or rolling dark stripes.
This does not mean every phone-camera stripe equals severe visual risk. Camera settings can exaggerate flicker, and stripes can appear when shutter speed interacts with the lamp frequency. But if obvious bands appear on multiple phones and shooting modes, and a hand-waving test also shows segmented afterimages, the lamp should be treated with caution.
Comfort depends on frequency, modulation depth, and use scenario. High-frequency, low-depth ripple is usually less problematic. Low-frequency, high-depth flicker is more likely to cause fatigue. Dimming is especially important: some lamps are acceptable at full output but flicker badly when dimmed. For reading, study, handwork, and kitchen tasks, choose fixtures with clearly controlled flicker performance.
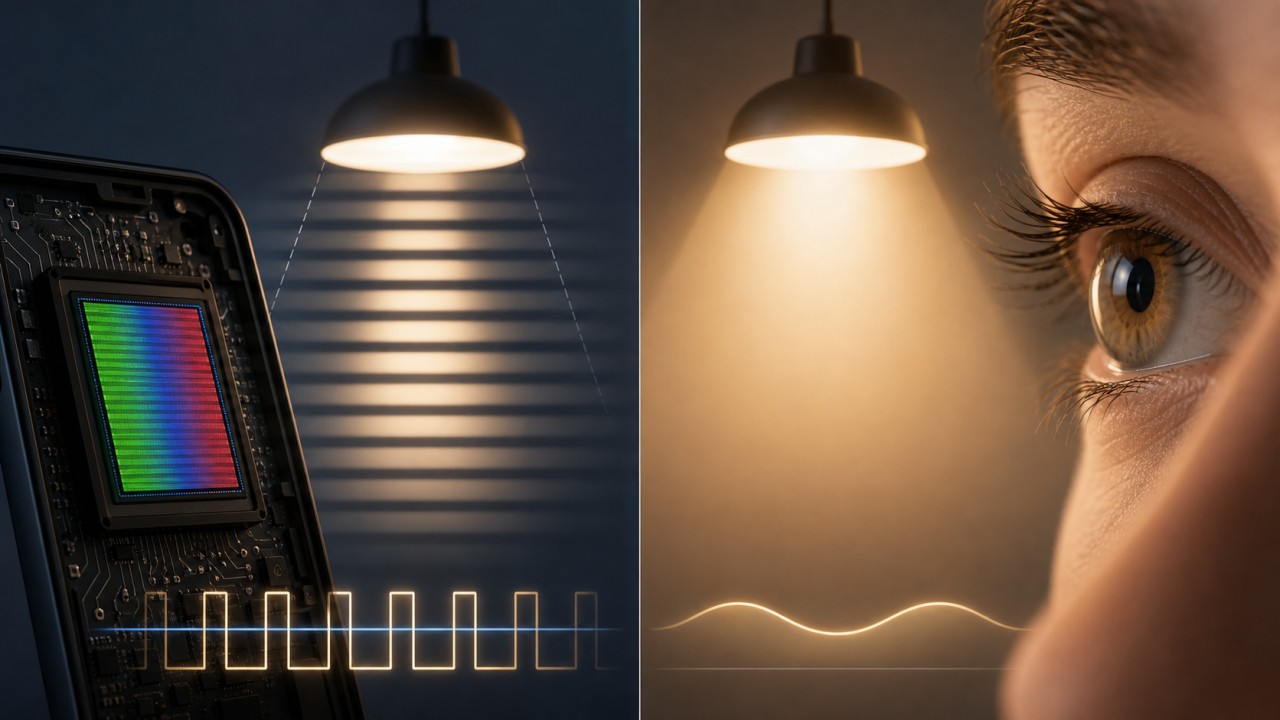
Blue-light protection: can glass lampshades use material or coatings for selective spectral filtering?
A glass shade can provide selective spectral filtering through its material or coating, but it is not a complete blue-light protection solution by itself. Blue-light safety mainly depends on the LED spectrum, luminance, distance, exposure time, and complete luminaire optics. The glass shade can act as an auxiliary layer that reduces some short-wavelength blue light or modifies the transmitted spectrum.
Material-based filtering adds ingredients to the glass formula, such as certain rare-earth or metal oxides, so the glass absorbs part of the short-blue range around 415-455 nm. The advantage is stability and wear resistance. The disadvantage is possible loss of transmittance, CCT shift, and reduced color rendering. Coating-based filtering uses multilayer films to selectively reflect or absorb blue wavelengths. It is more flexible but must be tested for wiping, heat, humidity, and long-term stability.
Blue-light protection should not mean filtering as much blue as possible. Excessive filtering can make the light yellow, reduce color rendering, lower visual clarity, and weaken useful daytime circadian stimulation. Children's rooms, bedside lamps, and night modes may benefit from reduced short-blue content. Study and work areas need a balance among low glare, low flicker, high CRI, and suitable CCT. In procurement, look at photobiological safety of the complete luminaire, not only blue-light claims for the shade.
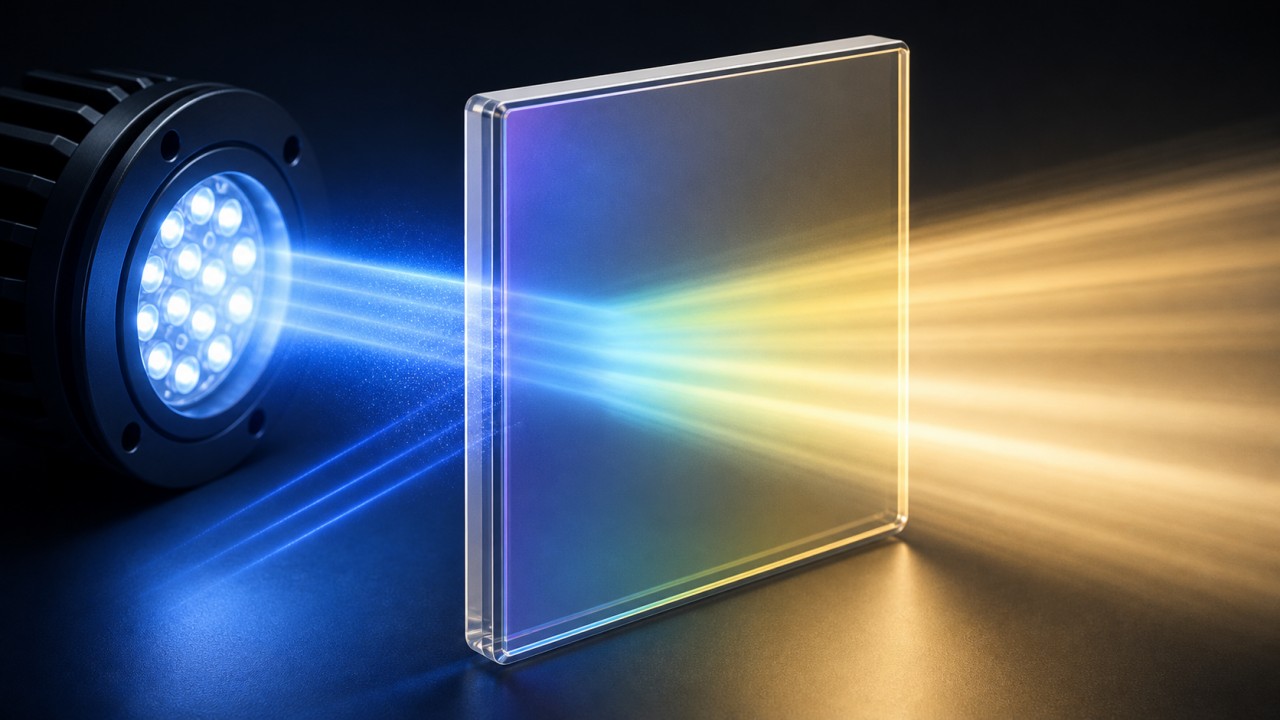
For age-related vision decline, how should glass lampshades choose light color and haze to compensate visually?
Common age-related visual changes include yellowing of the lens, smaller pupil size, lower contrast sensitivity, higher glare sensitivity, and slower dark adaptation. Lighting for older adults therefore needs to be brighter but not harsh, color-accurate but not excessively cool.
Glass shades should use high transmittance with moderate diffusion. Reading, cooking, medicine identification, and washing areas need sufficient illuminance. A useful range is 70-90% transmittance with 30-70% haze, combined with a larger soft emitting surface to reduce bright points. A very milky low-transmittance shade can make the space too dim for detail recognition. A fully clear shade can create glare.
For color temperature, 3000K-4000K is often suitable for daily activities: clearer than very warm light but less harsh than high-CCT cool white. CRI should preferably be Ra 90 or higher, with good red and skin-tone rendering, helping users judge food, medicine, and physical condition. Night lights should use low brightness, low CCT, and low mounting positions to avoid direct eye exposure. The overall principle is higher illuminance, lower glare, high color rendering, and soft diffusion.

Scenario-Based Lighting and Lifestyle
Should dining pendant light fall on the tabletop or on the food, and how should color temperature and CRI be selected?
The dining pendant should mainly light the tabletop and food area, not people's faces and eyes. More precisely, it should illuminate the center of the table, dishes, and food while allowing the surrounding room to remain slightly dimmer. If the beam is too narrow, it feels like a stage spot and the table edges become dark. If it is too wide, the dining area loses focus.
Mounting height should avoid blocking sight lines and direct glare. A common range is about 70-90 cm from the bottom of the pendant to the tabletop. For long tables, use multiple pendants or a linear pendant so the table is evenly covered. The shade should hide direct view of the bulb. Opal glass, light smoked glass, subtle texture, or internal diffusion can reduce glare compared with a fully exposed clear bulb.
Recommended CCT is usually 2700K-3000K, making food look warm and appetizing. Modern open kitchen-dining spaces can use 3000K-3500K. CRI should preferably be Ra 90 or higher; good R9 helps render meat, fruit, and warm-colored food. Low-CRI cool white light is not suitable for dining because it can make food look grey, cold, or unappealing.
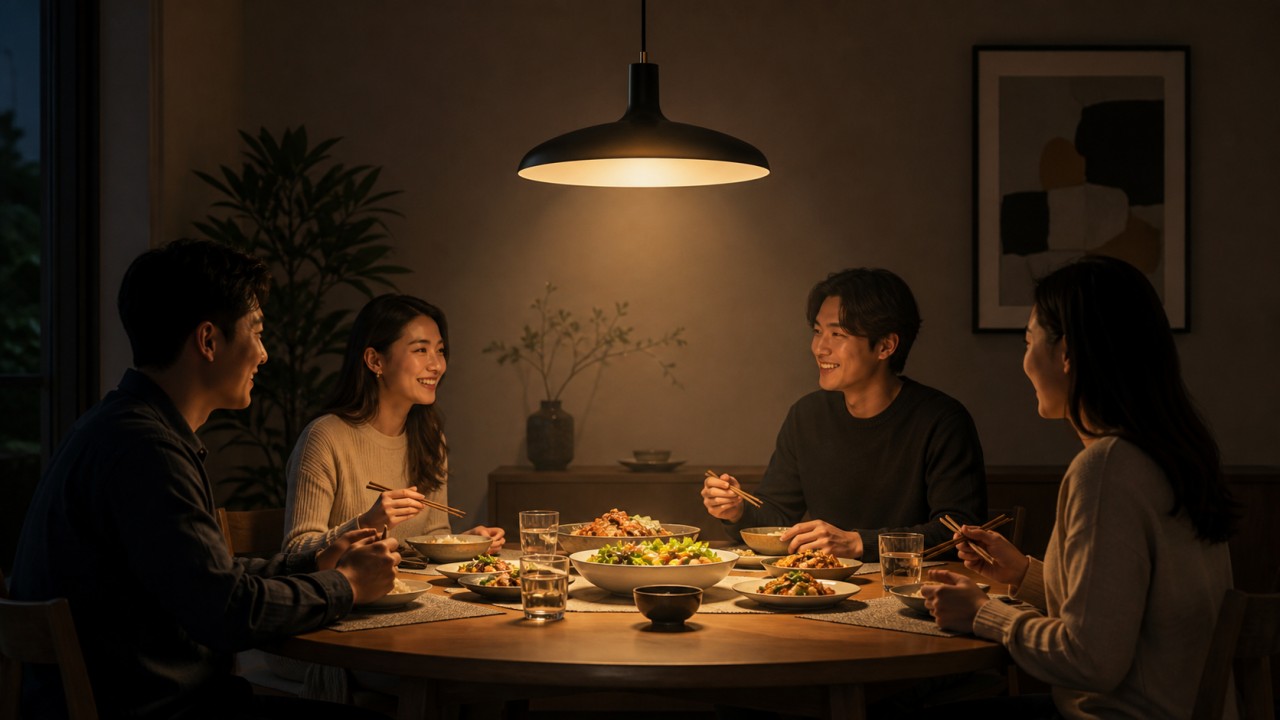
In movie mode, which living-room lights should stay on and which should be turned off?
Movie mode should reduce reflections on the screen and direct glare to the eyes, while keeping a small amount of low-level background light. This prevents the eyes from repeatedly adapting between a bright screen and a completely dark room. Turn off main ceiling lights, spotlights, and bright pendants that face the TV, hit the screen, or enter the viewer's eyes.
Keep low-position, indirect, warm, and dim lights: bias lighting behind the TV, a floor lamp behind or beside the sofa, toe-kick lights, strip lights, or cabinet-reflected light. The light should fall on walls or floors, not directly on the screen, and should not create visible screen reflections. CCT can be 2200K-3000K, with very low brightness.
If the living room has grouped controls, a good movie scene is: ceiling lights off, TV-wall spotlights off, TV bias light at 10-20%, sofa-side lamp at 5-15%, and toe-kick or pathway lights at low level. This keeps immersion while still allowing safe movement and easy access to objects.
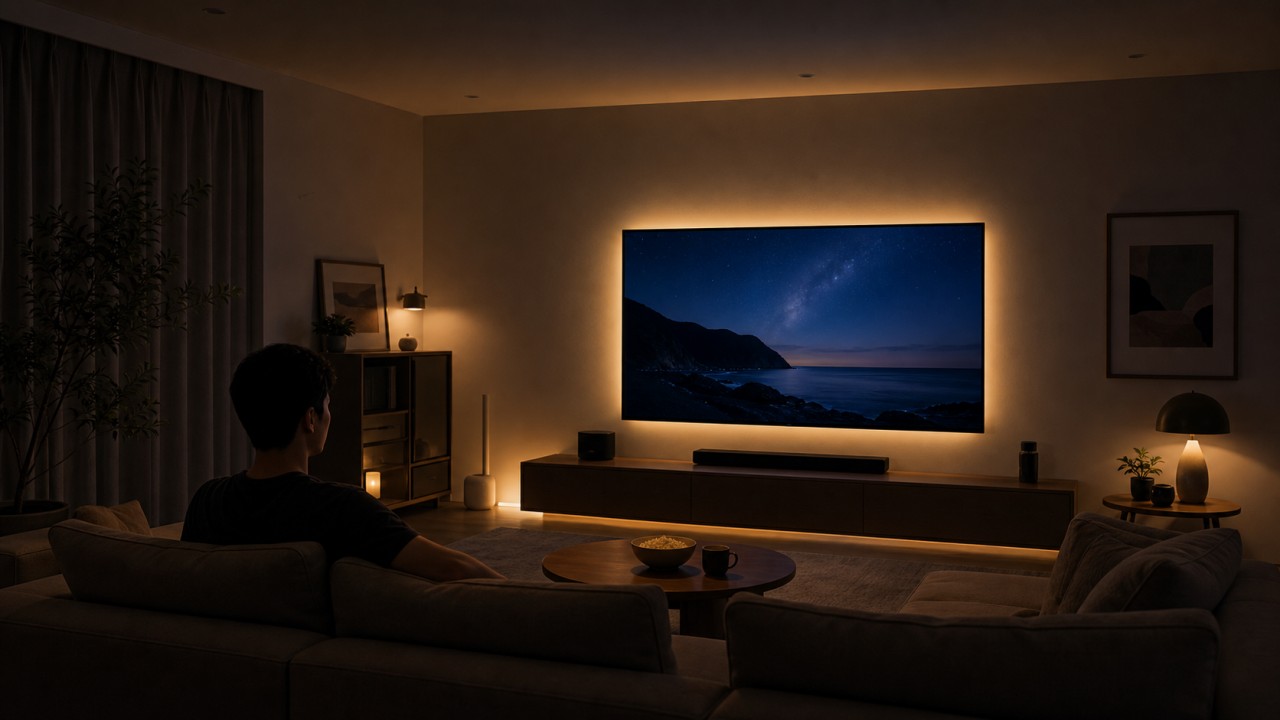
How can lighting for a tea corner or wine cabinet reveal texture without becoming overly heavy?
Lighting for a tea corner or wine cabinet should reveal material texture without becoming overly theatrical. The key is small-area accent light plus soft ambient light, giving highlights to ceramics, glass, wood grain, bottles, and liquid while avoiding an excessively dark surrounding.
A tea area works well with warm 2700K-3000K light and Ra >= 90. Light can come from the upper side or front side, falling on the tea setting and creating gentle shadows. Avoid strong direct glare on reflective teaware. Use a medium-narrow spotlight, low-luminance pendant, or concealed strip. For wine cabinets, use linear lights, shelf lights, or backlighting. CCT can be 2700K-3500K depending on style. Clear bottles benefit from backlight or side light, while dark bottles need front-side or upper accent light.
The key to avoiding heaviness is contrast control. Accent light can be about two to four times brighter than ambient light; the surroundings do not need to be black. Glass shades can be light smoked, low-iron clear, subtly textured, or low-haze diffusing glass, preserving highlights while reducing harsh reflection. Dimming is important: use low levels for evening mood and higher levels for display.
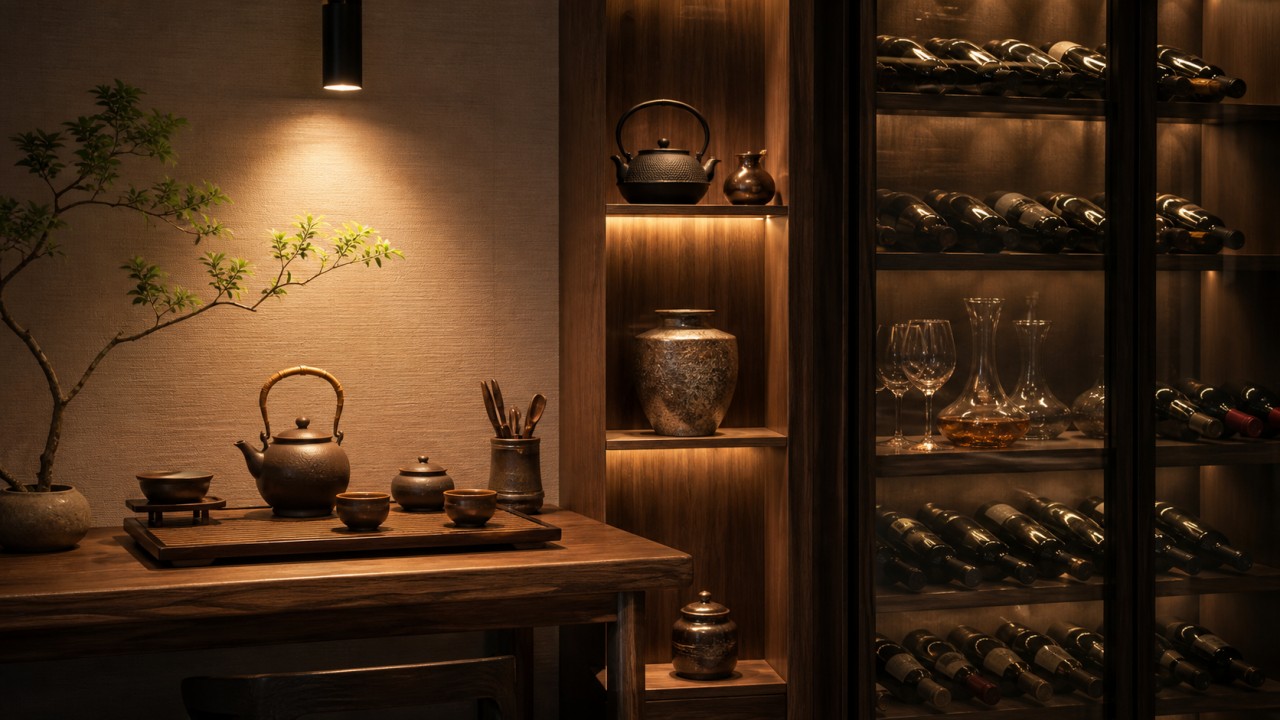
How should bedroom night-mode lighting be designed in brightness, color temperature, and position so it does not disturb sleep afterward?
Night-mode bedroom lighting should not illuminate the whole room. Its job is to let people see the path safely while minimizing eye stimulation and circadian disruption. Brightness should be very low, often only about 1-5 lx on the floor or path. The bedside or bathroom entrance can be slightly higher, but there should be no harsh bright points.
Use warm low-CCT light, about 1800K-2700K, and avoid cool white light. The light position should be low, indirect, and away from the eyes: under-bed strips, baseboard lights, motion-sensor footlights, wardrobe-bottom lights, or a low light near the bathroom door. Do not use ceiling downlights or strong bedside lamps as night lights.
Control can use motion sensors, bedside foot sensors, low-level buttons, or smart scenes. The on-time should be short, with fade-in and fade-out if possible. Glass shades should be high-haze and low-luminance, not clear point-source covers. A good night light lets the user move safely without fully waking up, so returning to sleep remains easy.
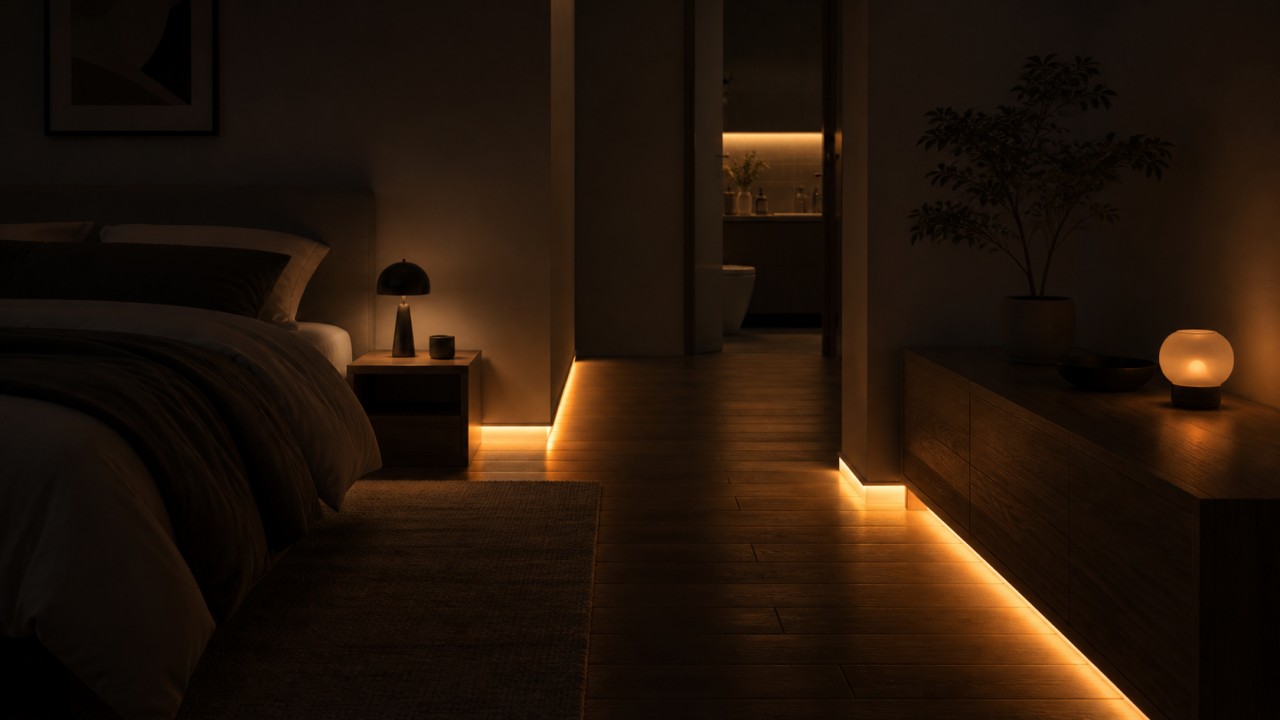
How can one space switch between daydreaming, reading, and housework through layered lighting?
To support daydreaming, reading, and housework in one space, divide lighting into ambient light, task light, accent light, and mood light, with separate control. Do not rely on one main lamp dimmed up and down, because different activities need different light positions and brightness distributions.
For resting or doing nothing, use low-level warm ambient light plus a little wall or corner light. Around 2700K with gentle contrast works well. For reading, add local task light so the page reaches about 300-500 lx, while keeping some background light to avoid excessive contrast. For housework, use higher overall brightness and better uniformity: ceiling diffusion, cabinet lights, and work-zone lights. CCT can rise to 3000K-4000K for clarity.
A practical setup includes a dimmable ceiling or linear light for base light, a floor or table lamp for reading, wall lights or strips for mood, and cabinet lights for storage and cleaning. Scene control should be simple: rest at 30%, reading with ambient at 40% plus reading lamp at full, and housework with general lighting at 70-100%. Layered lighting lets the room respond to life, instead of staying at one brightness all the time.
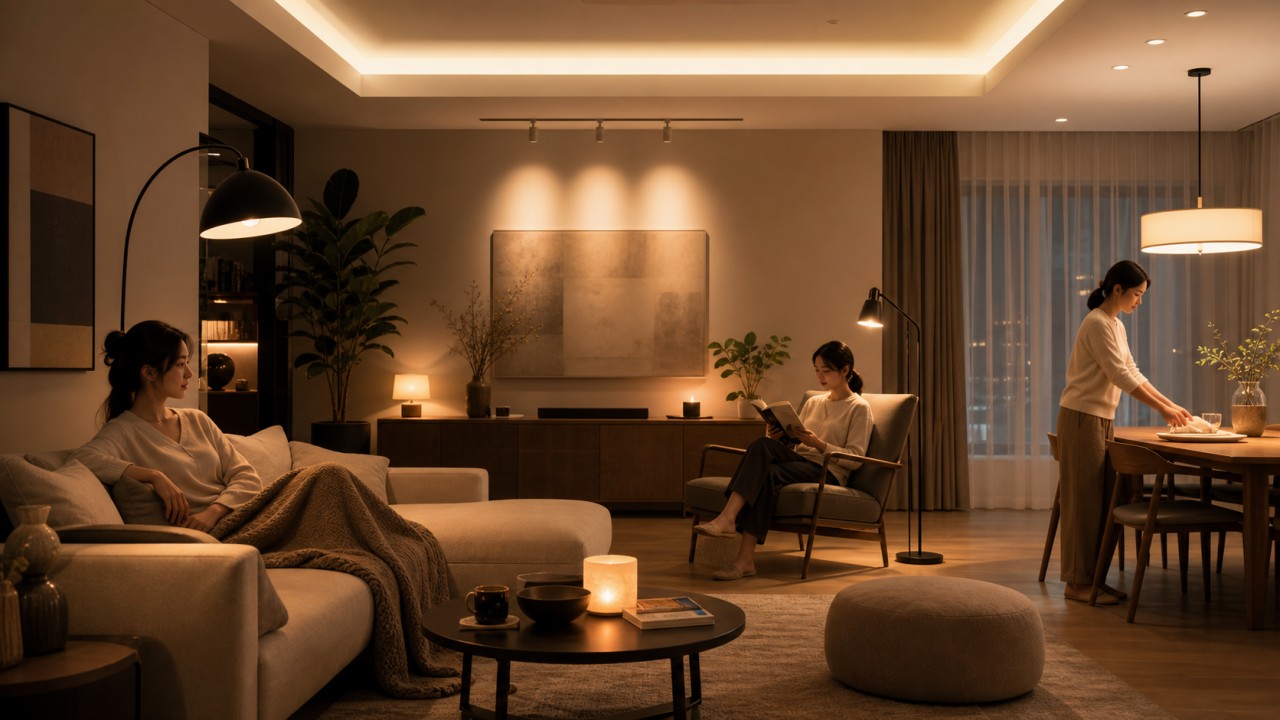
How can lighting, rather than partitions, define zones in an open living-dining-kitchen space?
An open living-dining-kitchen space does not need partitions to feel zoned. Lighting can create boundaries through different brightness levels, beam directions, fixture types, and color-temperature moods, while keeping the overall style consistent.
The kitchen should be the clearest zone: high countertop illuminance, even light, good CRI, and often 3500K-4000K for food preparation. The dining area can use a pendant or linear light to focus light on the table, usually 2700K-3000K, creating a visual center. The living area should use softer ambient light, wall washing, floor lamps, and TV bias lighting, with lower brightness and a more relaxed mood.
Transitions should be gentle, not abrupt. Use the same material language or fixture family for unity, while changing mounting height and light distribution for function. Grouped controls are essential: cooking, dining, movie watching, and hosting guests should have separate scenes. Even without walls, people will naturally read the kitchen, table, and lounge as different zones.
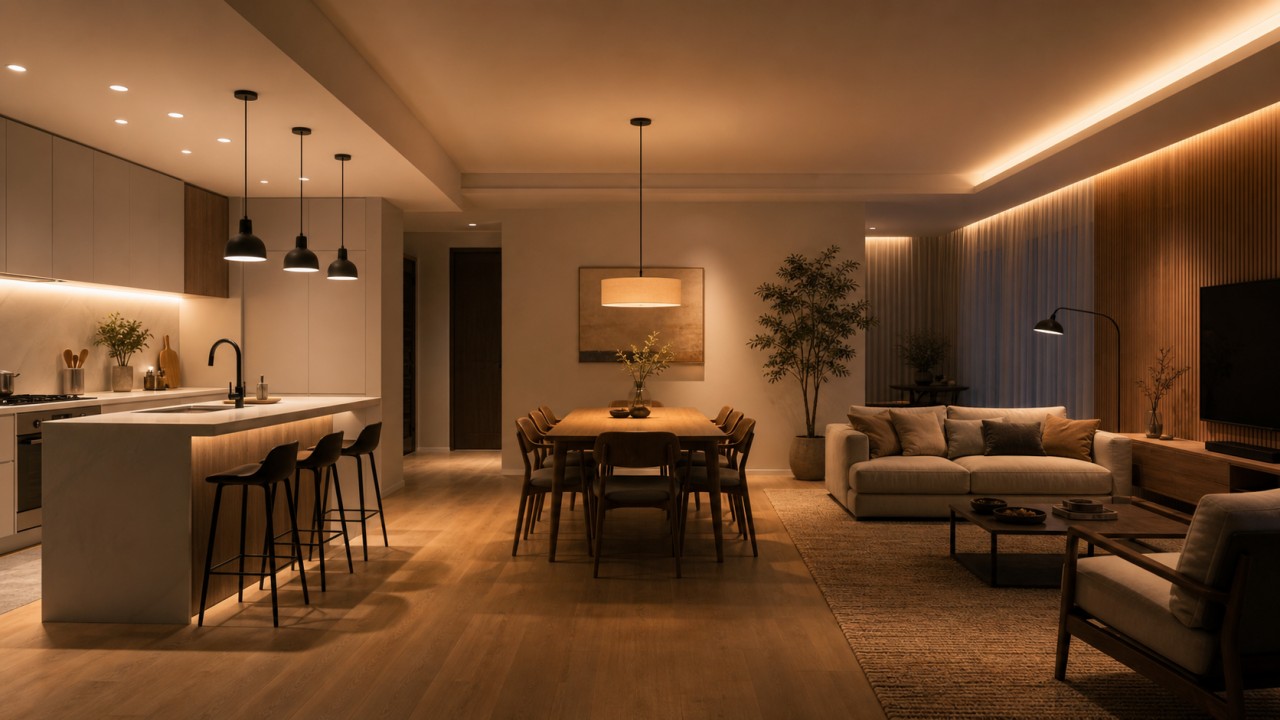
How can a yoga or meditation corner be lit to support relaxation and focus?
A yoga or meditation corner should feel quiet, low-stimulation, and adjustable. It does not need to be very bright. It needs soft, stable, low-glare light with a calm rhythm. Base lighting can come from indirect light, wall-reflected light, low-level strips, or soft lamps with opal glass shades. Avoid strong overhead downlights shining into the eyes.
Recommended CCT is 2700K-3000K, and evening meditation can go down toward 2200K. Dimming is important: use more light for stretching or cleaning the mat, and lower levels for meditation. Light should come from the side, wall, or floor reflection, not from a bright point in the line of sight. Suitable glass shades include high-haze opal, fine frosted, or low-reflective soft glass.
For a sense of ritual, add one low-brightness accent light aimed at a plant, fabric, or textured wall rather than at the person. Avoid rapidly changing colored lights or dynamic effects because they distract attention. Good yoga lighting gently defines the body, keeps the space quiet, and lets attention return naturally to breathing.
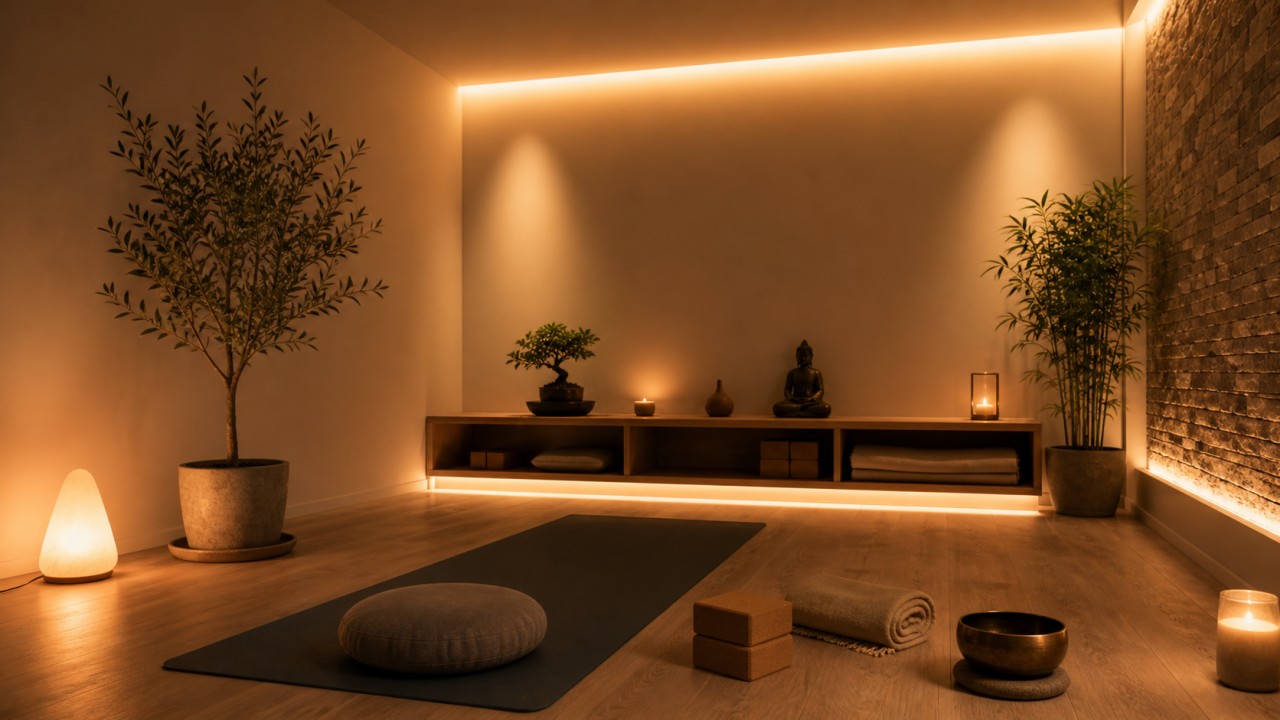
Efficiency and Energy Saving
How can high-transmittance glass lampshades directly improve system efficacy (lm/W) and help luminaires meet energy-efficiency standards?
System efficacy, measured in lm/W, is the luminous flux output of the complete luminaire divided by input power. It is not the LED-chip efficacy. Since the glass shade affects delivered lumens, a high-transmittance shade can directly improve system efficacy. For example, a 10 W luminaire producing 800 lm after the shade is 80 lm/W. If a better glass shade raises output to 900 lm, the system efficacy becomes 90 lm/W.
The improvement comes from reducing absorption, reflection, and ineffective scattering. Low-iron glass, proper thickness, smooth surfaces, low-loss diffusion structures, and high-quality coatings can all reduce light loss. However, transparency alone is not enough. If a clear shade causes glare and users dim the lamp or replace the bulb, real energy performance may not improve. An efficient shade must balance high transmittance with necessary glare control.
For manufacturers, high-transmittance glass can help reach higher lumen output at the same power, or reduce LED power and heat at the same target brightness. It may also reduce LED count, driver load, and operating temperature, improving lifetime. Evaluation should include complete luminaire efficacy, light distribution, UGR, temperature rise, and maintained output, not just glass transmittance.
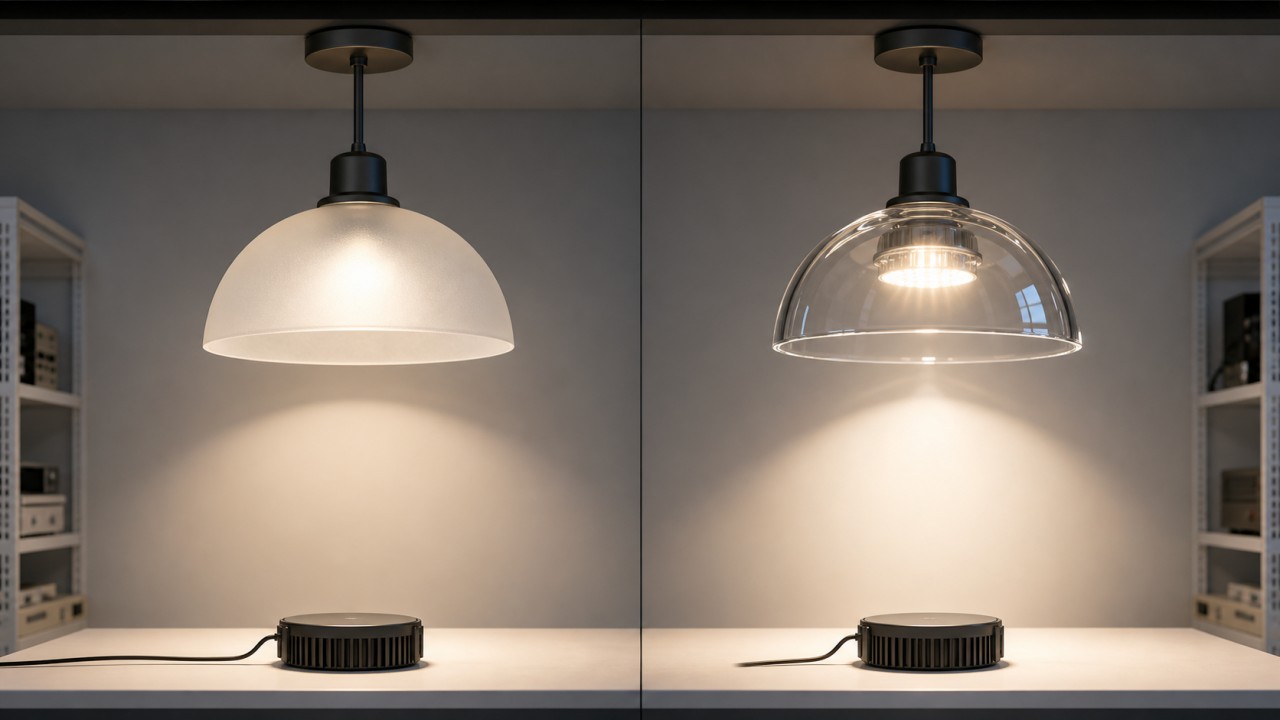
In energy-saving retrofits of existing luminaires, how much efficacy gain can be achieved by replacing only the glass shade?
The efficacy gain from replacing only the glass shade depends on how much loss the original shade caused. If the old cover is yellowed plastic, thick opal glass, heavily dirty, or dark decorative glass, replacing it with high-transmittance, low-loss, easy-clean glass may increase delivered light by 10-30%, sometimes more. If the original shade is already clear high-transmittance glass, the gain may be only a few percent.
The value is not only higher initial brightness, but also better maintained performance. Glass is less prone to yellowing than ordinary PC covers, and high-quality coatings can be easier to clean. Effective output declines more slowly over time. For large stocks of corridor, basement, kitchen, or public-area luminaires, shade replacement can be cheaper than replacing the whole fixture.
However, replacement must not be blind. The new shade must match size, fixing method, weight, heat dissipation, glare control, and safety requirements. Higher transmittance may increase direct luminance, so glare must be checked. A change in enclosure may affect temperature. Before and after retrofitting, measure illuminance, power, temperature rise, and fixing reliability. The goal is not only brighter light, but safe and comfortable performance.
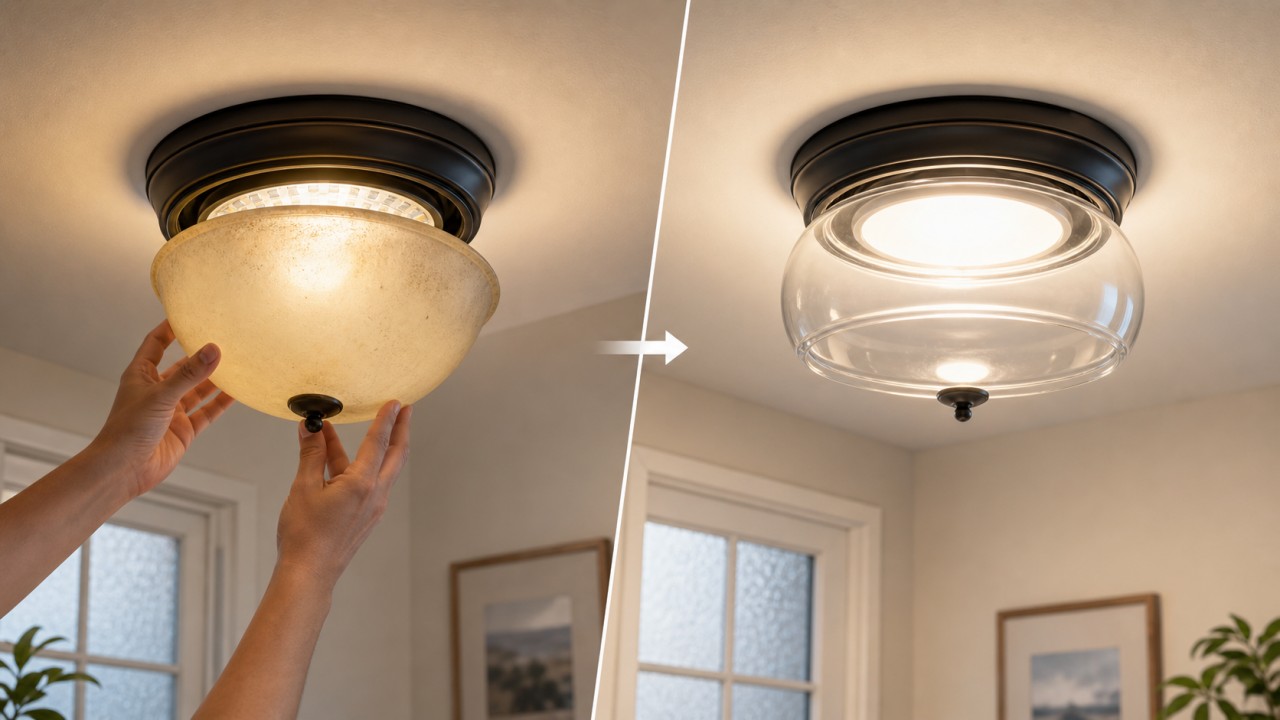
Besides wattage, what parameters should be considered when judging whether a lamp is energy-efficient?
To judge whether a lamp is energy-efficient, do not look only at wattage. A low-power lamp that is not bright enough may require more fixtures or longer operating time. Key parameters include complete luminaire efficacy in lm/W, actual lumen output, whether the light distribution sends light where needed, and whether color quality and glare control allow users to use lower brightness comfortably.
Also check dimming ability, standby power, driver efficiency, power factor, lifetime, and lumen maintenance. A high-quality LED fixture may not have the lowest initial wattage, but if it has high efficacy, long life, slow lumen depreciation, and scene-based dimming, its long-term energy and replacement cost can be lower. For sensor lights, sensor accuracy also matters: false-on and false-off behavior both affect real energy saving.
The glass shade contributes too. High-transmittance, low-loss, easy-clean glass delivers more useful light from the same power. Good glare control prevents users from raising brightness unnecessarily. True energy efficiency means using the least electricity to provide enough comfortable light where it is actually needed.
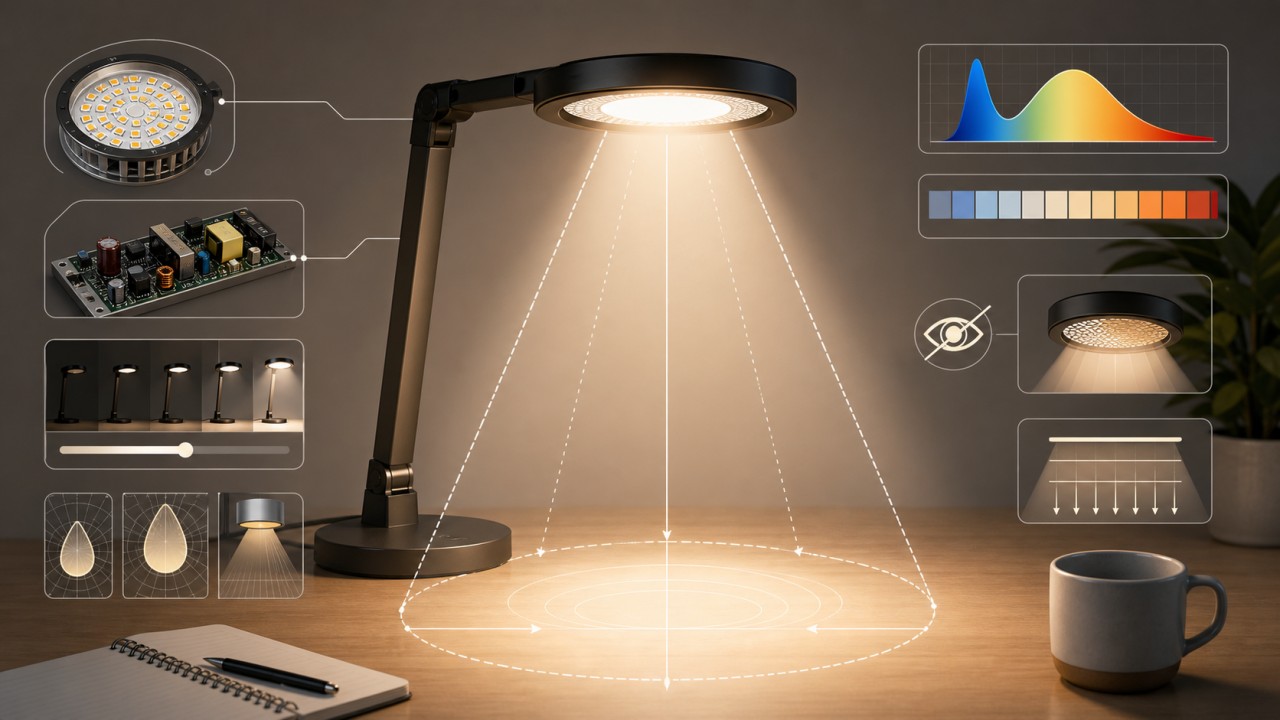
What is the relationship between a luminaire's energy-efficiency rating and its actual electricity savings?
Energy efficiency rating reflects the efficiency of a luminaire under standard test conditions. It is usually related to complete luminaire efficacy, source efficiency, and driver losses. A higher rating generally means less power is needed for the same light output. But real savings also depend on operating hours, room needs, control method, and user behavior.
For example, a high-efficiency lamp installed in an area that does not need high brightness and left at full output may not save more than a medium-efficiency lamp with sensors and dimming. On the other hand, in kitchens, corridors, offices, and public areas that operate for long hours, higher efficiency can significantly reduce electricity cost and heat.
Energy rating is an important selection threshold, but not the whole story. Also check whether the light is useful, whether it is over-bright, whether it can be grouped and dimmed, whether lumen depreciation is low, and whether maintenance is easy. The ideal solution is high-efficiency luminaires combined with good lighting design and smart control, avoiding the problem of efficiently lighting places that do not need light.
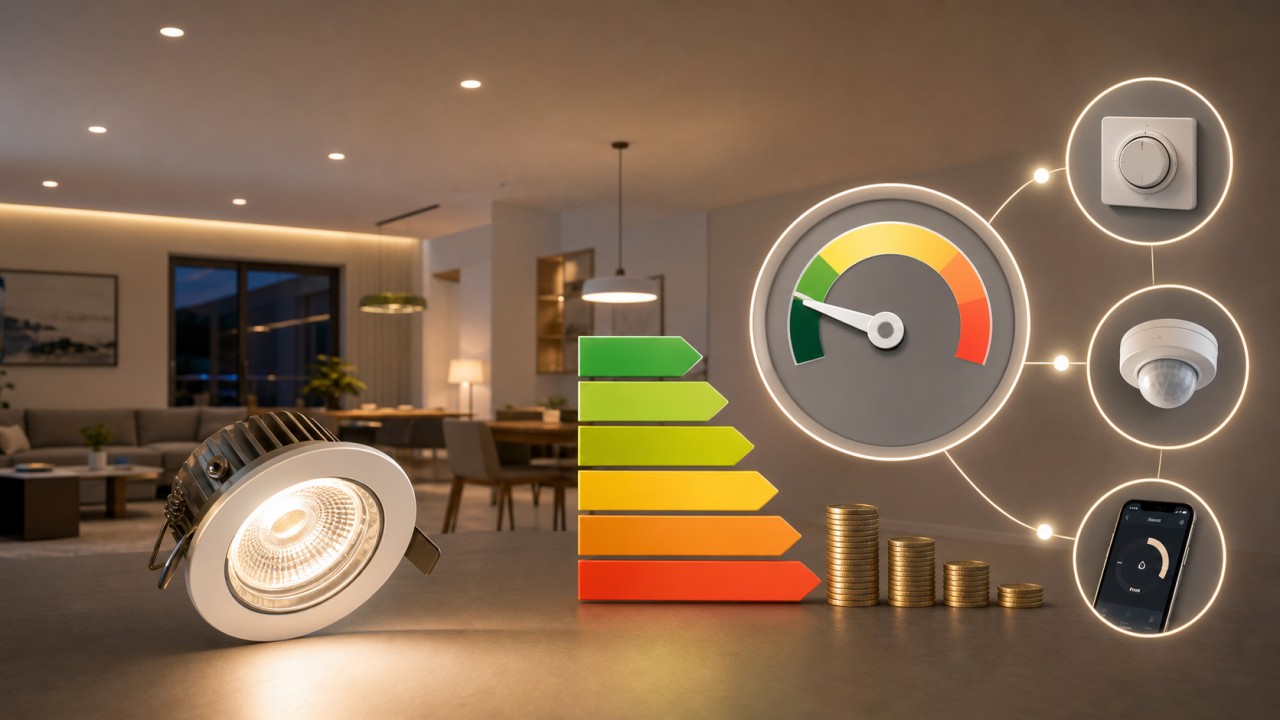
Why do high-efficacy luminaires cost more upfront but become more economical over the long term?
High-efficacy luminaires often cost more upfront because they use better LED chips, drivers, power supplies, heat sinks, optics, and structural materials. They convert electricity into light more efficiently and usually control temperature, glare, flicker, and lumen depreciation better. A cheap luminaire may cost less at purchase, but electricity, replacement, and maintenance can be higher over time.
Long-term value comes from three areas. First, energy saving: lower power for the same illuminance. Second, longer life: LEDs and drivers are less likely to fail early due to heat or poor components. Third, lower maintenance: shades yellow less, lumen depreciation is slower, and cleaning restores performance better. In spaces used for several hours every day, electricity and maintenance savings can offset the initial price difference within a few years.
The right method is life-cycle cost, not purchase price alone. Include product cost, electricity, expected lifetime, replacement labor, downtime, and comfort. In kitchens, studies, commercial spaces, and public corridors, high-efficacy reliable luminaires are often more economical than cheap fixtures.
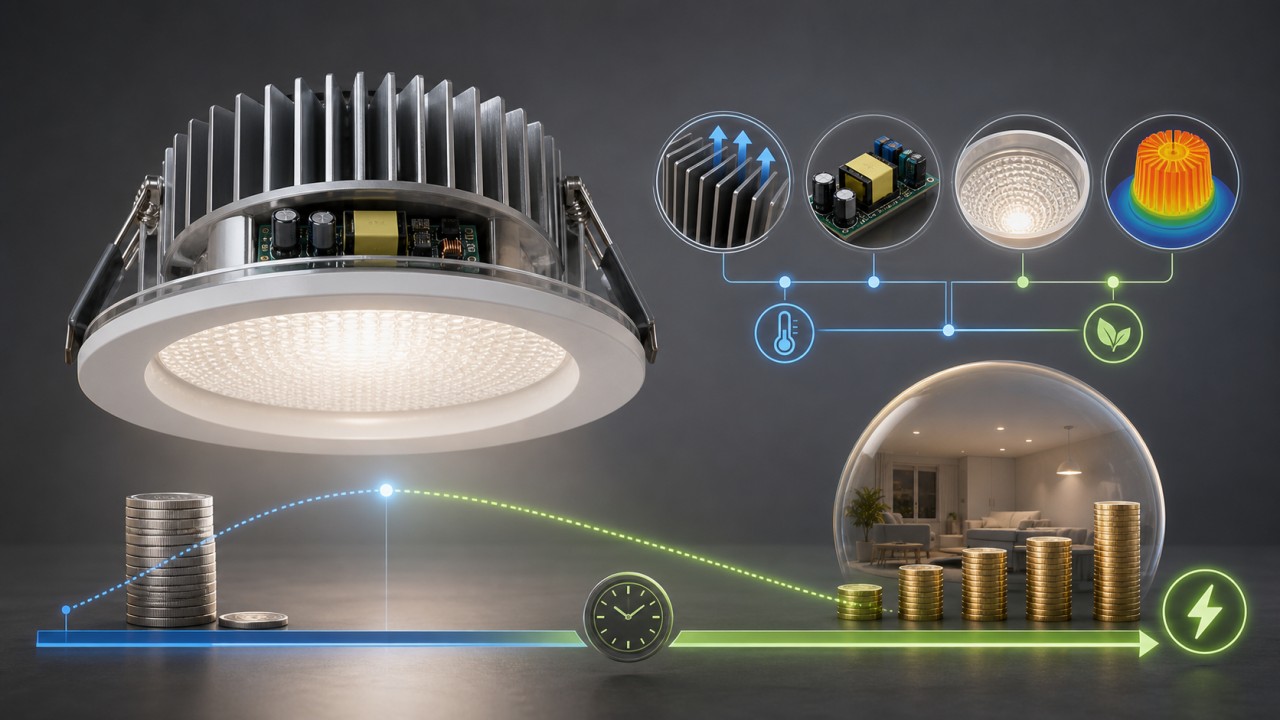
Must a broken luminaire be discarded entirely, or can the light source or driver be replaced in some cases?
A failed luminaire does not always need to be thrown away. Many failures come from the light source module, driver, terminal, switch, remote receiver, or sensor, while the housing, glass shade, and heat sink remain usable. If the fixture uses replaceable lamps or modular drivers, repair can be cheaper and more sustainable than replacing the whole luminaire.
Repair is practical when a standard E27, GU10, or similar lamp fails; when the LED driver fails but the LED module and housing remain good; when a remote or dimming module can be replaced; or when a broken glass shade can be replaced with an original part. Replacement parts must match voltage, current, power, IP rating, dimming protocol, and insulation requirements.
Repair is not recommended if the housing is burned, insulation is aged, water corrosion is present, the circuit board is widely damaged, the heat sink is deformed, the integrated fixture has no service parts, or post-repair safety cannot be guaranteed. Work involving mains voltage and drivers should be handled by qualified personnel. Choosing maintainable luminaires at the design and procurement stage is an important way to reduce waste.
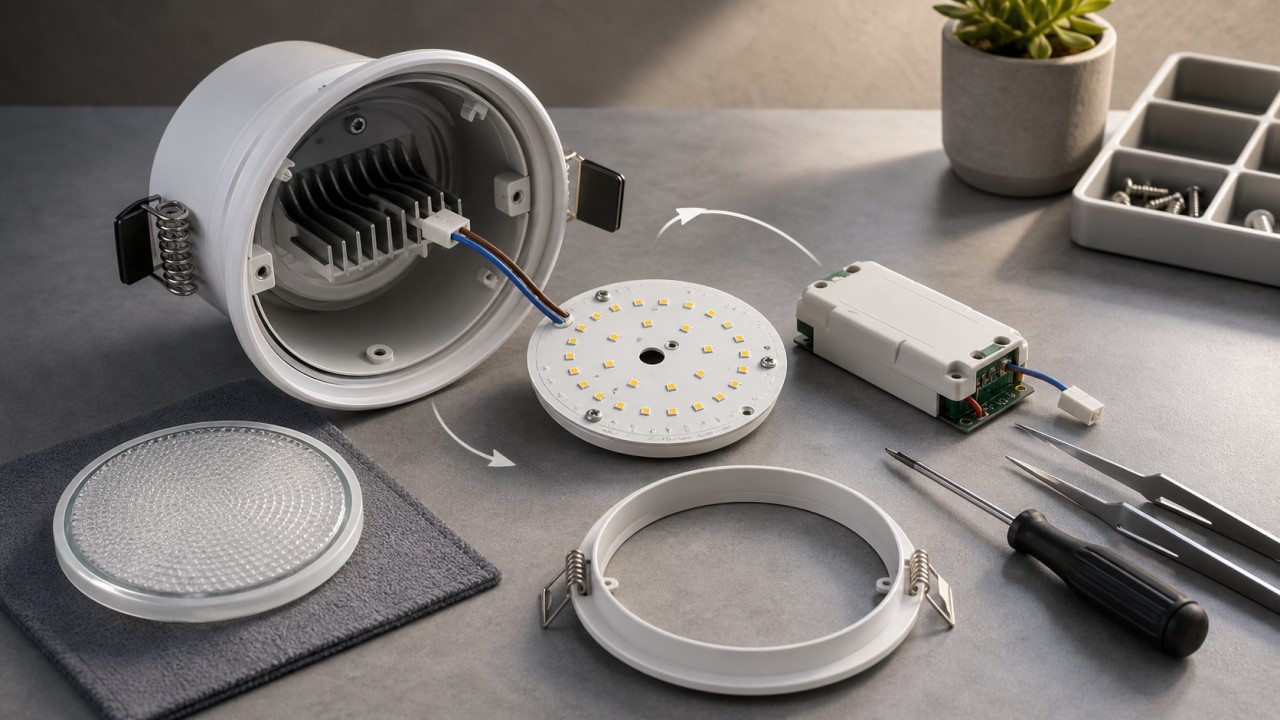
How should old luminaires and light sources be handled to reduce environmental impact?
Old luminaires should not simply be mixed with household waste. They may contain metal, glass, plastic, circuit boards, drivers, LED chips, mercury-containing lamps, or batteries. Proper sorting and recycling reduce environmental risks from heavy metals, electronic waste, and broken glass.
LED luminaires and drivers are electrical and electronic waste and should go to formal recycling points, property-management recycling, appliance recycling channels, or brand take-back programs. Fluorescent tubes and compact fluorescent lamps may contain mercury and must be handled carefully without breaking; send them to hazardous-waste or professional recycling channels. Glass shades may be treated as glass or construction waste according to local rules if uncontaminated. Broken glass should be wrapped and labeled to protect workers.
The best way to reduce environmental impact is to extend service life and improve repairability. Choose luminaires with replaceable sources, replaceable drivers, durable shades, and low lumen depreciation. During disposal, separate glass, metal, and electronic parts where possible. For projects, keep a batch recycling list recording luminaire model, material, and disposal route.
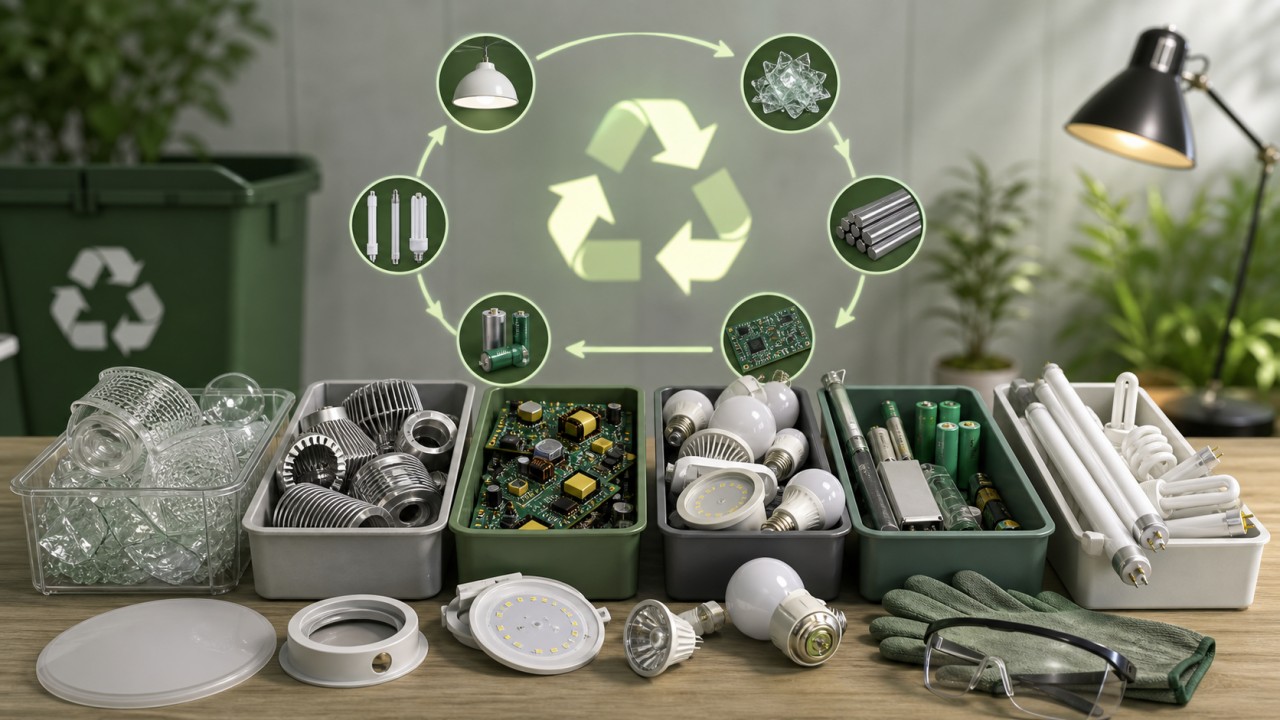
Installation, Maintenance, and Safety
How should IP ratings for dust and water protection be understood, and what minimum ratings are needed in dry and wet zones?
An IP rating has two digits. The first digit indicates protection against dust and solid objects. The second digit indicates water protection. For example, IP20 protects against finger access but has little water protection. IP44 protects against small objects and splashing water. IP65 is dust-tight and resists water jets. Higher numbers mean stronger protection, but they may also increase cost and heat-management difficulty.
Dry home areas such as living rooms, bedrooms, and studies usually need only IP20. Kitchens generally need IP20-IP44, while areas near sinks, steam, and grease may need IP44 or higher. Bathroom dry zones may use IP20-IP44, but mirror areas, basins, bathtubs, or shower-adjacent locations should generally start from IP44. Direct splash zones should use IP54, IP65, or higher depending on local rules. Outdoor areas, balconies, toe-kick lights, and ground lights often require IP65 or higher. In-ground or water-accumulation locations may require IP67 or IP68.
IP rating is not the only safety factor. Also consider mounting position, supply voltage, grounding, residual-current protection, corrosion resistance, condensation, and drainage. Bathroom and outdoor lights should not rely only on marketing claims. Check complete-luminaire test reports and install according to electrical codes.
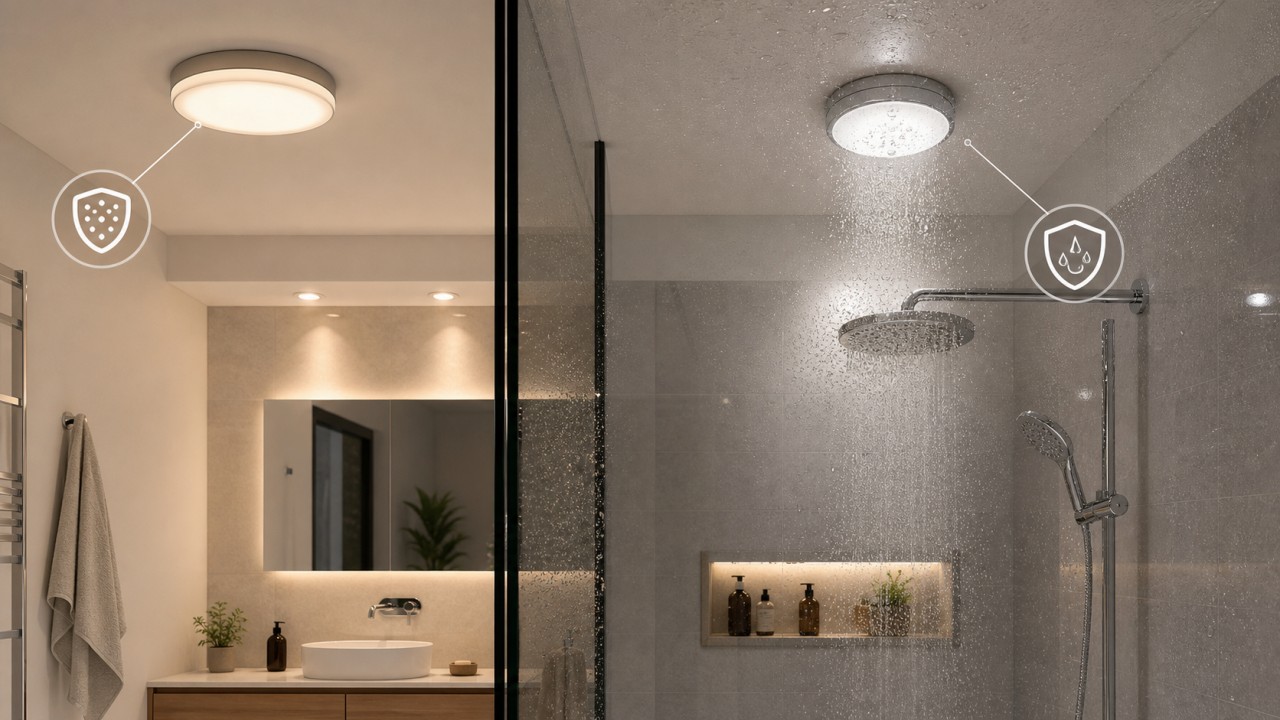
What pendant hanging heights are recommended for different spaces, and how should they be adjusted according to movement paths?
Pendant height should consider lighting effect, sight lines, head-clearance risk, and room proportion. For dining tables, the bottom of the pendant is commonly about 70-90 cm above the tabletop. This focuses light on the table without blocking eye contact. Bar pendants can be about 75-95 cm above the counter, with even spacing between multiple fixtures.
For a living-room chandelier, ceiling height and movement paths matter. In general, the bottom should not be lower than about 2.1 m above the floor, and should be higher in frequent walking paths. If the pendant is directly above a coffee table where people do not walk underneath, it can be slightly lower, but should not glare into seated eyes. Bedside pendants should avoid the path of sitting up and turning over; the bottom can be about 40-60 cm above the nightstand, but not in a head-impact zone.
To adjust height, map human movement: entry path, sofa to balcony, dining-chair pull-out, getting out of bed, cabinet-door opening. The pendant should not fall into head height along these paths. Large glass chandeliers also need clearance for swing, cleaning, and lamp replacement. Height is not a fixed formula; it depends on fixture size, table height, ceiling height, and human behavior.
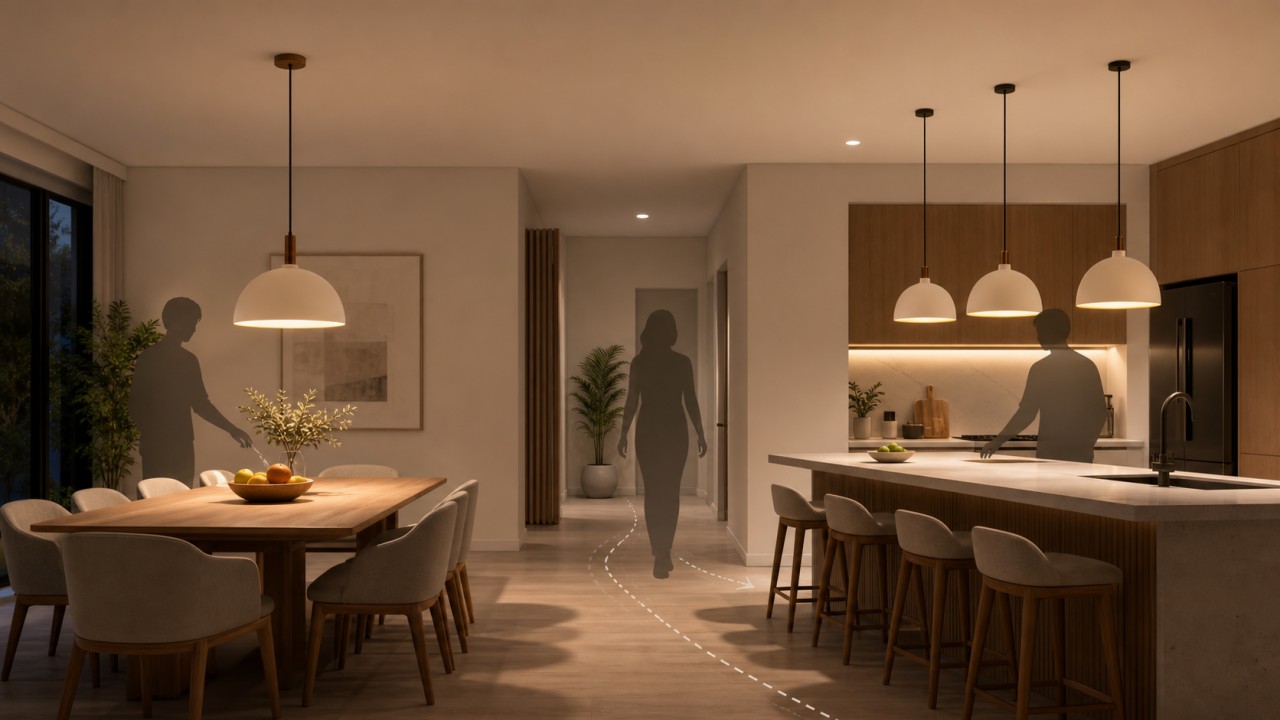
What ceiling load-bearing requirements apply when installing heavy chandeliers and large ceiling lights?
Heavy chandeliers and large ceiling lights must not be fixed only to gypsum board, wood veneer, or ordinary suspended-ceiling runners. They must connect to a reliable load-bearing structure, such as a concrete slab, embedded anchor, reinforced steel frame, reinforced main runner, or dedicated suspension point. The heavier the fixture, the more important it is to consider long-term static load, installation impact, swing, and vibration or seismic factors.
Before installation, confirm the total weight, including glass shades, metal parts, light sources, drivers, and decorative elements. Suspension points, expansion bolts, rods, steel cables, backplates, and connectors all need sufficient safety margin. Large ceiling lights should use multiple load points to avoid deformation from single-point loading. Glass parts should have secondary retention or anti-fall structures, especially large glass shades and crystal pendants.
In finished apartments or older buildings, the ceiling structure must be verified. If uncertain, open an inspection point or ask a professional installer. Heavy fixtures are best planned during renovation with embedded reinforcement; strengthening after finishing is harder. The rule is: decorative surfaces do not carry weight. Loads must return to the building structure or a calculated reinforcement system.
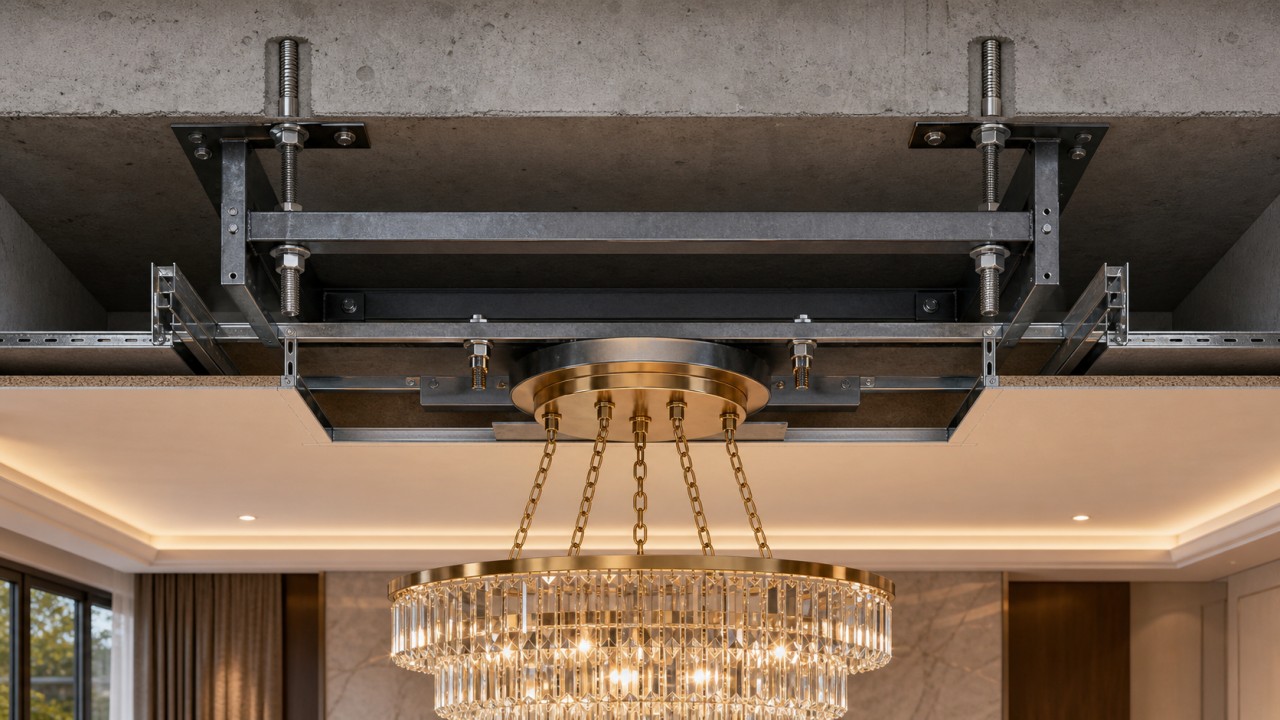
How should cut-out size and heat-dissipation space be reserved for recessed luminaires so installation is safe and future replacement is easy?
For recessed luminaires, do not reserve holes based only on visible trim size. Check the product manual for cut-out diameter, installation depth, spring clearance, heat-dissipation distance, and driver space. A hole that is too small prevents installation. A hole that is too large causes weak fixing, gaps, or poor appearance.
Heat space is critical. Recessed LED fixtures need to transfer heat to the housing and ceiling cavity. If insulation, wood boards, or debris press directly against the fixture, temperature rises, causing lumen depreciation, driver failure, or safety risk. Reserve top and side clearance according to the manufacturer. Do not bury the driver in a non-ventilated and non-serviceable location.
For future replacement, use common cut-out sizes, keep an access opening or pull-out driver lead, and avoid permanently sealing the driver. Record fixture model and cut-out dimensions for multiple lights. For no-main-light systems, confirm actual samples before ceiling work, so the cut-outs are not discovered to be wrong after finishing.
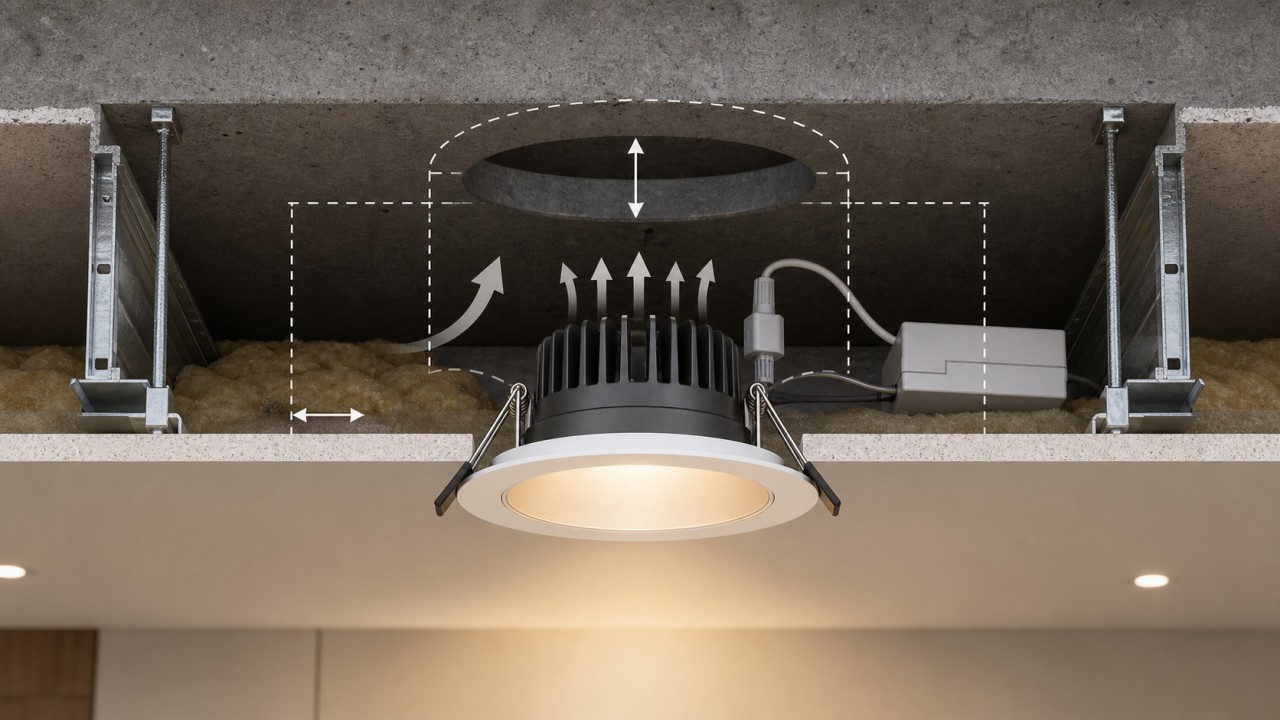
In older residential buildings with unstable voltage, what protective measures should be considered when selecting and installing lights?
Older residential buildings may have voltage fluctuation, aged wiring, poor grounding, and transient surges, all of which can shorten LED-luminaire life. Choose fixtures with wide input voltage, good constant-current drivers, and protection against overvoltage, overcurrent, short circuit, and overheating. Avoid very cheap unbranded driver products.
During installation, check circuit capacity, wire size, grounding, residual-current protection, and switch wiring. For high-power, smart, or dimmable lights, confirm driver and dimmer compatibility. In areas with frequent storms or obvious grid fluctuation, surge protection can be added at the distribution board or important circuits. If lamps fail repeatedly, ask an electrician to measure voltage and neutral-line condition.
The glass shade itself does not solve voltage problems, but enclosed shades can raise driver and LED temperature. Voltage stress plus heat accelerates failure. In older buildings, heat dissipation and serviceability are especially important. Drivers should be replaceable and should not be permanently buried deep in the ceiling.
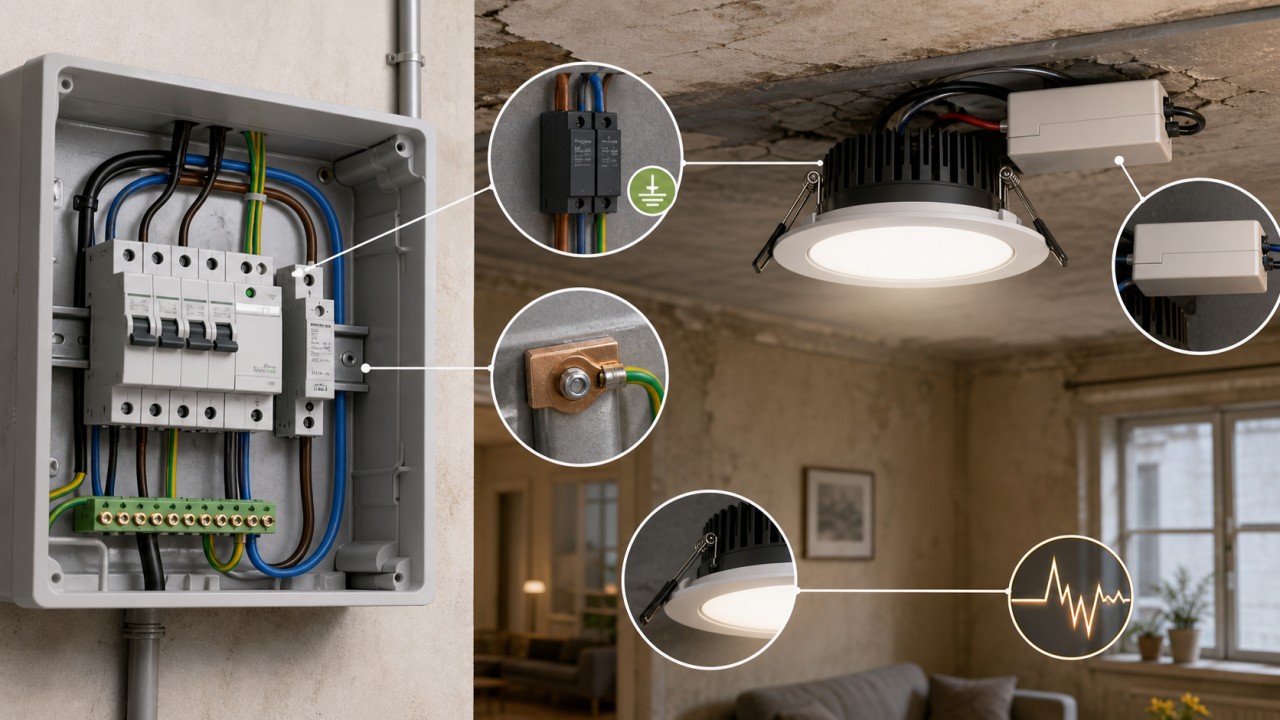
Why do some LED luminaires lose brightness noticeably after one or two years, while others remain almost unchanged?
Different LED luminaires lose brightness at different rates mainly because of LED-chip quality, drive current, heat dissipation, operating temperature, shade degradation, and driver life. LEDs are heat-sensitive. Higher junction temperature means faster lumen depreciation. Excessive drive current can make initial brightness look good but accelerates long-term decay.
High-quality fixtures usually have better heat sinks, stable drivers, reasonable current, low thermal resistance, and optical parts that resist yellowing. Low-cost fixtures may have undersized heat sinks, weak drivers, overdriven LEDs, and shades that yellow easily, becoming visibly dim after one or two years. Enclosed shades, kitchen grease, and hot ceiling cavities also accelerate decline.
When choosing fixtures, check L70/L80 lifetime, warranty, temperature-rise tests, driver quality, and heat-sink structure. In use, avoid long-term full-power high-temperature operation and clean shades and vents regularly. Good lumen maintenance comes from stable thermal, electrical, and optical design, not only from good LEDs.
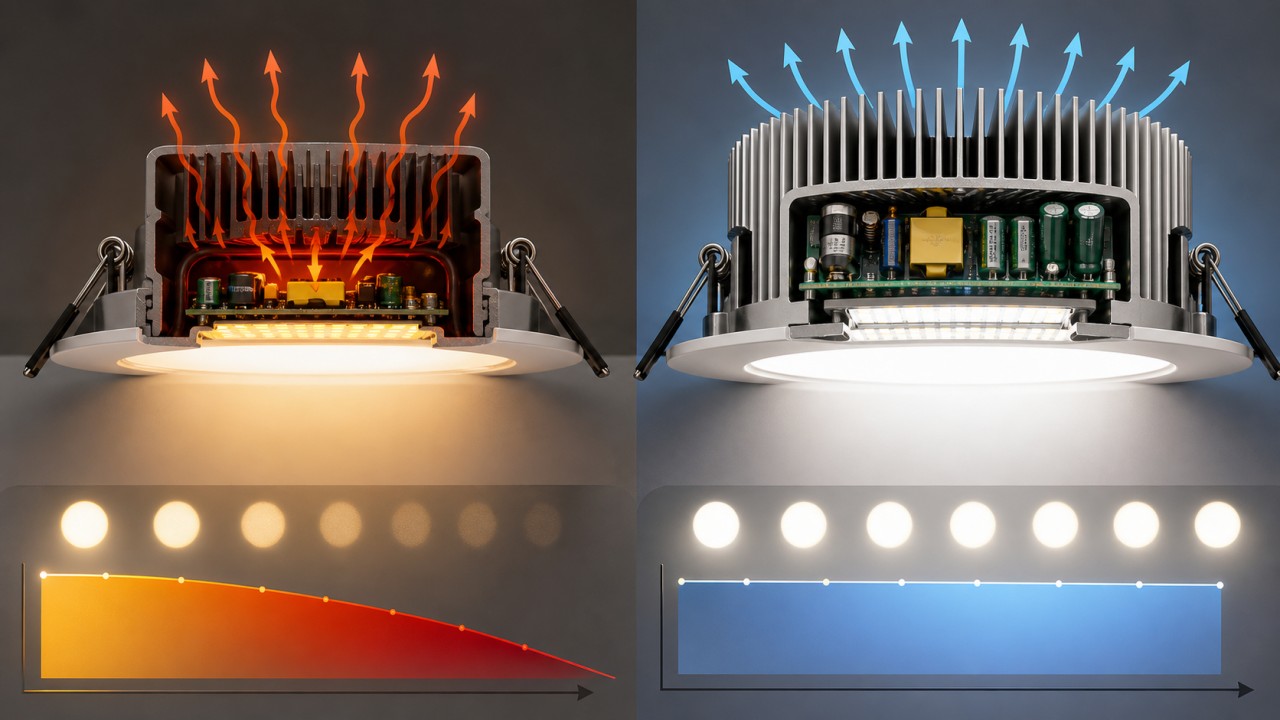
Can tapping sound or appearance quickly reveal whether a glass lampshade has been properly tempered?
You cannot reliably judge whether a glass shade is well tempered only by tapping sound or appearance. Tempered glass may sound sharper, have cleaner edges, or show slight roller waves or stress patterns, but none of these are decisive. Ordinary glass can also sound clear, and poorly tempered glass may look normal.
More reliable quick checks include permanent tempering marks, supplier certificates, batch test reports, and breakage sample testing. Polarized film can reveal stress patterns, but it only shows stress distribution; it does not prove full compliance. Edge quality is also important. Glass should be ground and chamfered before tempering, because edge chips greatly increase breakage risk.
Do not hit the shade hard or try to break it at home for verification. In procurement, request tempering process information, thickness data, stress inspection, impact testing, and thermal-shock testing. For luminaire glass shades, the key is not whether it "looks tempered," but whether there is traceable testing and stable quality control.
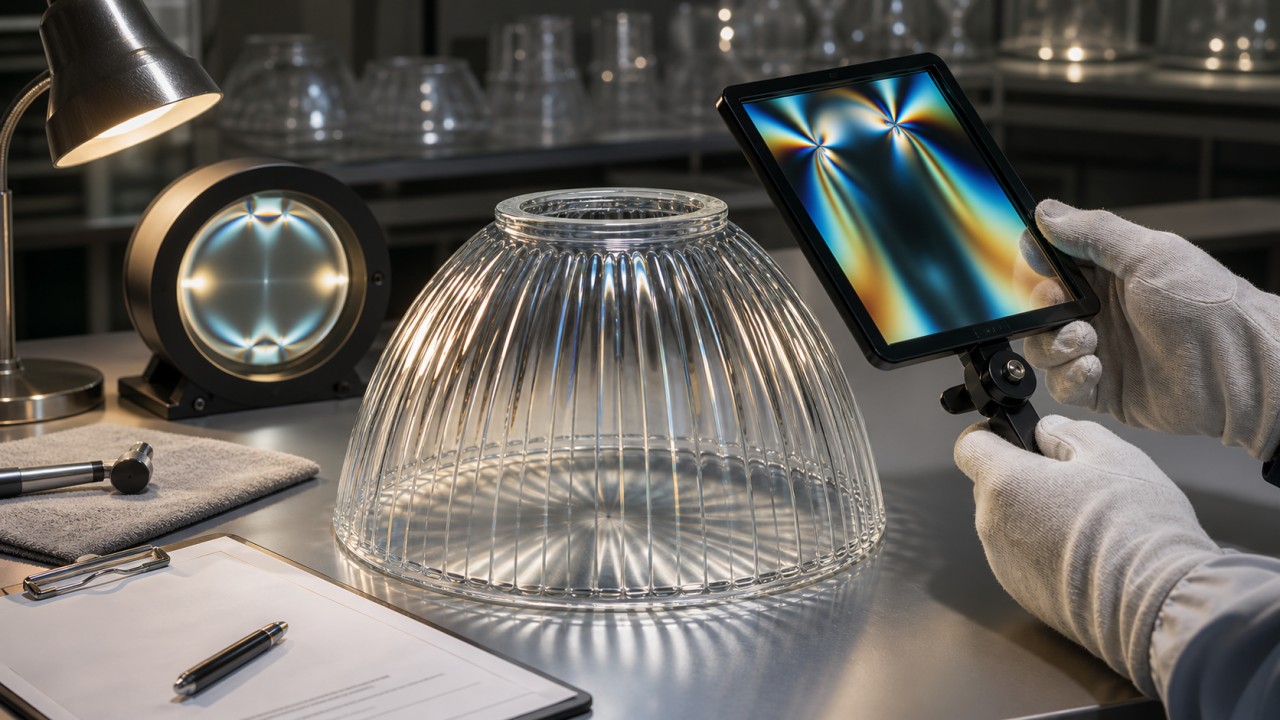
If a glass lampshade breaks accidentally at home, what emergency handling and safe replacement steps are needed?
If a glass shade breaks, first turn off power and do not touch fragments with bare hands. Wait for the fixture to cool, wear thick gloves and shoes, and clean with cardboard, a broom, and a vacuum cleaner. Pick large pieces into a rigid container. Use wet paper towels or tape for tiny shards, then vacuum cracks and gaps. Wrap and label broken glass to protect others.
If broken glass remains hanging on the fixture, do not stand directly below and force it off. Check the fixing structure first and call a professional if needed. Inspect the housing, lampholder, wiring, LED board, and driver for damage or water entry. If the breakage may have been caused by overheating, mounting stress, or an incompatible bulb, solve the cause before replacing the shade.
Use an original same-specification replacement shade matching size, thickness, heat resistance, fixing method, and weight. Do not substitute ordinary glass or a nearly fitting shade casually. If the original was tempered, laminated, or borosilicate glass, the replacement should meet the same safety level.
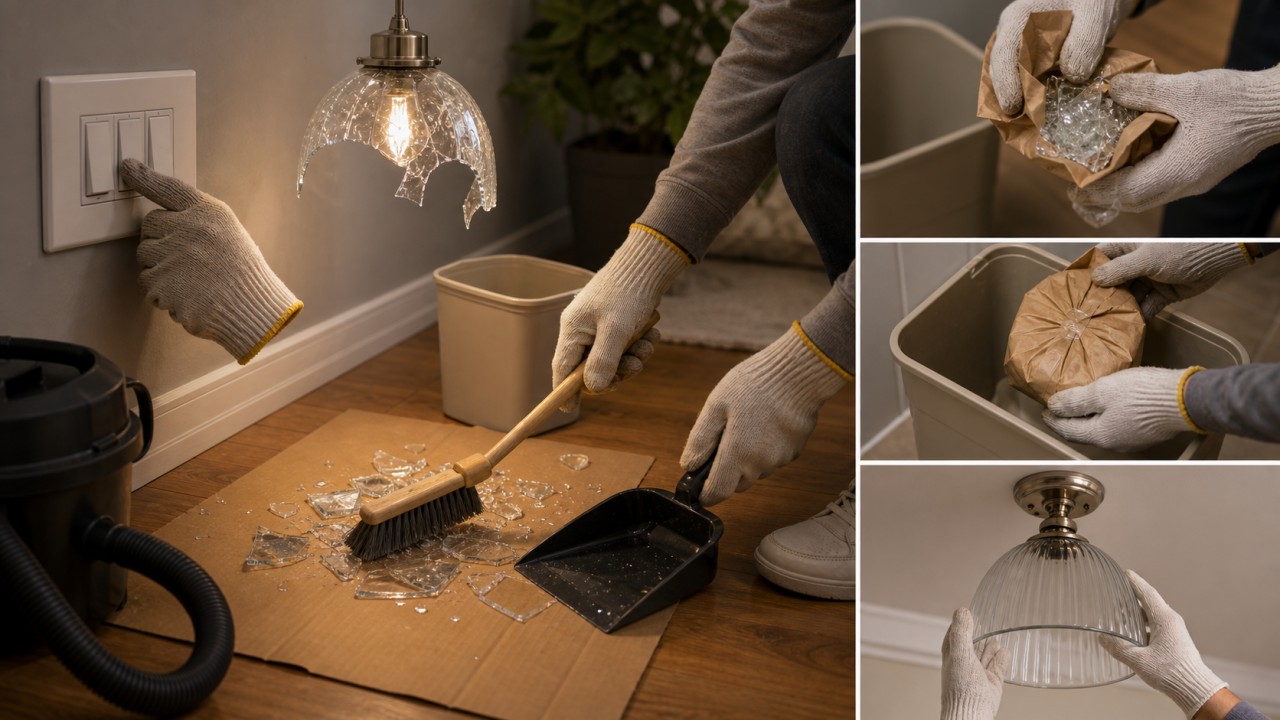
What explicit requirements do Chinese mandatory lighting standards set for mechanical strength and thermal shock of glass lampshades, and what are the new product trends?
In China, luminaire safety is generally evaluated according to GB/T 7000.1 and the relevant GB/T 7000 particular standards, together with CCC catalogue requirements and product type. A glass shade is usually not certified as an isolated object; it is tested as part of the complete luminaire structure. Mechanical strength, heat resistance, fire resistance, endurance, temperature rise, electric shock protection, and ingress protection may all be relevant. Exact requirements depend on luminaire category, installation method, accessibility, and environment, so they should not be judged separately from the complete product.
Key issues for glass shades include reliable fixing, prevention of falling during normal use and maintenance, hazard control if breakage occurs, accessible surface temperature, thermal shock near the light source, sharp-edge prevention, and whether the protective cover can reduce source or fragment hazards. Bathroom, outdoor, child-accessible, toe-kick, and in-ground luminaires may also require water resistance, dust resistance, load bearing, impact resistance, and low surface temperature.
New product trends emphasize complete-luminaire safety and long-term reliability: tempered, laminated, or borosilicate glass; secondary anti-fall structures; low-glare micro-structured glass; high-transmittance easy-clean coatings; replaceable modular shades; and traceable supply chains with third-party test reports. Because standards are updated, projects and mass production should always follow the latest applicable standards for the target market and the certification body's interpretation.
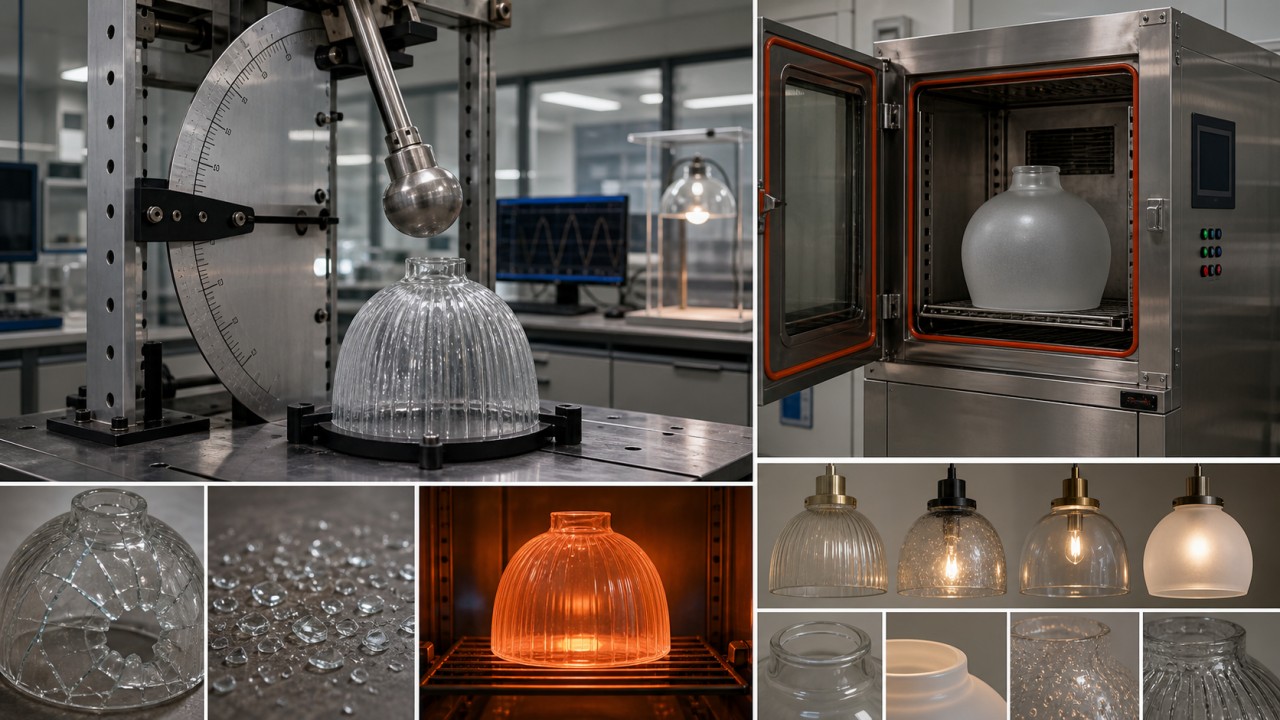
For luminaires exported to Europe and North America, what heavy-metal limits or breakage-test standards must glass components meet?
For export to Europe and North America, glass components must satisfy both luminaire safety standards and environmental or chemical restrictions. In the EU, relevant frameworks often include RoHS, REACH, CE-related safety requirements, and EN/IEC 60598 series standards. In North America, common references include UL 1598, UL 8750, and CSA requirements. The exact standards depend on luminaire type, installation location, and sales channel.
For heavy metals, RoHS restricts lead, cadmium, mercury, hexavalent chromium, certain flame retardants, and phthalates in electrical and electronic equipment. Glass, glaze, colored coatings, films, inks, solder, and electrical parts may all be relevant. Traditional lead crystal or cadmium-containing pigments require special caution in export projects. Confirm whether exemptions apply, whether limits are exceeded, and whether the customer's market accepts the material.
For breakage and mechanical safety, European and North American standards generally evaluate whether the complete luminaire can withstand impact, vibration, suspension loads, thermal shock, and normal maintenance risks. Glass parts may need tempering or lamination evidence, impact tests, thermal-shock tests, edge-finishing control, and fragment-risk evaluation. In real projects, a third-party lab should define the test plan according to the complete luminaire standard for the target market, rather than relying only on a glass material description.

Are there mandatory rules for accessible surface temperature on glass covers used in children's luminaires?
Accessible surface temperature must be carefully controlled for children's luminaires, but exact limits depend on target market, luminaire type, and applicable standards. Child-accessible products may refer to IEC/EN 60598-2-10 for portable luminaires for children, the GB/T 7000 series, and local certification requirements. Standards generally require accessible parts not to create burn hazards under normal or specified abnormal conditions.
From a design perspective, regardless of the exact limit, children's luminaires should use low-temperature LED sources, low power density, large heat-dissipation area, thermal isolation, and shades that do not trap heat. Glass is heat-resistant, but once heated it can still become too hot to touch. Small enclosed glass shades need special attention. Accessible glass surfaces, edges, and metal fixing parts should all be checked for temperature.
In engineering, perform complete-luminaire temperature-rise testing rather than estimating. Tests should cover maximum ambient temperature, maximum power, worst-case installation, and long operating time. If the product is marketed for children's rooms or child-accessible positions, ask the certification body to confirm the applicable standard and test method. The safety target should be stricter than for ordinary adult-use luminaires.
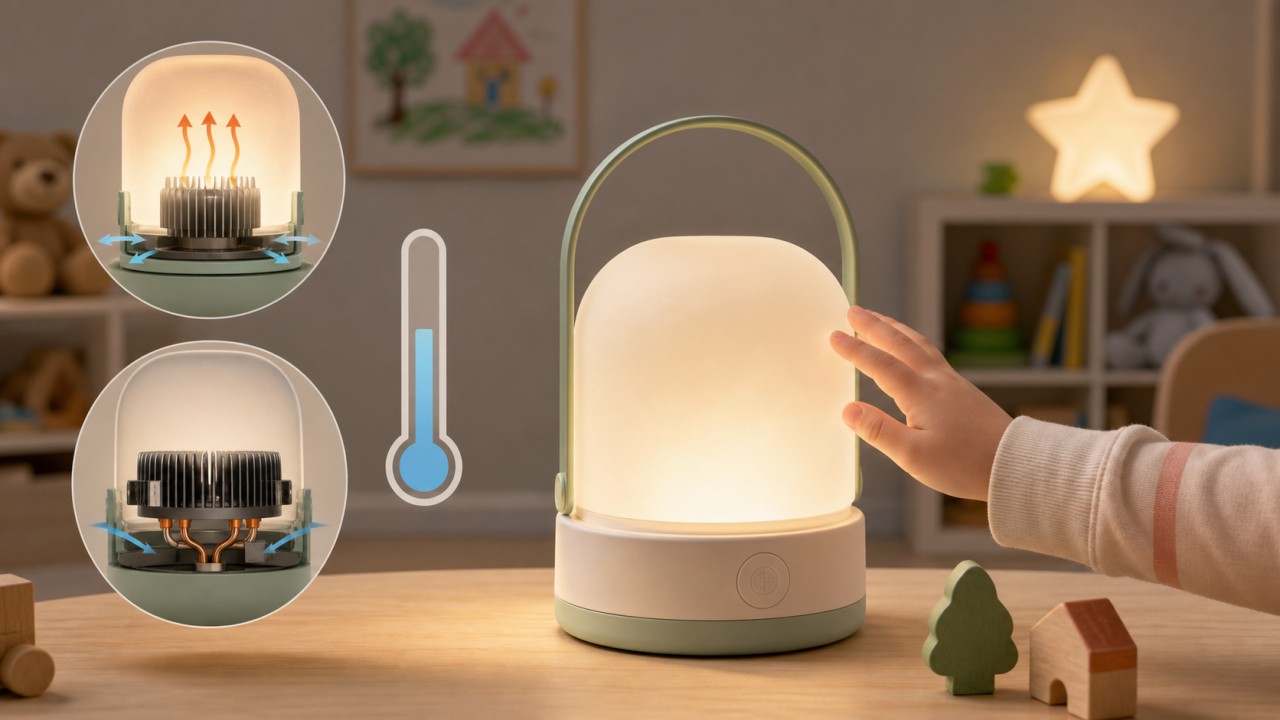
For project acceptance, what third-party optical test reports are needed for glass lampshades?
For project acceptance, glass-shade test documents should cover four areas: optical performance, safety, durability, and batch consistency. Optical reports may include transmittance, haze, chromaticity coordinates, color difference, spectral transmittance, surface reflectance, and optical uniformity. If the shade affects light distribution, provide complete-luminaire luminous flux, intensity distribution, illuminance simulation or measurement, UGR, and glare evaluation.
Safety documents may include tempering or lamination evidence, impact testing, thermal-shock testing, edge-finishing inspection, heat resistance, fire-related tests, and breakage behavior. Bathroom, outdoor, toe-kick, or in-ground luminaires may also need complete-luminaire IP, corrosion, salt-spray, load, or walk-over tests. Coated glass should include adhesion, wiping resistance, detergent resistance, damp-heat, and UV-resistance reports.
Acceptance files should include approved samples, batch numbers, laboratory qualification, test methods, pass/fail criteria, and allowed tolerances. Remember that many parameters must be tested on the complete luminaire, not only on a glass sample. Efficacy, glare, temperature rise, and waterproofing are meaningful only in the assembled product.
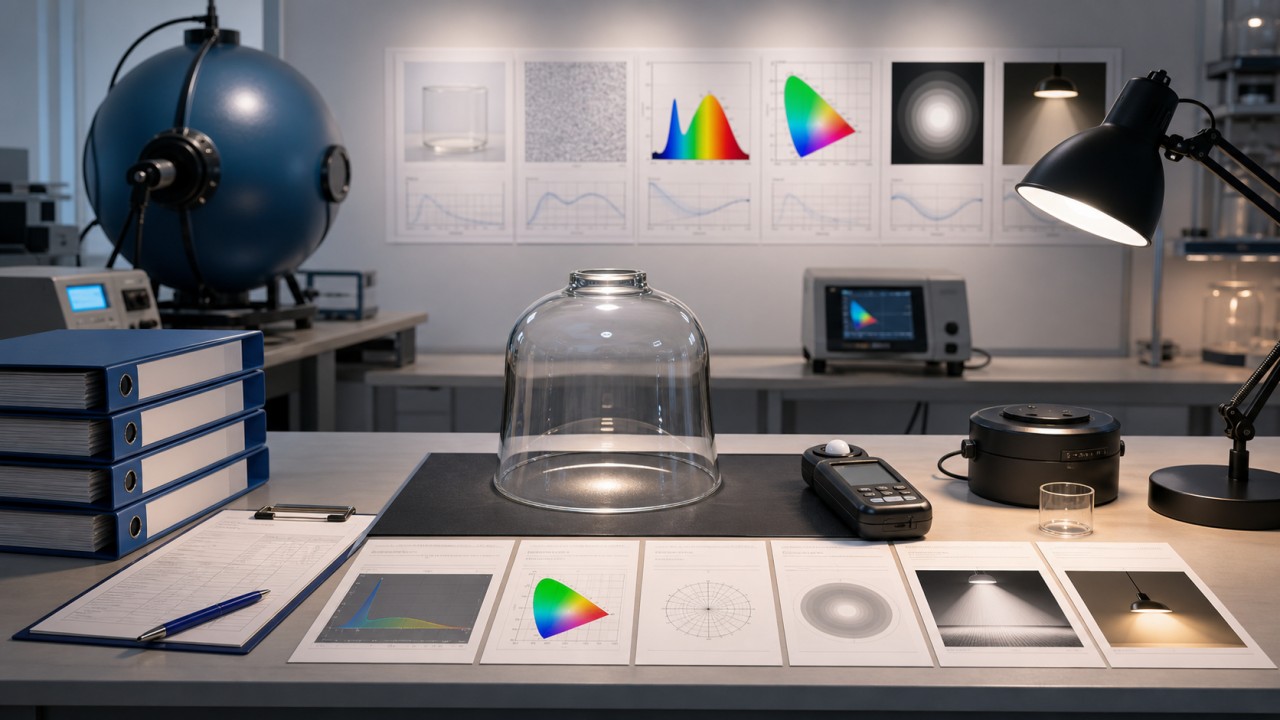
Green and Sustainable Lighting
In the life cycle of glass luminaires, how can formula optimization reduce carbon emissions during production?
In the life cycle of glass luminaires, carbon emissions from glass production mainly come from high-temperature melting energy, raw-material decomposition, transportation, forming yield, and post-processing loss. Formula optimization aims to reduce melting temperature, shorten melting time, improve yield, and reduce high-carbon raw materials and scrap, while still meeting requirements for transmittance, strength, heat resistance, color, and processability.
A common strategy is increasing the proportion of cullet. Qualified recycled glass melts more easily than virgin minerals, reducing energy use and decomposition emissions. However, cullet must be controlled for color, impurities, metal, ceramic, and organic contamination, otherwise it can affect transmittance, bubbles, cords, and strength. A second strategy is optimizing fluxes and fining systems to lower melting temperature without sacrificing durability or environmental compliance. A third is avoiding excessive ultra-clear specifications, unnecessary thickness, or overly complex shapes that increase energy use and reject rate.
For lighting glass, low carbon should not be judged only by emissions per kilogram. The use phase matters too. A high-transmittance glass shade that improves system efficacy may save electricity over years, offsetting extra production impact. Repairable, replaceable, yellowing-resistant, and easy-clean shades extend product life and reduce waste. Manufacturers can track formula carbon footprint, recycled content, yield, energy use, and transport distance, while adopting electric melting, waste-heat recovery, lightweight design, and local supply chains where possible.
Contact Us
Your feedback fuels our growth, and your questions drive our solutions.
We value your feedback, inquiries, and suggestions. Please feel free to get in touch with us
General inquiries
Please contact us via sales@bo-glass.com, and we will reply to you as soon as possible.
Interested to work with us
Drop your resume at info@bo-glass.com
and we will get back to you shortly.
We uses the contact information you provide to us to contact you about our relevent content, products, and services.