
Testing, Quality Control and RFQ
Turn design intent into acceptance criteria. A strong RFQ states how a property will be measured, the sampling plan, the tolerance, the report format, and what happens when a batch falls outside the agreed window.
Jump to a question (17)
- What test information should purchasers require for lighting glass?
- What are stress patterns in glass lampshades, and how can quality control reduce their impact on light efficiency?
- For irregular glass shades such as water-ripple forms, how can shape and optical consistency be ensured between batches?
- How can you quickly judge whether a lamp has serious flicker using simple methods?
- Why do some lamps flicker clearly in a phone camera while the human eye barely notices it?
- Why do some LED luminaires lose brightness noticeably after one or two years, while others remain almost unchanged?
- Can tapping sound or appearance quickly reveal whether a glass lampshade has been properly tempered?
- How should mechanical-strength and thermal-shock requirements for glass lampshades be identified correctly?
- For luminaires exported to Europe and North America, what heavy-metal limits or breakage-test standards must glass components meet?
- Are there mandatory rules for accessible surface temperature on glass covers used in children's luminaires?
- For project acceptance, what third-party optical test reports are needed for glass lampshades?
- Where can customers review BO-Glass manufacturing capabilities?
- Which BO-Glass indoor-lighting glass product collections are available?
- Where can customers review BO-Glass project experience?
- Which BO-Glass photographs document optical inspection and metrology equipment?
Testing and quality control
Verify stress, dimensional consistency, thermal and mechanical strength, regulatory evidence, optical reports, and batch stability.
What test information should purchasers require for lighting glass?
A useful test requirement identifies the sample, method, condition, reported result, tolerance, sampling plan, and acceptance decision. A certificate that lists only a property name or a single pass/fail statement is usually insufficient for comparing suppliers, approving a golden sample, or investigating later batch drift.
| Test or inspection | Information to require |
|---|---|
| Transmittance | Glass type, thickness, wavelength range, instrument and result |
| Haze | Sample geometry, treated side, method and individual values |
| Color | L*, a*, b* or chromaticity coordinates and tolerance |
| Residual stress | Inspection method, sampling and acceptance limit |
| Thermal cycling | High/low temperature, transition rate, cycles and failure criteria |
| Dimensions | Datum, gauge method, sample quantity and tolerance |
| Complete luminaire | Flux, beam distribution, surface temperature and visual uniformity |
Where the result depends on curved geometry, wall-thickness variation, mounting pressure, source distance, ventilation, or the enclosure, test production-representative parts and the complete luminaire. Record individual values as well as summaries so that outliers and process drift remain visible.
What are stress patterns in glass lampshades, and how can quality control reduce their impact on light efficiency?
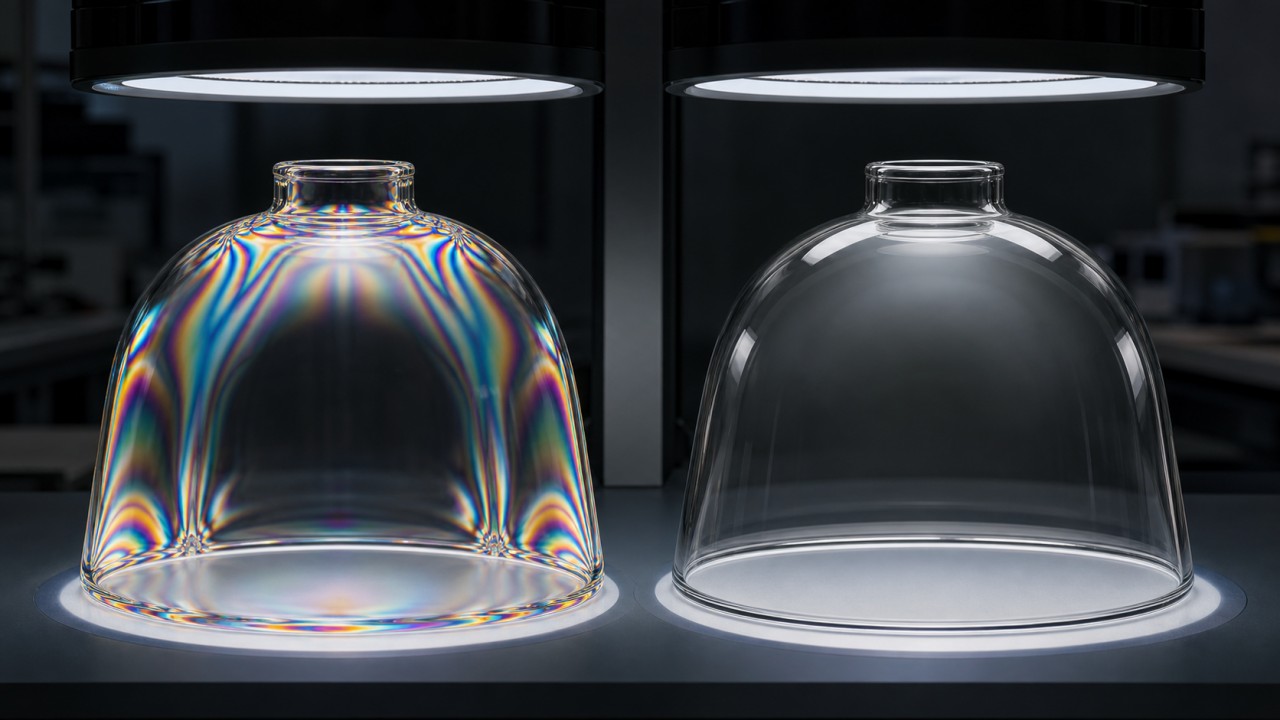
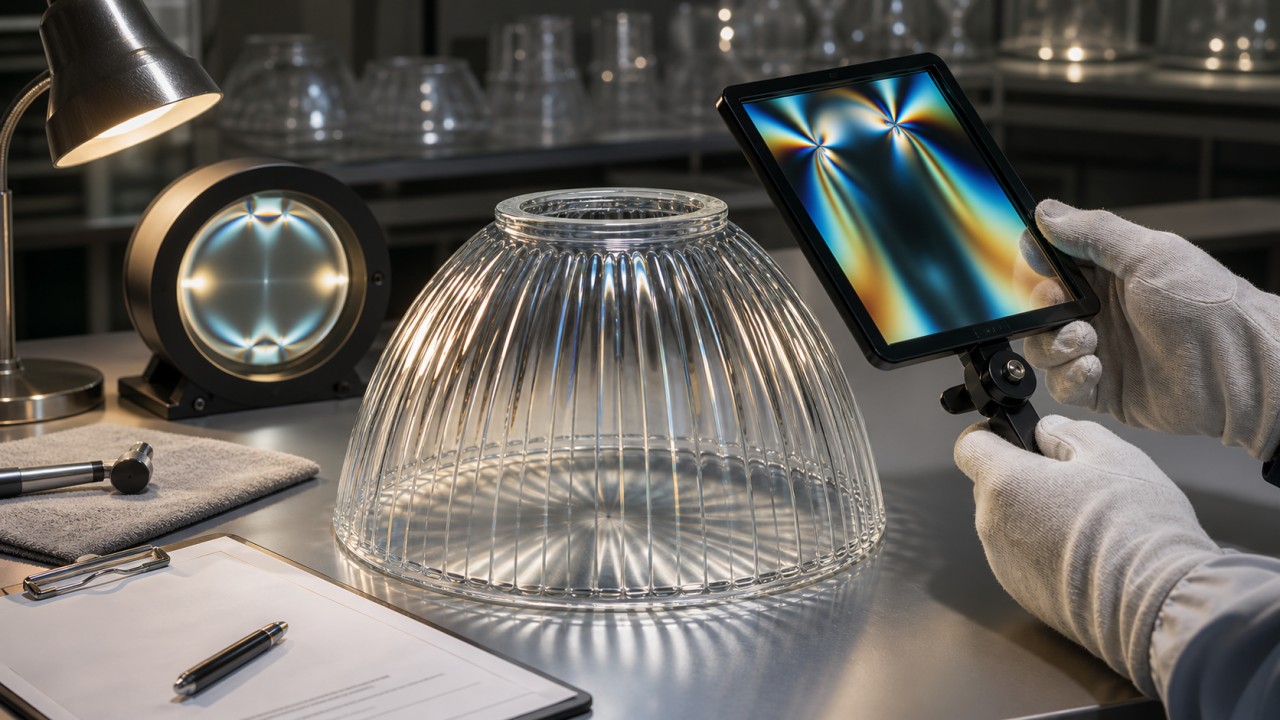
"Stress marks" in a glass lampshade refer to visible patterns, rainbow-like bands, dark patches, or uneven brightness caused by residual internal stress or uneven stress distribution in the glass. They may not be obvious under normal room light, but they become easier to see when the lamp is switched on, when the glass is viewed through polarizing filters, or when a uniform light source is placed behind the shade. The root cause is related to cooling, annealing, tempering, wall-thickness variation, and local temperature differences.
After glass is formed at high temperature, it must cool in a controlled way. If cooling is too fast, if the wall thickness varies too much, or if some regions heat or cool differently, tensile and compressive stresses remain inside the glass. Tempered glass also intentionally contains surface compression and internal tension, which is necessary for safety behavior. But if the process is poorly controlled, visible stress patterns can appear. Stress can cause slight birefringence, changing the polarization of transmitted light and creating colored bands or patches under polarized viewing.
The effect on lighting performance is usually not a simple large loss of lumens. The bigger problem is uniformity and visual quality. Stress marks can create local brightness differences, color unevenness, distorted transmitted images, dirty beam edges, or cloud-like patches on large ceiling panels. In a decorative shade, slight stress may be acceptable. In a large uniform luminous panel, clear glass shade, optical lens, wall washer, or premium luminaire, it can seriously reduce the perceived quality.
Stress reduction should begin with product design. The shade wall should be as uniform as possible. Sudden thick areas, sharp corners, abrupt curvature changes, and local glass masses should be avoided. The mounting structure should also avoid excessive point pressure from metal clips, screws, or gaskets, because installation stress can combine with thermal stress.
The forming and annealing process is equally important. Forming temperature, mold temperature, cooling speed, and annealing schedule must be stable. Insufficient annealing leaves high residual stress; uneven annealing can create distortion and optical inconsistency. For tempered glass, heating uniformity, air-quench uniformity, roller marks, and edge stress must be controlled. Large glass panels especially require uniform heating and cooling.
Quality control should include polariscopic inspection or polarized-film sampling to check stress bands, stress concentration, and batch variation. For optical parts and high-end shades, the supplier should define acceptable stress levels, visible-defect zones, and stricter requirements for the main luminous area. Thickness tolerance, warpage, edge chips, and thermal-shock resistance should also be checked. Glass with obvious stress should not be used in the main luminous surface or lens area.
Finally, the luminaire structure must allow for thermal expansion. The glass should not be clamped too rigidly. Elastic gaskets, floating mounts, and proper clearance allow the glass to expand and contract slightly during heating and cooling. The practical solution is uniform thickness, controlled annealing or tempering, polariscopic inspection, and stress-friendly mechanical mounting.
For irregular glass shades such as water-ripple forms, how can shape and optical consistency be ensured between batches?
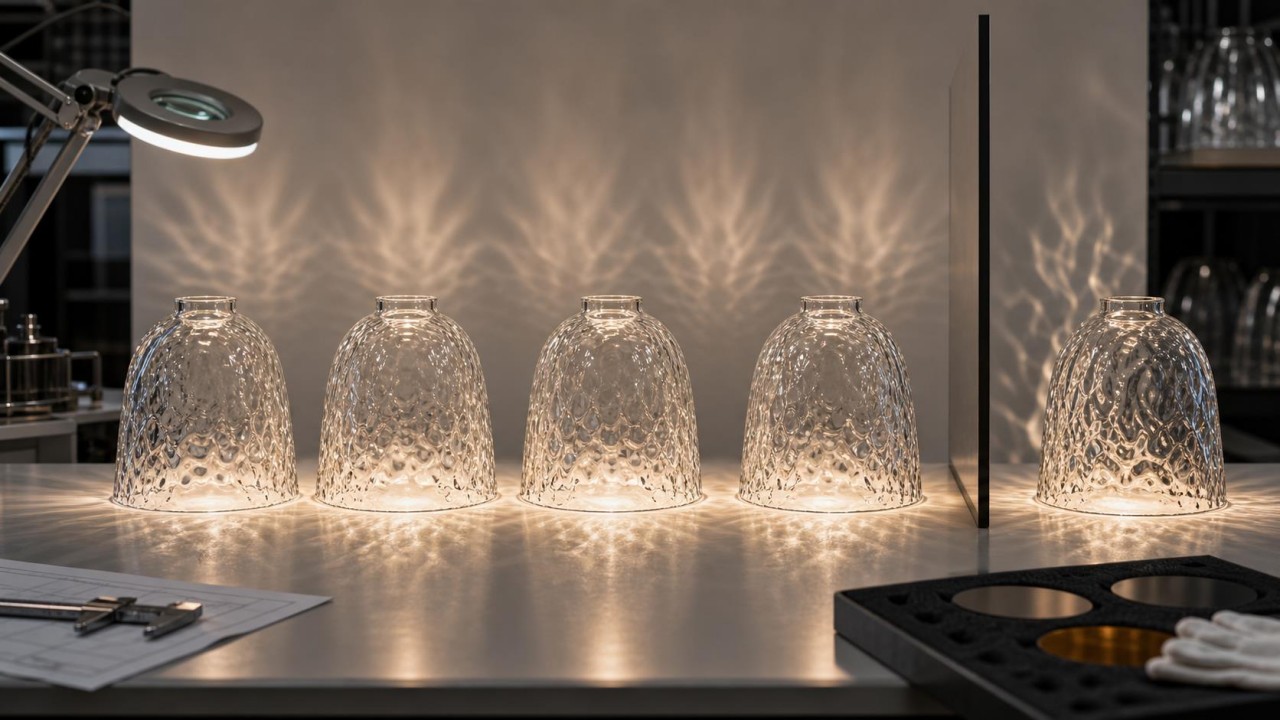
For irregular glass shades, the hardest part is not making one beautiful piece. It is making many pieces look like the same product. Irregular water-ripple glass, handmade waves, twisted textures, bubbles, and organic curved surfaces all contain some randomness. Without clear process control and acceptance criteria, different batches can vary in texture depth, shape, transmittance, beam effect, and even mounting dimensions.
The first step is to define what "acceptable irregularity" means. The designer should not rely only on a rendering. Key control items must be specified: overall dimensions, mounting opening size, wall-thickness range, weight range, texture depth, texture direction, ripple density, transmittance, haze, color range, and allowed bubble size and distribution. For water-ripple glass, it is useful to provide a master sample and boundary samples, showing the shallowest and deepest acceptable texture.
The second step is to stabilize molds and forming parameters. If the irregular shade is mold-pressed or mold-blown, mold accuracy, mold temperature, glass temperature, pressing pressure, blowing pressure, rotation speed, and cooling rate all affect the final texture. First-article approval should be performed before each production batch, followed by regular sampling during production. If the shade is handmade blown glass, the process card should control gob weight, blowing time, rotation speed, time in mold, and annealing curve.
The third step is to control thickness and stress. If part of a water-ripple shade becomes too thick, it may act like a lens and create abnormal bright streaks. If it becomes too thin, strength and color depth may be insufficient. Thickness gauges, weight checks, and polariscopic stress inspection should be used to keep each batch within range. For clear or translucent irregular shades, residual stress and thickness variation directly affect optical consistency.
The fourth step is optical verification, not just appearance inspection. Use a standard light source, fixed distance, and standard background board to photograph the lit effect. Compare beam range, brightness distribution, texture projection, and glare points. For premium projects, photometric testing or image analysis can quantify uniformity. This ensures that pieces are consistent not only when switched off, but also when illuminated.
The fifth step is batch management. Each batch should record glass batch number, mold number, process parameters, production date, and inspection results. Projects with many lamps installed side by side should use the same production batch where possible, or be matched and grouped before shipment. Irregular glass can have natural variation, but the variation must stay within the design intent. Randomness should not become uncontrolled quality fluctuation.
How can you quickly judge whether a lamp has serious flicker using simple methods?
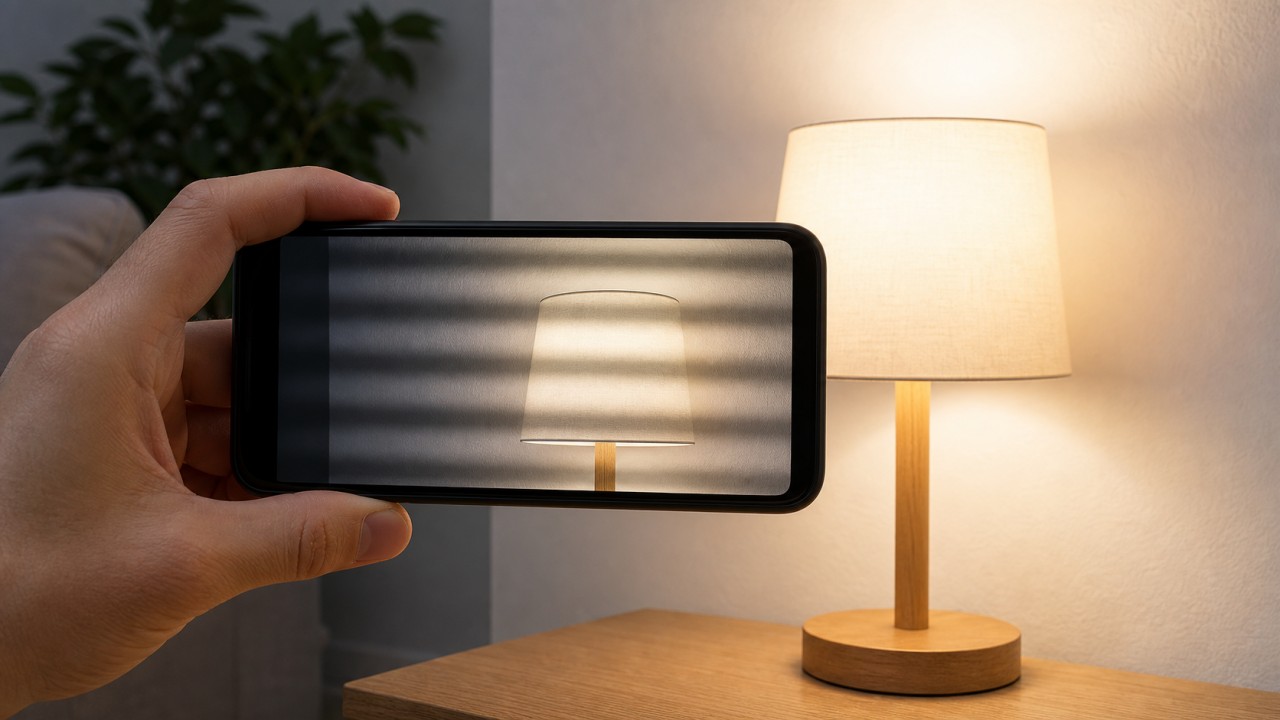
The simplest method is to use a phone camera. Point the camera at the lamp or at a white wall lit by the lamp. If you see obvious rolling bands, dark stripes, or flicker on the screen, the lamp may have significant flicker. However, phone testing is affected by shutter speed, frame rate, and exposure, so it is only a rough screening method, not a precise measurement.
Another quick method is to wave a finger or pencil under the light. If you see segmented afterimages, like separated frames, the light may have low-frequency flicker or large ripple. A third method is to record the lamp in slow motion and check for moving brightness bands. If flicker becomes worse at certain dimming levels, the driver or dimmer compatibility may be poor.
Accurate flicker evaluation requires instruments measuring flicker percentage, flicker index, modulation depth, frequency, SVM, or Pst LM. For home use, choose products labeled as having no visible flicker, using high-quality constant-current drivers, and with clear dimming compatibility. Study rooms, children's rooms, kitchen task areas, and long-stay spaces should avoid low-cost lamps with unknown flicker performance.
Why do some lamps flicker clearly in a phone camera while the human eye barely notices it?
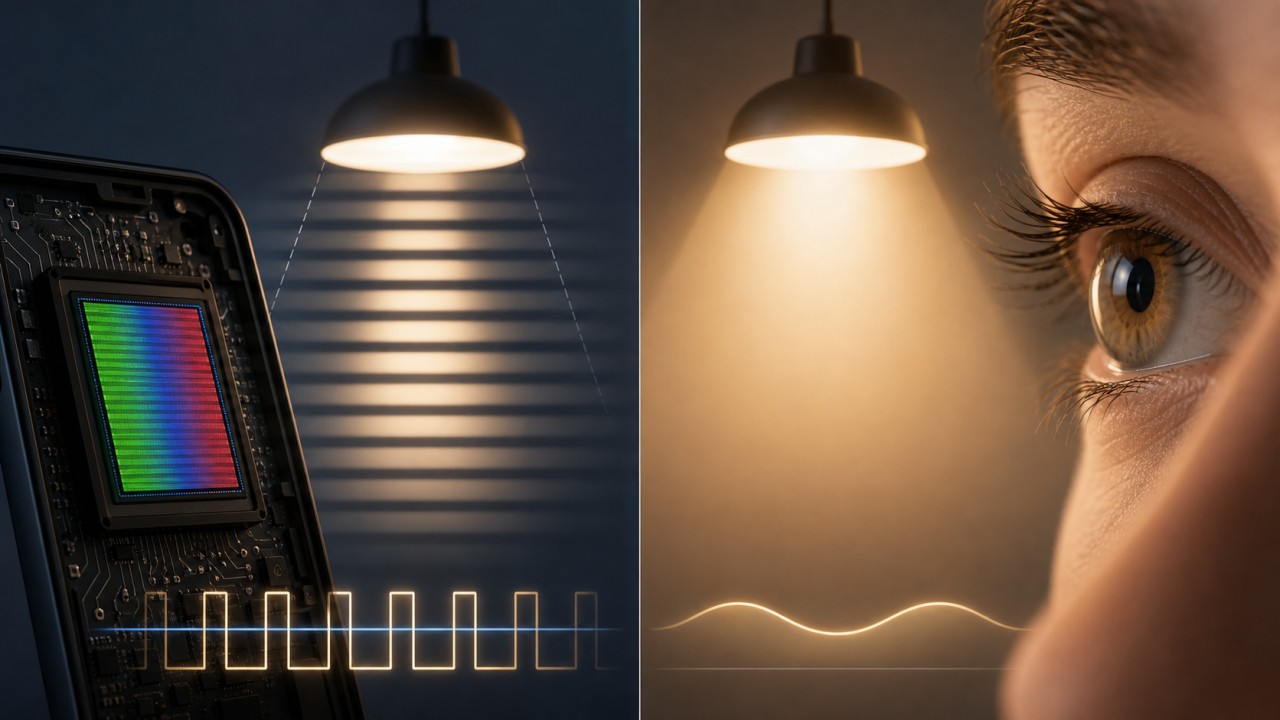
A phone camera shows flicker because the camera scans the image line by line while the light output changes over time. Many LED lamps are powered by rectified AC and drivers, so their brightness may fluctuate at 100 Hz, 120 Hz, or higher. Human eyes are not very sensitive to high-frequency fluctuation, especially when modulation is small. A phone's electronic shutter can convert that time variation into visible bands or rolling dark stripes.
This does not mean every phone-camera stripe equals severe visual risk. Camera settings can exaggerate flicker, and stripes can appear when shutter speed interacts with the lamp frequency. But if obvious bands appear on multiple phones and shooting modes, and a hand-waving test also shows segmented afterimages, the lamp should be treated with caution.
Comfort depends on frequency, modulation depth, and use scenario. High-frequency, low-depth ripple is usually less problematic. Low-frequency, high-depth flicker is more likely to cause fatigue. Dimming is especially important: some lamps are acceptable at full output but flicker badly when dimmed. For reading, study, handwork, and kitchen tasks, choose fixtures with clearly controlled flicker performance.
Why do some LED luminaires lose brightness noticeably after one or two years, while others remain almost unchanged?
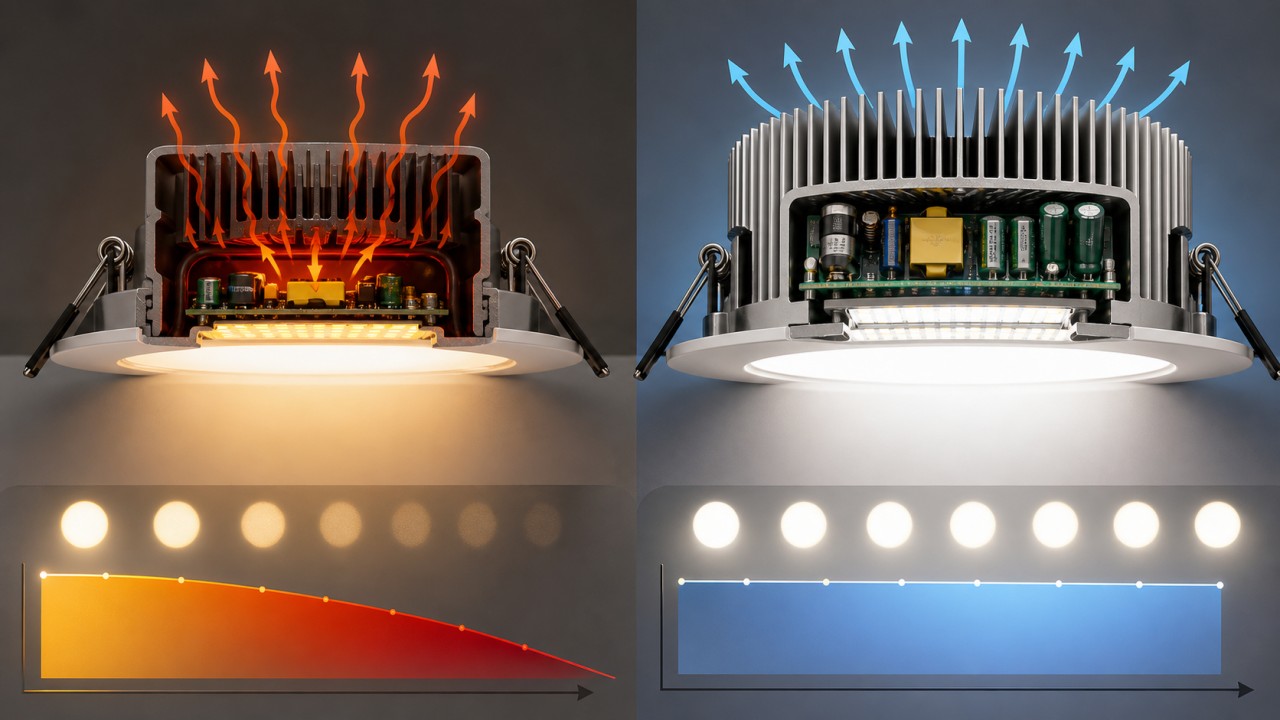
Different LED luminaires lose brightness at different rates mainly because of LED-chip quality, drive current, heat dissipation, operating temperature, shade degradation, and driver life. LEDs are heat-sensitive. Higher junction temperature means faster lumen depreciation. Excessive drive current can make initial brightness look good but accelerates long-term decay.
High-quality fixtures usually have better heat sinks, stable drivers, reasonable current, low thermal resistance, and optical parts that resist yellowing. Low-cost fixtures may have undersized heat sinks, weak drivers, overdriven LEDs, and shades that yellow easily, becoming visibly dim after one or two years. Enclosed shades, kitchen grease, and hot ceiling cavities also accelerate decline.
When choosing fixtures, check L70/L80 lifetime, warranty, temperature-rise tests, driver quality, and heat-sink structure. In use, avoid long-term full-power high-temperature operation and clean shades and vents regularly. Good lumen maintenance comes from stable thermal, electrical, and optical design, not only from good LEDs.
Can tapping sound or appearance quickly reveal whether a glass lampshade has been properly tempered?
You cannot reliably judge whether a glass shade is well tempered only by tapping sound or appearance. Tempered glass may sound sharper, have cleaner edges, or show slight roller waves or stress patterns, but none of these are decisive. Ordinary glass can also sound clear, and poorly tempered glass may look normal.
More reliable quick checks include permanent tempering marks, supplier certificates, batch test reports, and breakage sample testing. Polarized film can reveal stress patterns, but it only shows stress distribution; it does not prove full compliance. Edge quality is also important. Glass should be ground and chamfered before tempering, because edge chips greatly increase breakage risk.
Do not hit the shade hard or try to break it at home for verification. In procurement, request tempering process information, thickness data, stress inspection, impact testing, and thermal-shock testing. For luminaire glass shades, the key is not whether it "looks tempered," but whether there is traceable testing and stable quality control.
How should mechanical-strength and thermal-shock requirements for glass lampshades be identified correctly?
For the international luminaire framework, begin with IEC 60598-1:2024 and then identify the applicable IEC 60598 Part 2 standard according to product type and mounting method. For China or any other target market, confirm the current national adoption, certification catalogue, implementation rules, and laboratory interpretation; do not describe a standard as “mandatory” merely from its title or reuse a requirement outside its scope. A glass shade is normally evaluated as part of the complete luminaire wherever fixing, access, temperature, fragments, ingress, or electrical protection depends on the assembly.
For any value such as “150–200°C” or “ΔT 200°C,” identify whether it is a material-supplier typical value, a standard requirement, a third-party result, or a BO-Glass internal result. State the glass composition, thickness and geometry, tempering or annealing state, edge condition, sample quantity and batch, initial temperature, hot-zone temperature, cooling medium and temperature, transfer time, dwell time, cycle count, mounting condition, failure criterion, laboratory, method, report number, and date. Without these details, publish only a qualitative statement that thermal-shock resistance must be verified for the intended design.
Key issues for glass shades include reliable fixing, prevention of falling during normal use and maintenance, hazard control if breakage occurs, accessible surface temperature, thermal shock near the light source, sharp-edge prevention, and whether the protective cover can reduce source or fragment hazards. Bathroom, outdoor, child-accessible, toe-kick, and in-ground luminaires may also require water resistance, dust resistance, load bearing, impact resistance, and low surface temperature.
New product trends emphasize complete-luminaire safety and long-term reliability: tempered, laminated, or borosilicate glass; secondary anti-fall structures; low-glare micro-structured glass; high-transmittance easy-clean coatings; replaceable modular shades; and traceable supply chains with third-party test reports. Because standards are updated, projects and mass production should always follow the latest applicable standards for the target market and the certification body's interpretation.
For luminaires exported to Europe and North America, what heavy-metal limits or breakage-test standards must glass components meet?
For export to Europe and North America, glass components must satisfy both luminaire safety standards and environmental or chemical restrictions. In the EU, relevant frameworks often include RoHS, REACH, CE-related safety requirements, and EN/IEC 60598 series standards. In North America, common references include UL 1598, UL 8750, and CSA requirements. The exact standards depend on luminaire type, installation location, and sales channel.
For heavy metals, RoHS restricts lead, cadmium, mercury, hexavalent chromium, certain flame retardants, and phthalates in electrical and electronic equipment. Glass, glaze, colored coatings, films, inks, solder, and electrical parts may all be relevant. Traditional lead crystal or cadmium-containing pigments require special caution in export projects. Confirm whether exemptions apply, whether limits are exceeded, and whether the customer's market accepts the material.
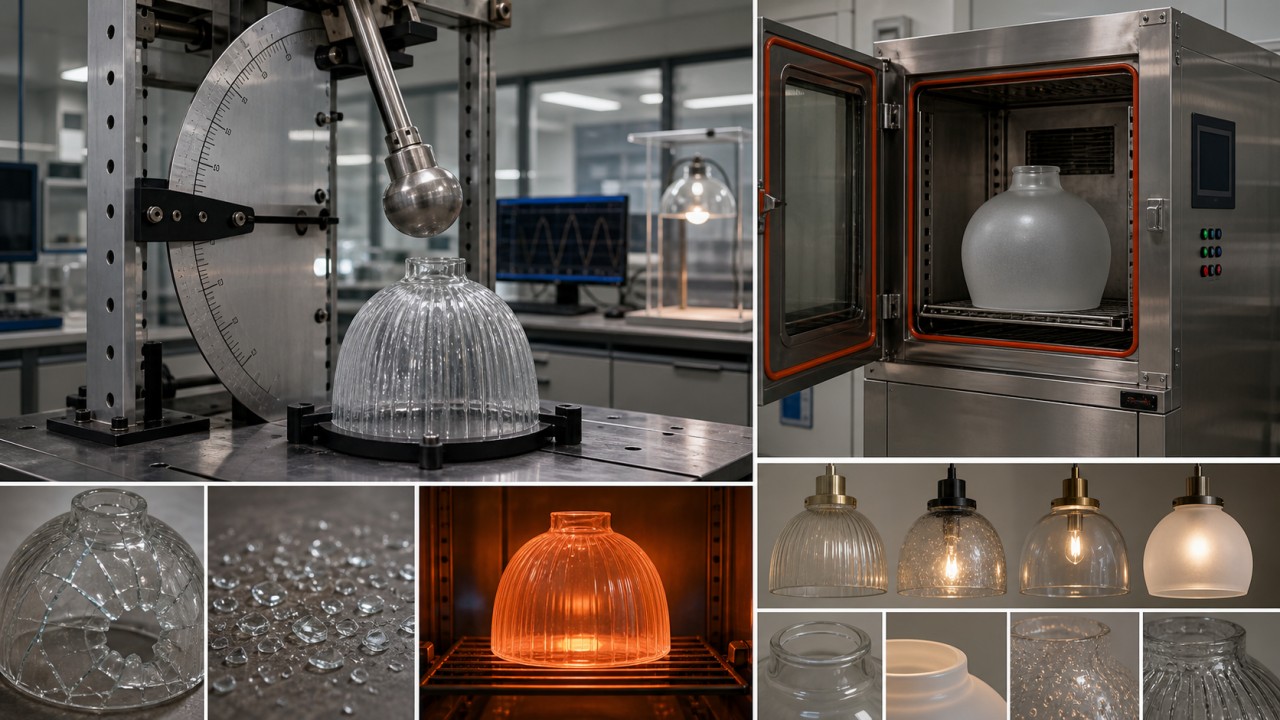
For breakage and mechanical safety, European and North American standards generally evaluate whether the complete luminaire can withstand impact, vibration, suspension loads, thermal shock, and normal maintenance risks. Glass parts may need tempering or lamination evidence, impact tests, thermal-shock tests, edge-finishing control, and fragment-risk evaluation. In real projects, a third-party lab should define the test plan according to the complete luminaire standard for the target market, rather than relying only on a glass material description.

Are there mandatory rules for accessible surface temperature on glass covers used in children's luminaires?
Accessible surface temperature must be carefully controlled for children's luminaires, but exact limits depend on target market, luminaire type, and applicable standards. Child-accessible products may refer to IEC/EN 60598-2-10 for portable luminaires for children, the GB/T 7000 series, and local certification requirements. Standards generally require accessible parts not to create burn hazards under normal or specified abnormal conditions.
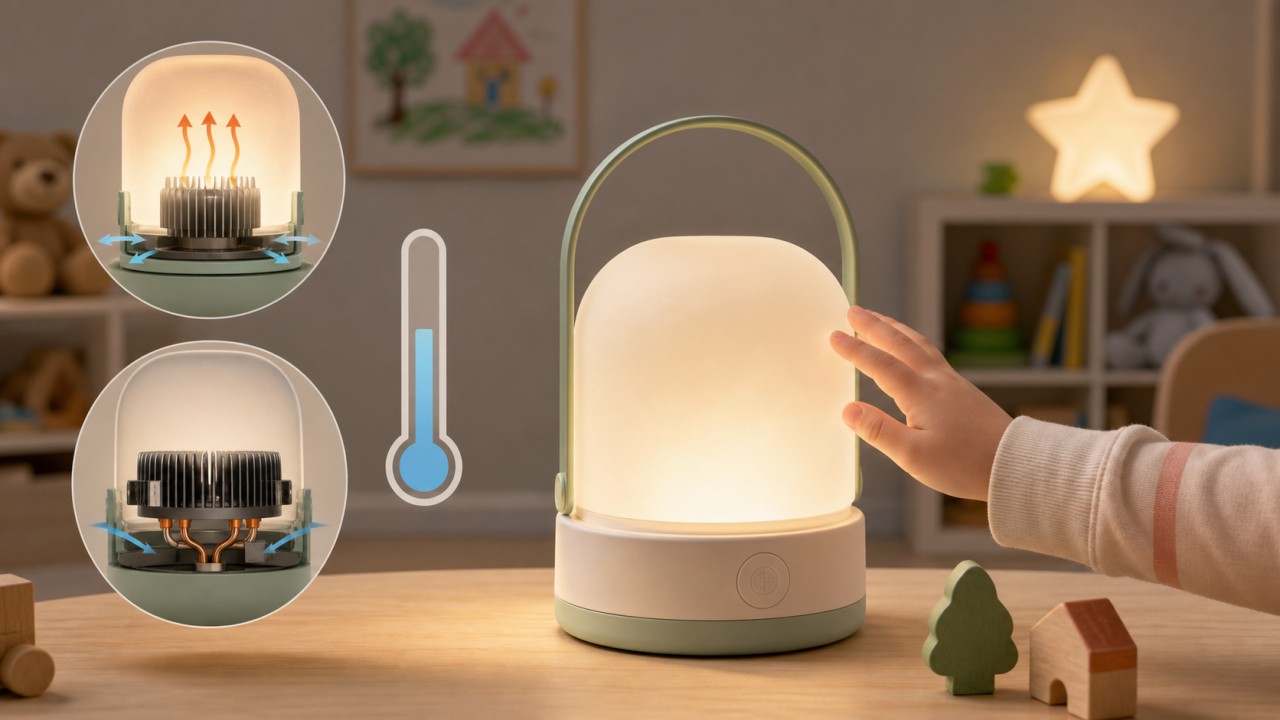
From a design perspective, regardless of the exact limit, children's luminaires should use low-temperature LED sources, low power density, large heat-dissipation area, thermal isolation, and shades that do not trap heat. Glass is heat-resistant, but once heated it can still become too hot to touch. Small enclosed glass shades need special attention. Accessible glass surfaces, edges, and metal fixing parts should all be checked for temperature.
In engineering, perform complete-luminaire temperature-rise testing rather than estimating. Tests should cover maximum ambient temperature, maximum power, worst-case installation, and long operating time. If the product is marketed for children's rooms or child-accessible positions, ask the certification body to confirm the applicable standard and test method. The safety target should be stricter than for ordinary adult-use luminaires.
For project acceptance, what third-party optical test reports are needed for glass lampshades?
For project acceptance, glass-shade test documents should cover four areas: optical performance, safety, durability, and batch consistency. Optical reports may include transmittance, haze, chromaticity coordinates, color difference, spectral transmittance, surface reflectance, and optical uniformity. If the shade affects light distribution, provide complete-luminaire luminous flux, intensity distribution, illuminance simulation or measurement, UGR, and glare evaluation.
Safety documents may include tempering or lamination evidence, impact testing, thermal-shock testing, edge-finishing inspection, heat resistance, fire-related tests, and breakage behavior. Bathroom, outdoor, toe-kick, or in-ground luminaires may also need complete-luminaire IP, corrosion, salt-spray, load, or walk-over tests. Coated glass should include adhesion, wiping resistance, detergent resistance, damp-heat, and UV-resistance reports.
Each reported number should be traceable to: material and finish; nominal and measured thickness; flat or curved geometry; specimen dimensions and orientation; light source, CCT and spectral distribution where relevant; wavelength range and photometric weighting; instrument manufacturer, model and calibration status; sphere, port, aperture, fixture and measurement geometry; conditioning and stabilization; standard and edition or internal method; deviations from the method; sample quantity and production batch; mean, range or standard deviation; uncertainty where available; laboratory qualification; test date; report number; and data owner.
Acceptance files should distinguish material-supplier data, third-party test results, BO-Glass internal tests, and design estimates. Approved samples, batch numbers, pass/fail criteria, allowed tolerances, and change-control rules should be included. Parameters that depend on sealing, thermal behavior, beam distribution, or electrical operation must be tested on the complete luminaire. Efficacy, glare, temperature rise, and IP are not established by a glass coupon alone.
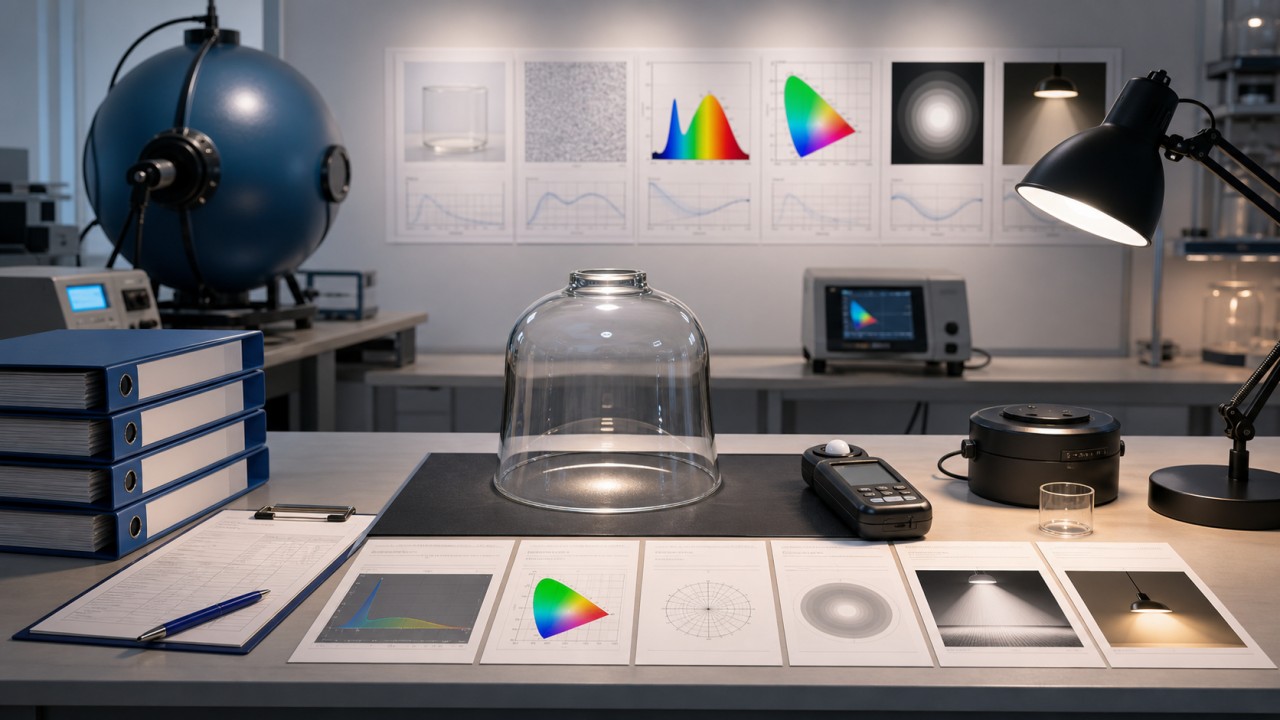
Where can customers review BO-Glass manufacturing capabilities?
Instead of duplicating factory photographs or making unsupported project-evidence claims on this pillar page, use BO-Glass's existing manufacturing pages. These pages provide process explanations, design guidance, product examples, quality-control information, and factory or production imagery relevant to each capability.
Precision Glass Molding Services
Precision pressing, mould design, materials, tolerances, quality control, factory photographs, and design-for-manufacturability guidance.
View precision glass molding capabilitiesMolten Glass Pressing Services
High-volume molten-glass pressing for lampshades and other glass components, including forming principles, moulding workflow, and production considerations.
View molten glass pressing servicesCustom Hand-Blown Glass Parts
Hand-blown custom parts, artisan forming, prototype development, shapes, finishes, inspection, and production examples.
View hand-blown glass capabilitiesMolten Glass Blowing Services
Molten-glass blowing for hollow lighting components, custom forms, small-to-medium production volumes, and process design.
View molten glass blowing servicesGlass Cutting and Fabrication
Cutting and fabrication options for flat and shaped glass components, including dimensional preparation for later processing.
View glass cutting capabilitiesGlass Drilling and Technical Knowledge
The BO-Glass knowledge base includes drilling equipment, glass drilling, cutting, moulding, blowing, bending, coating, and other technical topics.
Browse technical knowledge pagesThermal Glass Tempering
Physical tempering process, strength and breakage considerations, applicable geometries, production workflow, and limitations.
View glass tempering capabilitiesScreen Printing on Glass
Custom patterns, inks, printing processes, firing, design considerations, and production examples for decorative and functional glass.
View screen-printing capabilitiesGlass Coatings and Thin Films
Functional and decorative coating options for optical control, appearance, durability, and application-specific performance.
View glass coating capabilitiesWhich BO-Glass indoor-lighting glass product collections are available?
Use the seven existing indoor-lighting product pages to show actual product types, shapes, colours, fitting structures, and application examples. These links are more useful to buyers than repeating product photographs on the pillar page.
Opal Glass Lamp Shades
Opal and milk-white shades for soft diffusion, source hiding, ambient lighting, pendants, ceiling lights, and replacement applications.
View opal glass lamp shadesPyrex and Borosilicate Glass Lampshades
Hand-blown borosilicate shades and decorative lighting products for projects requiring heat resistance and custom forms.
View borosilicate glass lampshadesClear Glass Lamp Shades
Clear hand-blown shades for visible bulbs, decorative reflection, sparkle, textured forms, and custom indoor-lighting designs.
View clear glass lamp shadesGlass Lamp Shades with Screw Threads
Threaded and screw-fit glass shades for replaceable lighting components and controlled mechanical interfaces.
View threaded glass lamp shadesColored Glass Lamp Shades
Custom-coloured and decorative glass shades for warm, smoked, amber, gradient, and other visual effects.
View colored glass lamp shadesLight Bulb Glass Replacement
Replacement globes and glass covers for repair, restoration, compatible fittings, and custom replacement projects.
View replacement glass coversAmerican Retro Glass Lamp Shades
Vintage and retro-style glass shades for decorative pendants, wall lights, table lamps, and restoration projects.
View retro glass lamp shadesWhere can customers review BO-Glass project experience?
For project backgrounds, manufacturing approaches, material decisions, and completed custom-glass applications, direct readers to the existing case-study library rather than creating unverified case evidence on this page.
BO-Glass Case Studies
Review comparable projects and reference the closest manufacturing process, material, finish, or application when preparing an RFQ.
Browse BO-Glass Case StudiesWhich BO-Glass photographs document optical inspection and metrology equipment?
BO-Glass-provided photographs document small-component visual inspection, a large-aperture optical inspection setup, Zygo interferometry equipment, and a Zygo Nexview NX2 non-contact optical profiler. The photographs support the existence of inspection infrastructure; they do not establish a tolerance, uncertainty, report format, or pass result for an unspecified product.
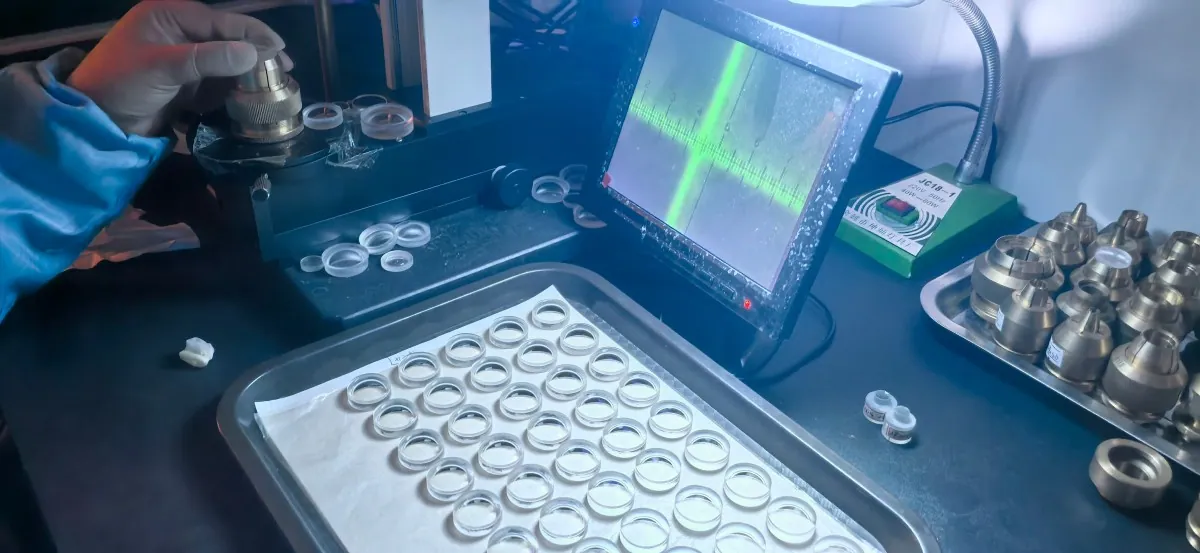
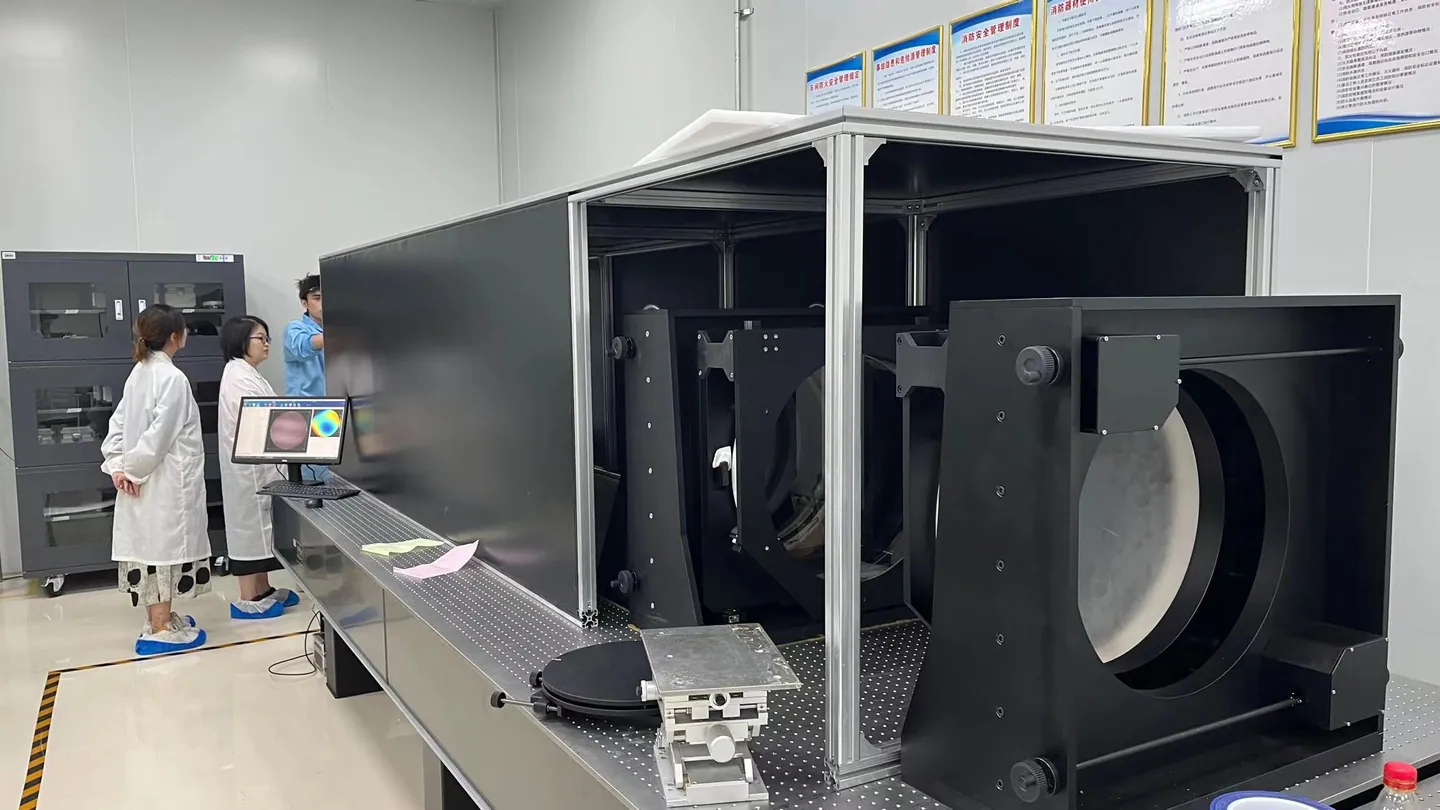
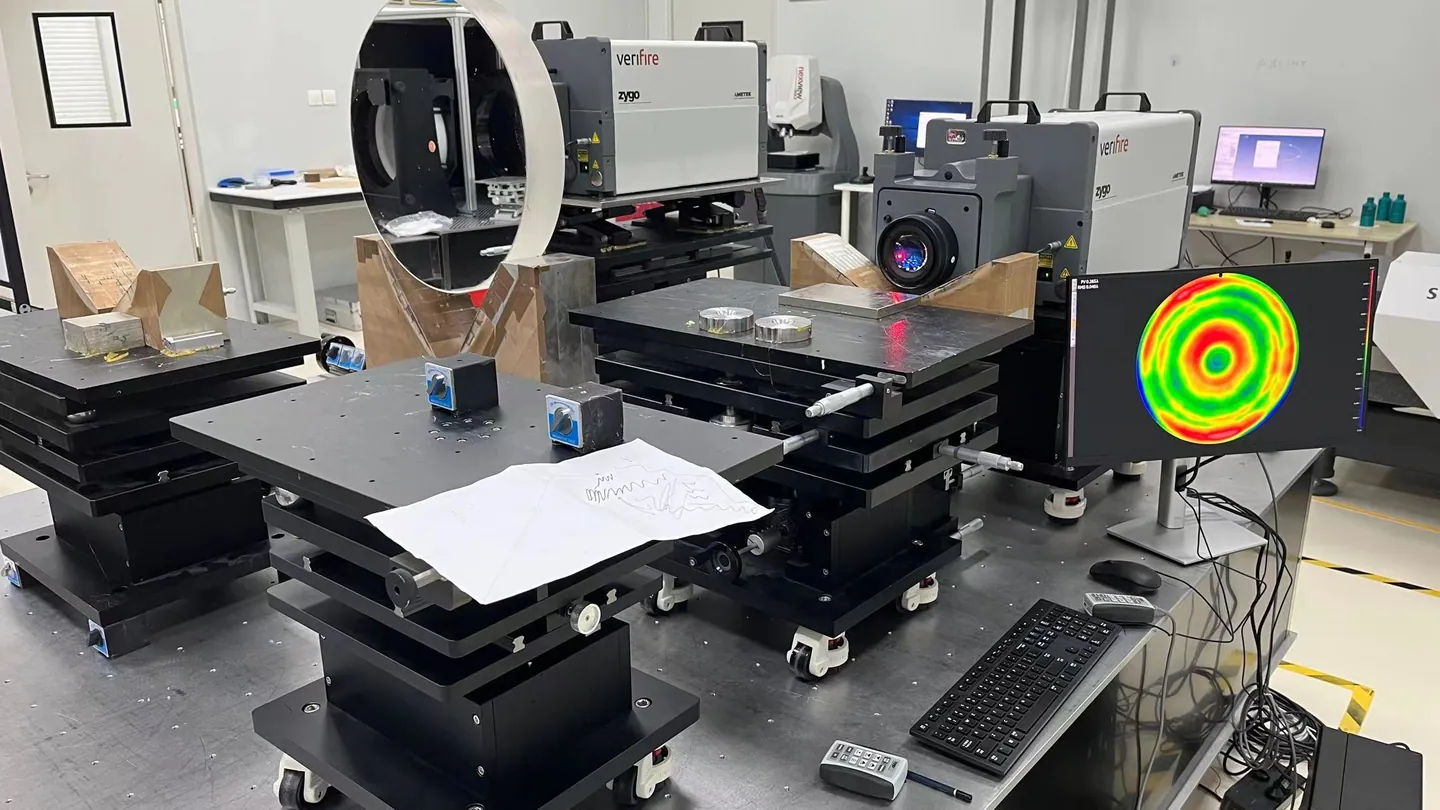
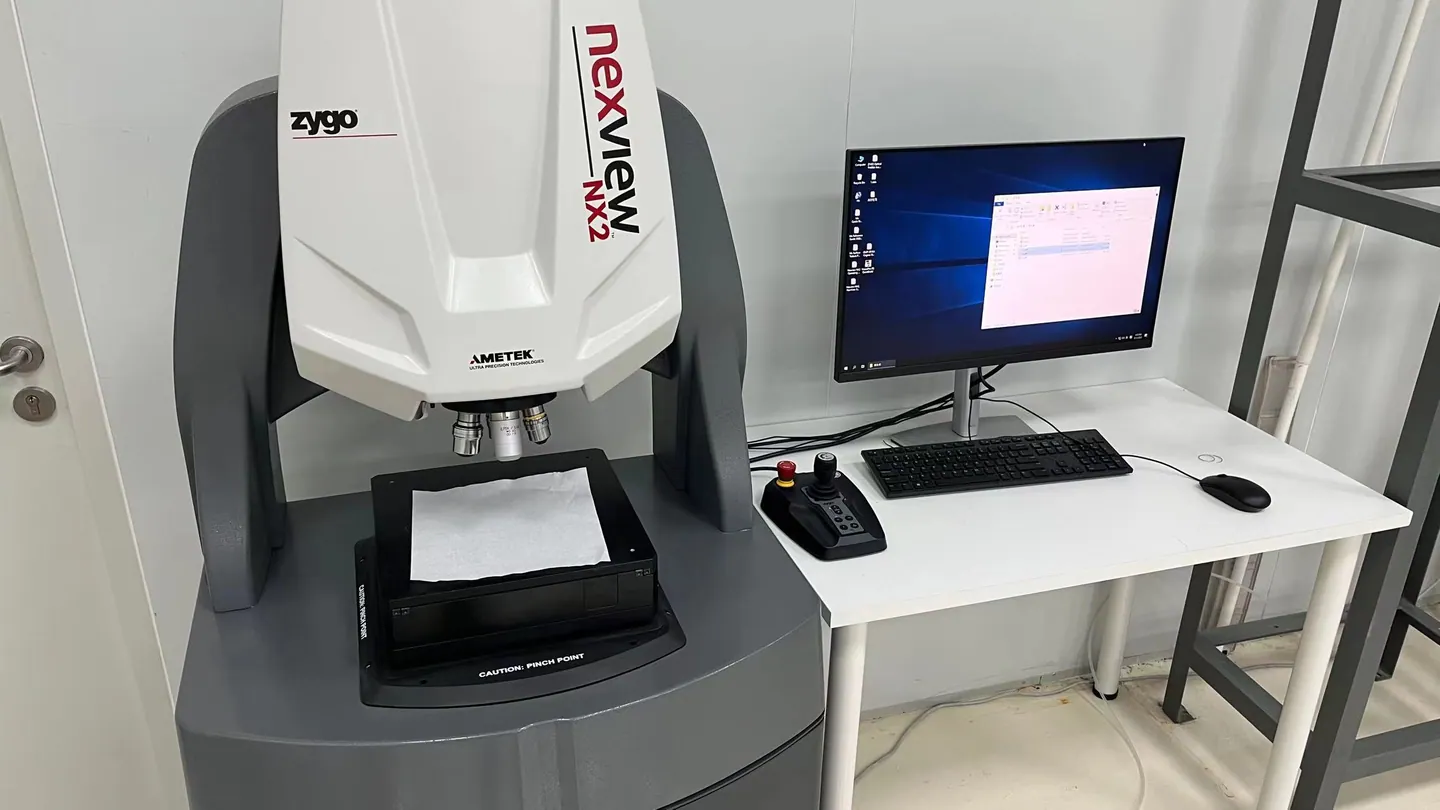
The RFQ should connect each required characteristic to an agreed instrument and method. Ask for a sample report showing part identification, instrument, calibration status, fixture or datum, measurement settings, individual results, tolerance and acceptance decision before relying on a general equipment list.
RFQ and engineering checklist
Provide the drawings, quantities, materials, optical targets, operating conditions, mounting details, and compliance needs required for a useful quotation.
Can glass sample kits with different transmittance and colors be provided so designers can compare on site during the concept stage?
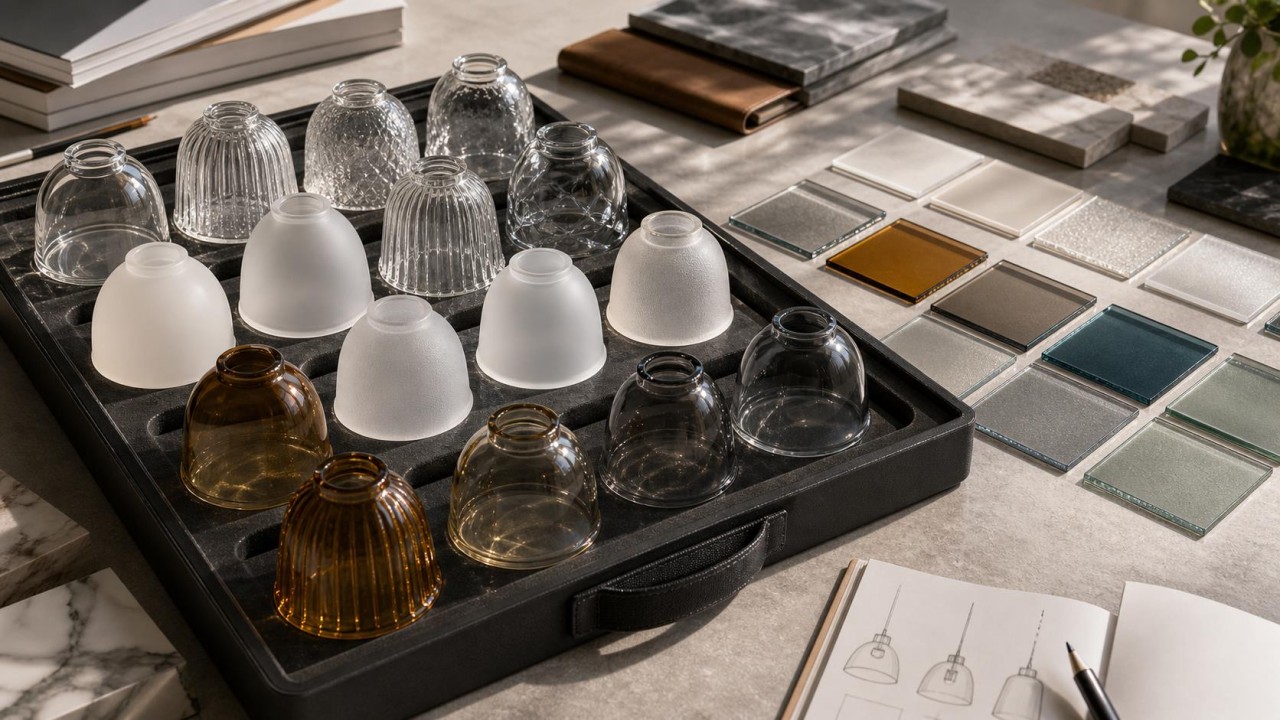
Yes, and for lighting projects, a glass sample kit with different transmittance levels and colors is extremely useful. The effect of a glass shade is difficult to judge from parameters or photos alone. Two glasses both labeled as 70% transmittance can look very different under different color temperatures, wall colors, LED spacing, and room brightness. On-site comparison helps designers evaluate brightness, softness, color shift, reflection, and material compatibility earlier in the design process.
A practical sample kit should include several dimensions. The first is a transmittance gradient, such as 90%+ ultra-clear glass, 80-85% light haze glass, 70-75% opal diffusion glass, 50-60% high-haze soft glass, and 30-40% decorative smoked or dark glass. The second is a haze gradient: low haze, medium haze, high haze, and micro-structured diffusion. The third is a color series: clear, low-iron, opal, light grey, smoke grey, tea, amber, champagne, blue-green, and so on. The fourth is surface treatment: smooth outside, inner frosted, outer acid-etched, embossed, fabric texture, AG anti-glare, and oleophobic coating.
Each sample should be clearly labeled with material type, thickness, transmittance, haze, color code, surface treatment, tempering status, coating status, recommended application, and cleaning notes. A QR code linking to full test reports or a digital catalog is helpful. For B2B customers, the label can also include MOQ, processable size range, mold requirements, lead time, and production tolerances.
During on-site comparison, designers should not only view samples flat on a desk. They should test with a light source and distance close to the real project. At minimum, use 2700K, 3000K, and 4000K sources, and observe the samples near white walls, dark walls, wood finishes, and metal materials. Both the switched-off appearance and switched-on effect should be checked. Some glass looks beautiful when off but becomes too dark, too colored, or patchy when lit.
Sample size also matters. A very small piece can show color but not uniformity or texture scale. A standard sample should preferably be at least 100 x 100 mm. Textured, gradient, and water-ripple glass should be shown in larger pieces or curved samples. For pendants, wall lamps, and ceiling lights, a small mock-up fixture is even better than a flat sample because it represents the real optical effect more accurately.
In short, a sample kit is not just a sales tool. It is a design decision tool. It reduces misjudgment, lowers sampling rework, and helps designers, clients, and suppliers share the same standard for brightness, haze, color shift, reflection, and cleanability.
Drawing and geometry
Provide 2D/3D drawings, overall dimensions, nominal and critical wall thicknesses, openings, edge details, datums, tolerances, curvature, interfaces, and the permitted visible and non-visible zones.
Quantity and programme
State prototype quantity, forecast order quantity, annual volume, target price range, required delivery date, tooling ownership, sample stages, approval timing, and expected product life.
Material and appearance
Identify preferred glass family, colour, clarity, texture, finish location, reference sample, acceptable bubbles or seeds, cosmetic inspection distance, illumination state, and batch colour tolerance.
Browse all BO-Glass material optionsOptical targets
Define transmittance, haze, spectrum, CCT and Duv shift, colour uniformity, source hiding, luminance uniformity, beam requirement, wavelength range, sample geometry, light source, instrument, method, and sample quantity.
Operating environment
Provide LED power and spectrum, glass temperature, ambient range, start-stop cycles, cleaning chemicals, humidity, grease, salt, UV exposure, indoor zone, expected IP rating of the complete luminaire, and service conditions.
Mounting and compliance
Show clips, screws, gaskets, adhesives, suspension points, contact pressure, maintenance access, installation height, target markets, luminaire type, applicable IEC 60598 Part 2 requirement, and agreed verification plan.
Review comparable BO-Glass projects before sending your RFQ
Use the case-study library to identify relevant materials, processes, surface finishes, and engineering decisions, then reference the closest examples in your enquiry.
Browse BO-Glass Case StudiesWhat sampling, packaging, approval, and change-control requirements should be included?
The RFQ should define how the project moves from prototype to repeat production, not only the part geometry and unit price. State the prototype quantity, expected minimum order quantity, annual forecast, tooling ownership, approval sequence, and documents required before production release.
First-article inspection should connect drawing dimensions, cosmetic approval, optical results, material identification, and assembly fit to traceable samples. Require written approval before a supplier implements a change that could affect appearance, performance, safety, compliance, packaging, or interchangeability, even when the supplier considers the change equivalent.
Contact Us
Your feedback fuels our growth, and your questions drive our solutions.
We value your feedback, inquiries, and suggestions. Please feel free to get in touch with us
General inquiries
Please contact us via sales@bo-glass.com, and we will reply to you as soon as possible.
Interested to work with us
Drop your resume at info@bo-glass.com
and we will get back to you shortly.
We uses the contact information you provide to us to contact you about our relevent content, products, and services.